Adventures in Sherwood Forest
  • Blog
  • Recipes
  • About

Making Recycled Paper

5/14/2019

0 Comments

 
Picture
I was organizing my craft closet one day when I came across a paper making kit that my mom and I used to make paper MANY (I won't tell you how many) years ago. I thought this would be a great project for my Daisies to earn their Use Resources Wisely badge! 

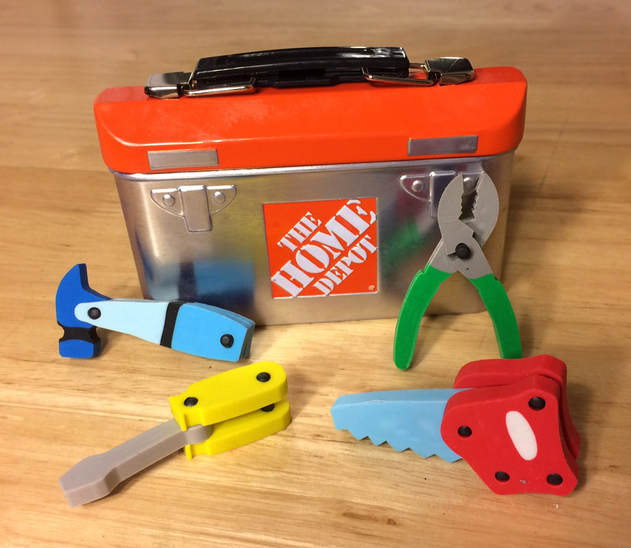
There was only one frame in my kit and I have eight girls, so I asked on our local Buy Nothing Facebook page for frames and window screen. I didn't get any hits, but one person did suggest asking a hardware store to see if they had any torn screen that they were throwing away. Then I went to the Goodwill to look for frames and about had a heart attack when I saw their prices. So I went to the Dollar Tree all disappointed because I had to buy them new and the whole point was to reuse and recycle. Well, they had a bunch of document frames with broken glass, so I asked if I could get a discount on them, and she gave them to me for a quarter each. When I thanked her profusely, she said, “No, thank you, I would have just had to throw them away.” Score! Saving the planet! THEN I went to Home Depot and asked if they had any window screening they were going to throw away, and the guy pulled out a roll that he keeps around for odd things and told me to cut as much as I needed. Then I went home and made a mess out of my kitchen because the last time I had made paper was 38 years ago. (Did I say that out loud?)
Instructions
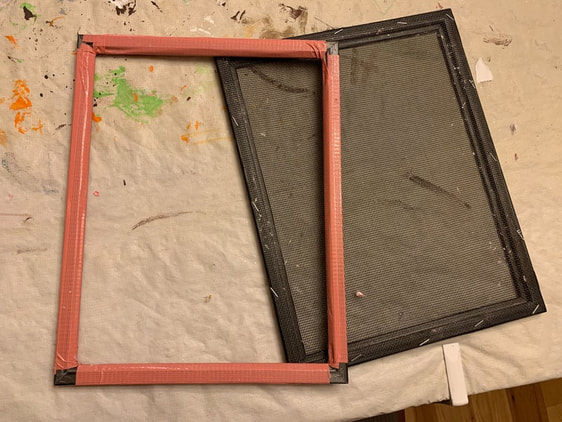
To prepare your screen frame, take the glass out and use pliers to pull out any metal bendy things that hold the photo and glass in the frame. Also remove any hanging hardware. Using a staple gun, staple the screen to the back of the frame, stretching it tight. 

If you have enough frames, it's handy to use a second frame on top to catch any pulp that might want to slide off the side of the screen. The frame had kind of a channel running through the sides, so I covered it with duct tape so pulp wouldn't get stuck in there.
Picture
Place the open frame on top of the screen frame (they should be back to back and nicely flat against each other.) Place both of them on top of a casserole dish and tape them down so they don't move around. 

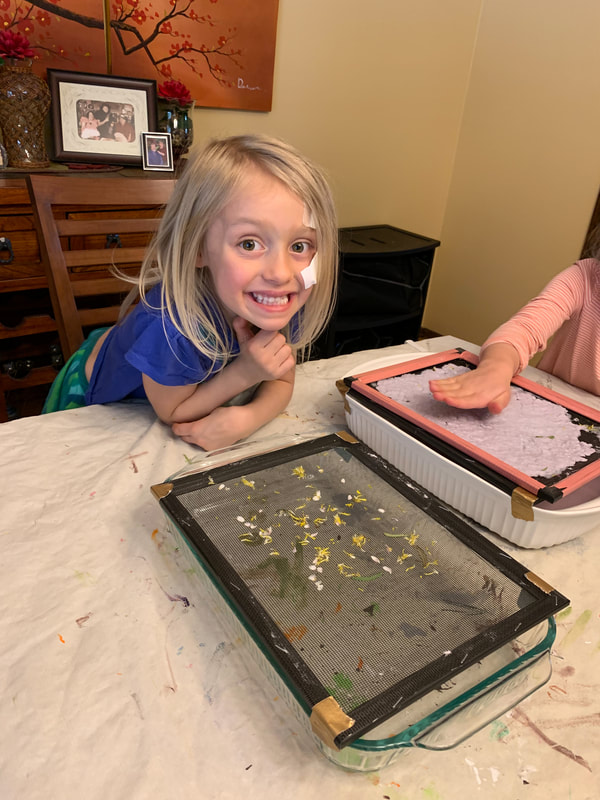
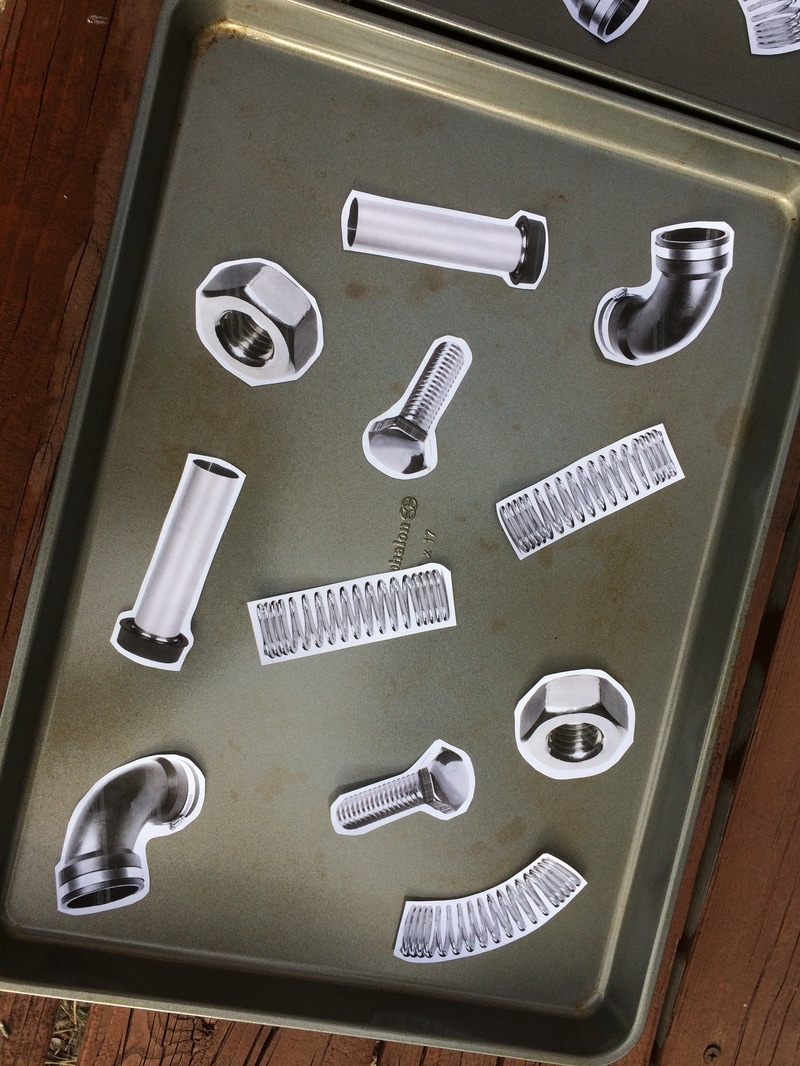
Now is the time to add any decorative bits to the screen, before you pour the pulp on. We used dried flower petals and confetti that I hole-punched from a colorful catalog.
Picture
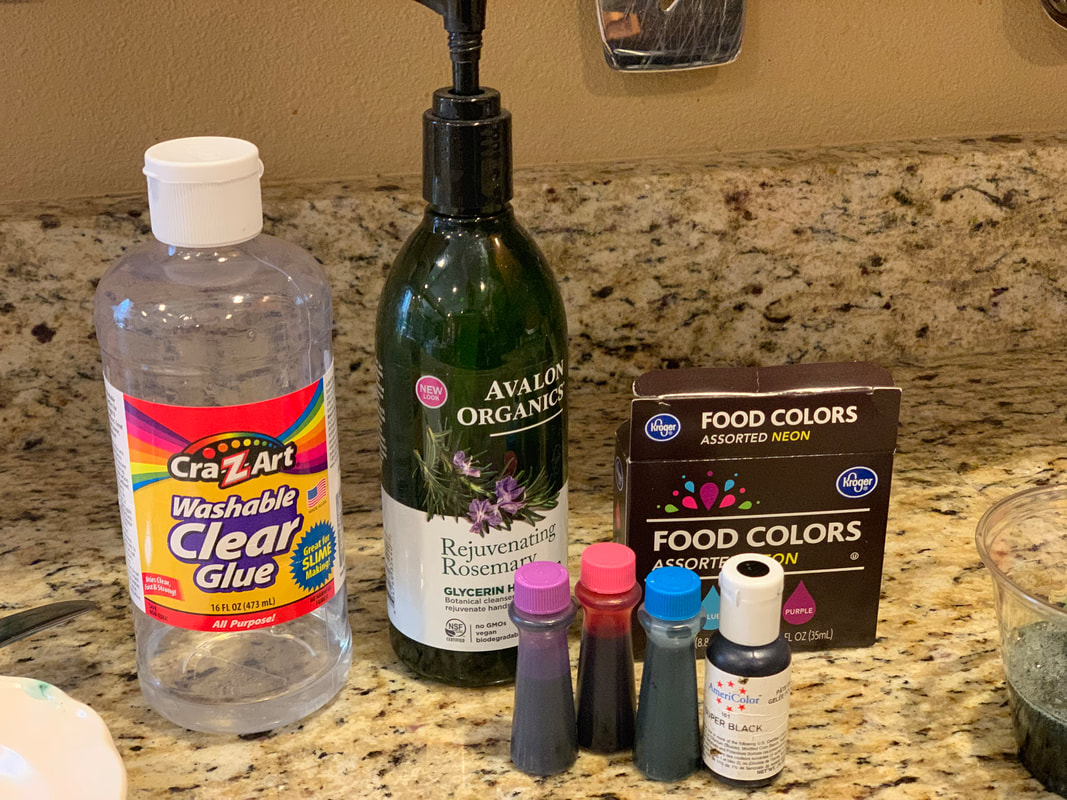
To make the pulp, tear up some paper that would have ended up in your recycle bin. Paper with photographs from magazines and catalogs will make a light brown (kraft colored) paper. I saved as much white paper as I could like bills and other mail. I read somewhere that you will need 3 times as much paper as the size of your frame. So if you are using an 8x10 frame, you will need the equivalent of 3 pieces of torn up paper. I didn't measure, I just had a bowl of torn up paper and had the girls grab three handfuls of paper.
Picture
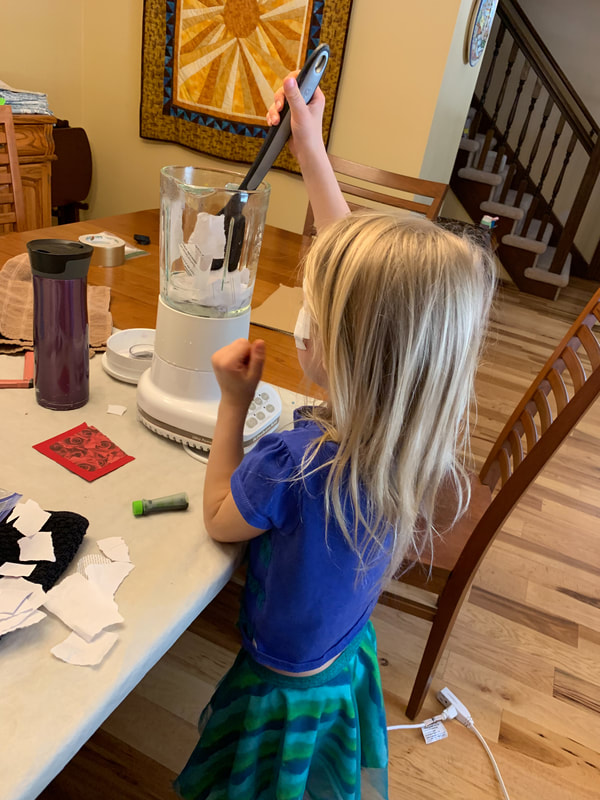
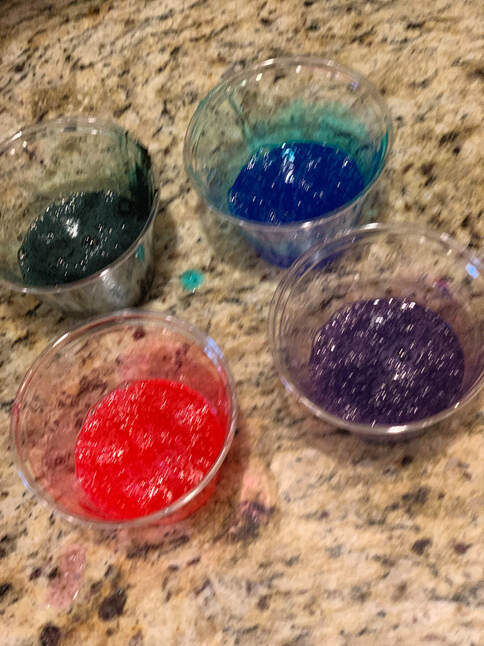
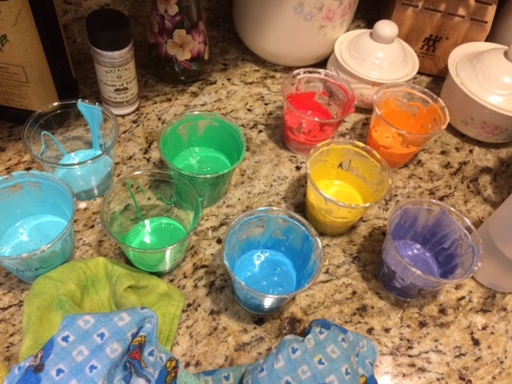
Put the paper in the blender and fill it half-full with water. Blend it up till it looks like really soppy oatmeal. Now you can add any food coloring you like. You can also make a paper with colored chunks in it by adding some colored paper scraps and just blending it a little bit so it gets broken up but not completely mixed in with the pulp.
Picture
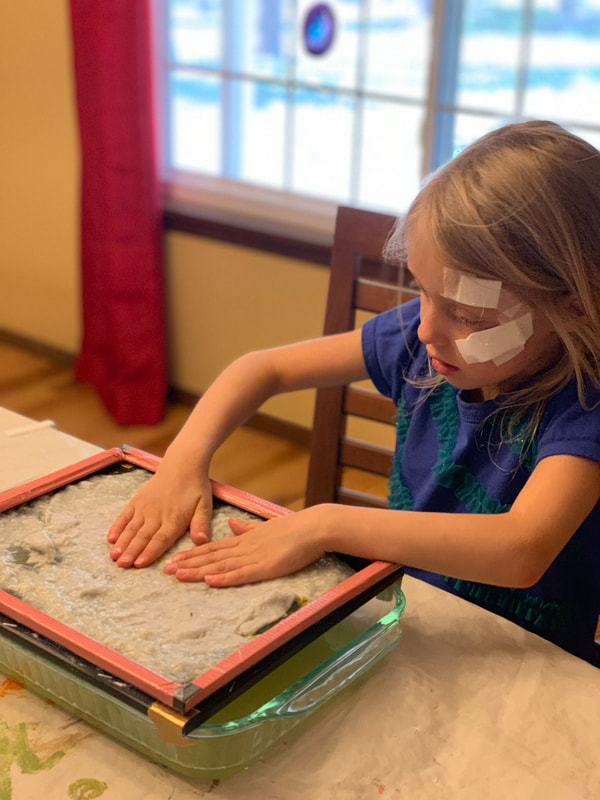
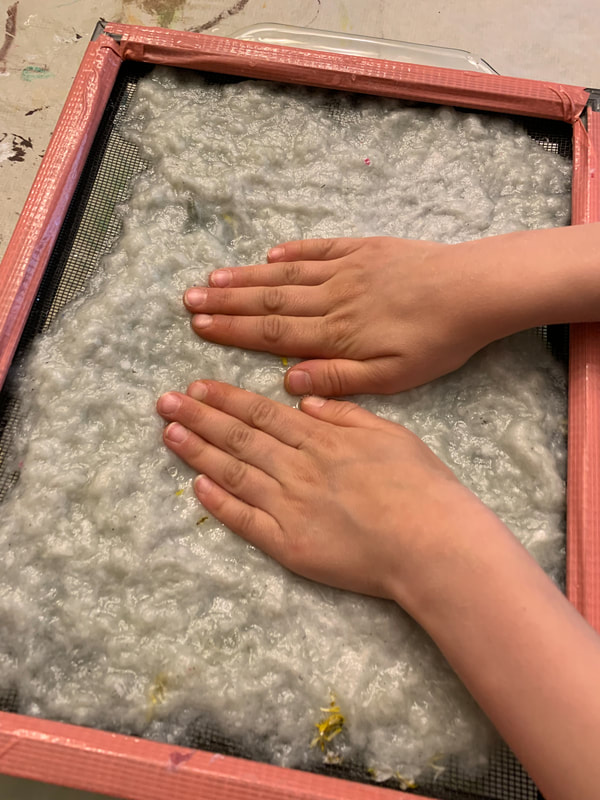
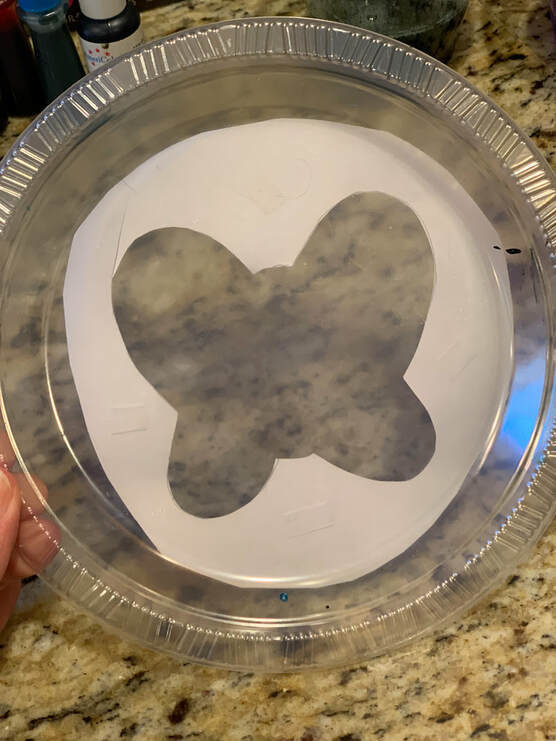
Carefully pour the pulp onto the frame, letting the water drain through into the casserole dish. Press carefully with your hands to get as much water out as you can. You have to be careful because the pulp tends to stick to the hands and you can pull it up when you lift your hands up. It helps to lift the tips of your fingers first and then slowly the rest of your hand a little at a time. If you get a hole in it, just push the pulp around to fill it. If it's hard to do that because you've pressed the water out of it, just pour more water on it and move it around and then press it out again.
Picture
Once you have most of the water pressed out, take the tape off that's holding the frame to the casserole dish and remove the top frame. Place a dish towel folded in half on top of the pulp and then place a piece of cardboard on top of that. Holding all of it sandwiched together, carefully flip it over so the cardboard is on the bottom.
Picture
Leaving the screen on, use your hands to press more of the water out into the towel. Still leaving the screen on, flip it all back over, remove the cardboard and then carefully remove the towel. Place the cardboard back on, flip it back over again, and remove the screen. Then leave the paper to dry on the cardboard for a couple days. The end result will be very stiff paper. We like to use it to make book covers.

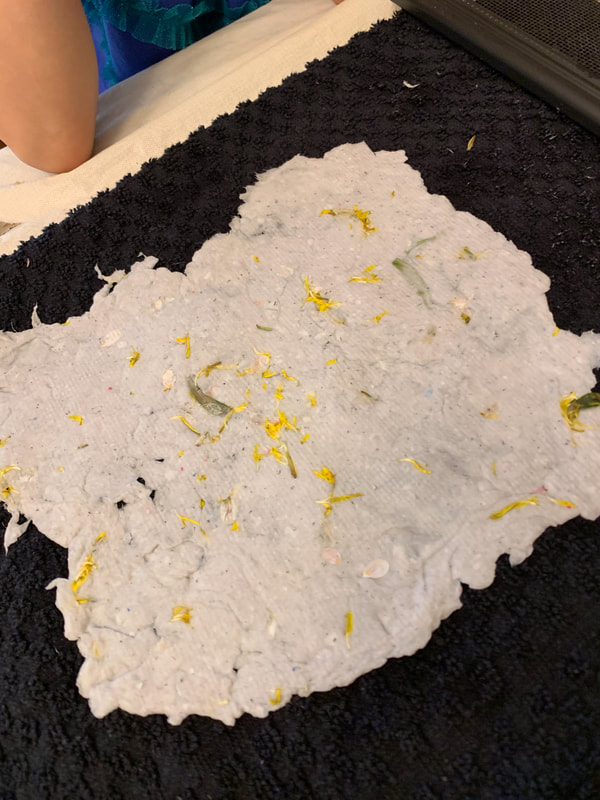
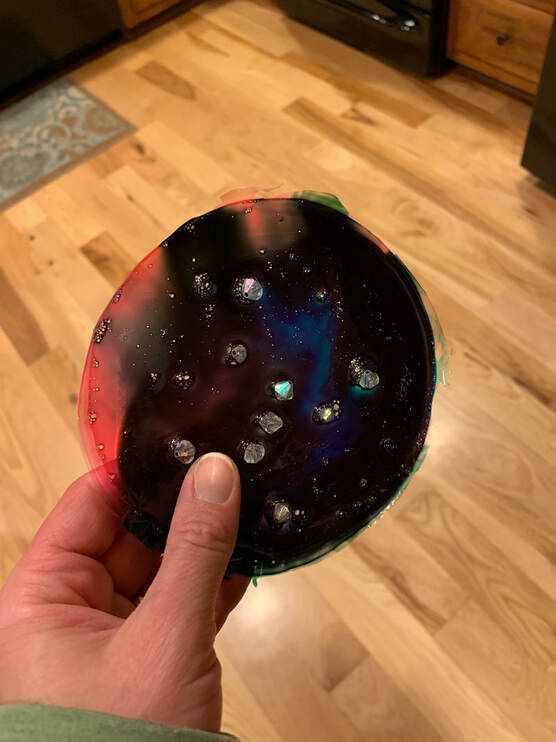
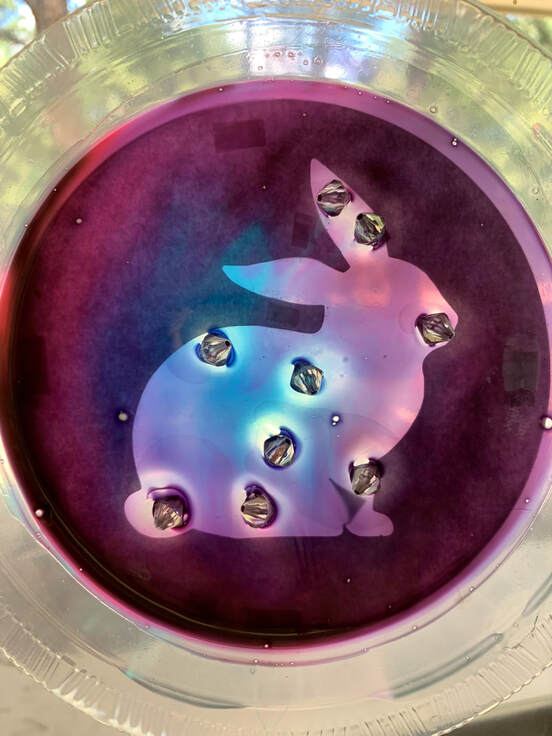
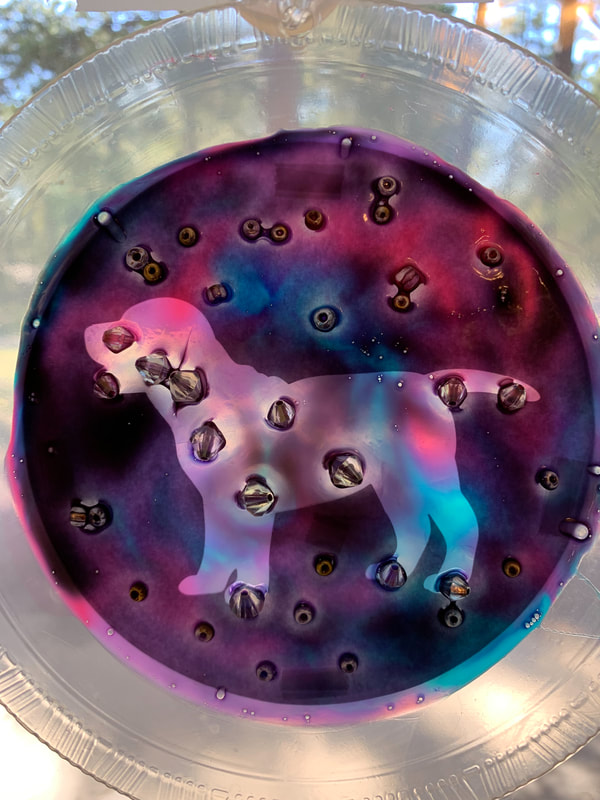
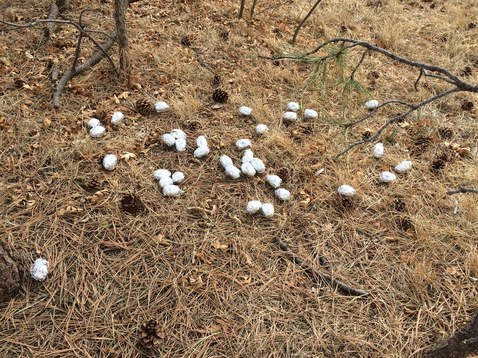
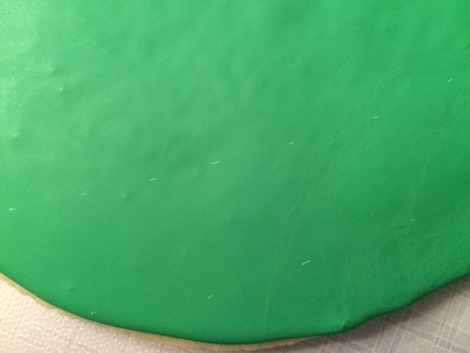
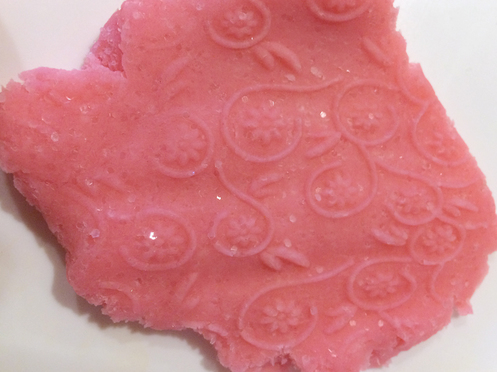
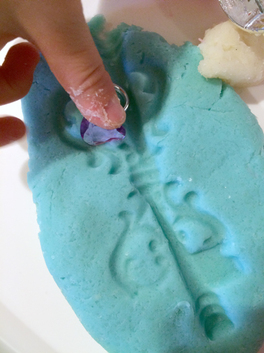
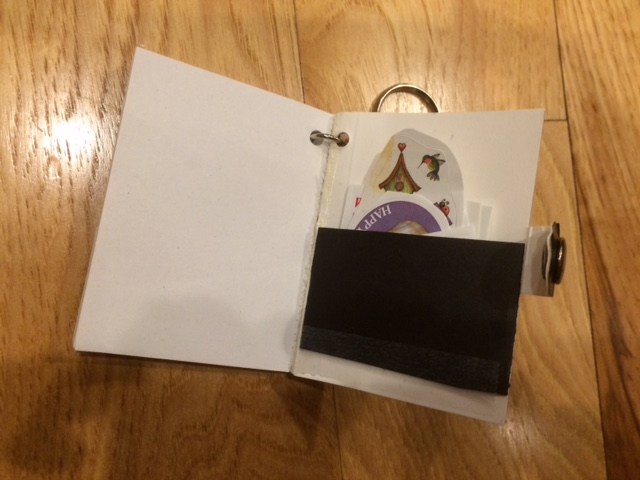
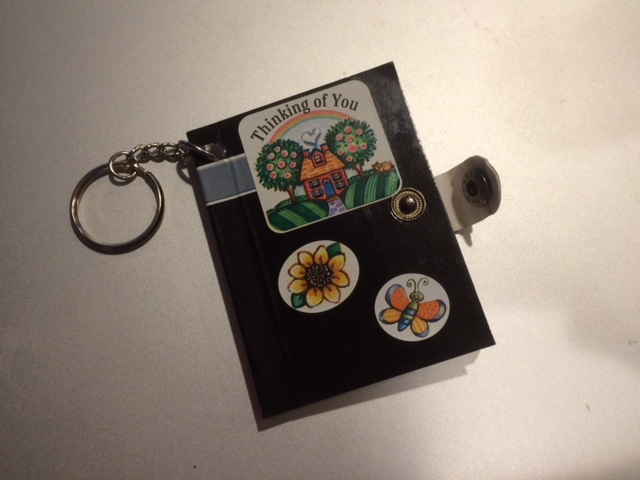
Here are a couple of our finished products:
Flower Petals:
Picture
Hole punch confetti:
Picture
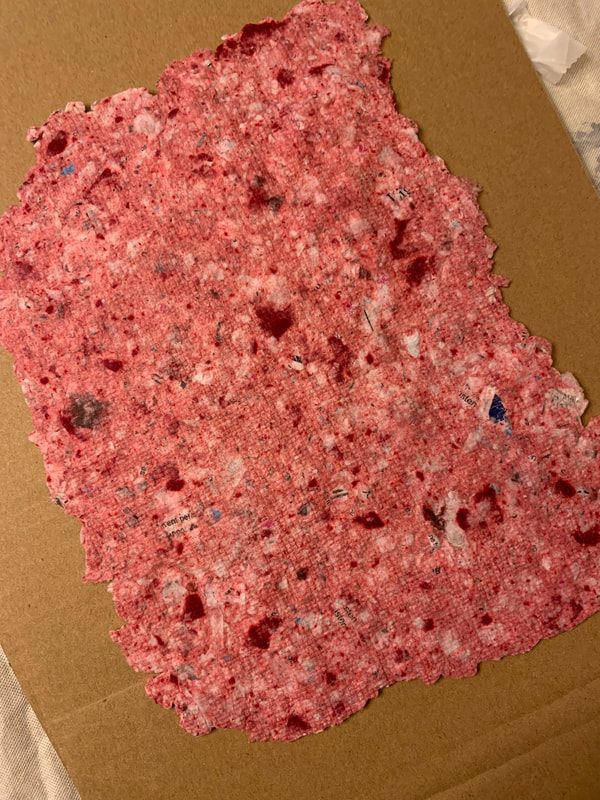
This one started with white paper and then one of the girls threw in a 4x6 scrap of red cardstock that had some red rose patterned paper glued to it. I pulsed it only a couple times so it was pretty chunky, but I think it's really pretty. You can actually still see some of words from the bills I used, part of my name is on it. ​😂
Picture
0 Comments

Constellation sun catchers

4/22/2019

0 Comments

 
Picture
My Girl Scout Daisy troop is working on their Space Science Explorer badge, and I came up with this fun idea to help them earn the "learn about the stars" portion of this badge. 

I got the original idea from these animal constellation cookies, which I still may make someday because they are SO COOL. My original idea was to let the paint dry on the sun catchers and then use brads for stars and connect them with embroidery thread. But then I thought that you might be able to see the back of the brad that's bent over when you put it up to the sun, so I decided on this version instead. It would still be cool to do the embroidery floss version using acrylic paint (maybe paint pouring??), that way it wouldn't be see-through and you wouldn't be able to see the brads.
For our meeting, I read Curious George Discovers the Stars first, which I found at our local library. It was a good book to explain why we started recording stars in constellations all that time ago and was at an age-appropriate level for Kindergarten. 
Picture
Then I showed them some pages from Zoo in the Sky, a beautiful book that shows different constellations and the story behind each. I didn't read the stories, but my point in showing this book was to show them different constellations and how they "look" like animals and other things.
Picture
I then showed them this series of pictures I found on Google Images.

​I told them this is the constellation Ursa Major (Great Bear). I asked them if they could see a bear in it:
Picture
Credit: http://www.allthesky.com/constellations/ursamajor/big.jpg
Of course, they could not. Then I showed them this picture and asked if they could see the bear now:
Picture
Credit: https://www.solarsystemquick.com/universe/ursa-major-2.jpg
They agreed that they could see something that had legs and a tail, but that it didn't really look like a bear. Then I showed them this one:
Picture
Credit: https://alchetron.com/cdn/ursa-major-1833156b-b4d2-4416-8f13-2cb19c461e0-resize-750.png
This was the ah-ha moment... they finally agreed that they could see it was a bear. I used this as the lead in to the constellation sun catchers, pointing out that they don't have to put a lot of beads on it, and it doesn't really have to look like anything, because the animal shape on the back was going to let people know what it was supposed to be. Then we moved on with the project.
We started with clear plates from Dollar Tree. I had asked each mom what her daughter's favorite animal was (and as I found out, some of the moms were wrong, haha). I cut out a circle with the silhouette of each animal using my Silhouette cutting machine and taped it to the back of the plate. (The butterfly below was my practice one so it was just hand-cut.)
Picture
I didn't want to spend a lot of money on glass paint, so I found this recipe and decided to make my own. I already had clear glue on hand from making slime, and also had clear hand soap and food coloring. I wish I could tell you exact measurements, but I kind of just winged it. I had about 1/3 cup of glue and 5 squirts of soap in each cup. This was enough for 8 sun catchers.
Picture
This is a blurry pic, but I wanted to show what happens when you stir too vigorously. Remember that it has soap in it, so it will get a lot of bubbles in it if you're not careful. I just let it sit for a day (covered with plastic wrap) and then skimmed off the bubbles with a spoon.
Picture
You'll want to make the paint a couple days ahead and try it yourself to see if the paint is dark enough or too dark. The first one I made (with just a tiny bit of paint, thankfully) was too dark in the black areas and you couldn't see through to the animal outline. The second (full) batch I made was too light, so I added more color till I was satisfied. 
Picture
I drizzled the paint on the plates, starting with the lighter colors and ending with black. Then the girls tipped the plates back and forth and swirled the paint a little with a plastic knife. You don't want to swirl it too much or it will all mix together and just become gray.
Picture
We used light tables so the girls could see through the paint to the animal outline so they would know where to put their stars. I had one real light table that was slanted, so I had to prop it up with a towel to make it level. I also used various iPads (protected with plastic wrap) and an app called Trace Table. You could just use a photo of a white piece of paper, but I had downloaded Trace Table for my daughter and liked the fact that you could lock the screen so it wouldn't change when you touched it. Since I had already paid for it, I was able to load it on old iPads that we had lying around, so we had four light tables.

I showed my girls some drawings of constellations (from Zoo in the Sky) and explained to them that it would be a good idea to put stars on the important parts of the body, like the head, legs, tail, etc. We had tweezers at the ready in case some of the stars got out of place and needed to be removed.

I used a bag of clear faceted beads I had found at our local creative re-use center (aka craft thrift store), Who Gives a Scrap. There were two different sizes of beads in the bag, so that was neat because the stars were different sizes.
Picture
After the project is done, you have to make sure to keep the plates level or the paint and beads will start to move around. If you do this at another location and then take it home in the car, it WILL move no matter how hard you try to keep it level. That's okay, you can just carefully reposition the beads once you get it home and on a flat surface.

It will take 3-4 days to dry, depending on how thick the paint is. You can check it after a couple days by holding it up vertically. If the stars start to move, it's not ready. Just nudge them back into place and keep waiting.

Once it's dry, you can punch a hole in the plate and use a suction cup (or string and tape) to hang it on the window. The dry paint may slide right off the plate after a week or so. You can just take the white paper off the plate and tape it onto the back of the dried paint disc and hang it back up.

Side note - the one below had some bubbles in it which kind of look like other stars in the galaxy. I suppose it's a fine line between getting just enough bubbles and too many, but I think it looks cool. The trial one I did after I made the all-bubbled-up mixture I showed above did not look very good at all, as all the bubbles attached to the beads. There weren't random bubbles scattered around to look like other stars, they were just globbed up right next to the beads.
Picture
Our paint changed a little after it was dry and the swirls weren't as evident but it still looks pretty.
Picture
Afterward we had one plate left over so my daughter and I tried it again using clear seed beads to make extra stars. I don't like it as much, I think it's the holes in the beads that throws it off.
Picture
By the way, remember that this is just glue and soap so don't get it wet. One of my trial sun catchers ended up falling into a dish of water that we had some "growing animals" soaking in and it was a slimy mess and stained some of our animals.

All in all, it was a lot of fun and the girls LOVED it!
0 Comments

A Cheap Gift for a Tool-Loving Kid

3/22/2017

0 Comments

 
Picture
Short and sweet, I just had to share this cute idea I came up with while I was cleaning the disaster that is my craft room. 

This little gift cost me all of $1.  One set of rubber tool-shaped erasers from Dollar Tree (the pliers actually move!), and a re-purposed Home Depot gift card box that was hanging out on my wrapping paper shelf.

Dollar Tree doesn't always have the tool erasers, so you have to snap them up when you see them. Pull the inside gift card holder out of the little tool box and discard. All four tools fit perfectly inside the little box, and it's small enough to carry around in your diaper bag or purse to be used as a "busy bag" to keep your kid occupied at a store or restaurant.

Dollar Tree for the win (again!)
0 Comments

How To Find Library Books To Augment Your Child's Preschool Class

3/22/2017

0 Comments

 
My daughter's preschool is a very small, private school so they don't have a library on site.  Her teacher asked for volunteers to go to the library every month and check out some books on that month's theme.  I love children's books, so I thought this would be a great way to volunteer for my daughter's class, and the beauty of it is... I can do it in my pajamas, whenever I have time, without leaving the comfort of my home.

Now, how hard can it possibly be, you think?  You just go to the library and ask for books on rain forests, right?  Well, our local library is pretty small and has a very limited selection, so I learned that ordering the books on the library district's website is the best way to go.  In our district, you can order books from any district library and have them delivered to your local library.  You just drive over and pick them up.

Still seems pretty simple... why do we need a whole blog post about it?  Well, after doing it for the past 5 months, I've learned some tricks that can make it easier and I also have some tips about how to find books that will provide the best experience for the little ones.
1.  Find out about your library district's website.
Picture
Find out if your library district has a website where you can order books or put them on hold.  If they don't, then you can stop reading now, because that's what this post is all about.  If they do, get yourself an account and then... Get on the website and figure out how to use it. 

Figure out how to:
  • Search for a title or author
  • Filter the search results
  • Order books or put them on hold
  • Cancel holds
  • Suspend holds (if they have this feature)
  • See all the books you have on hold
  • See all the books you have checked out
  • See when your books are due.  If you're really lucky, your library might have a way to email you when your books are going to be due.  Mine automatically does this the day before they're due.
2.  Find the books
There are several methods that I use to find books for a certain subject.  I start with one, and if that doesn't yield good enough results, then I'll move on to others.  Certain subjects are easier to find than others.  Our library has a million preschool-level books on farms, but almost nothing on Native Americans.
Picture
First, I put the search term into the search box and hit the Search button.  Then I get a bunch of filters on the left side.  (Your library may be different, hopefully they have a way to filter search results.)

For preschool, I like to filter by Shelf Location - Children's Easy first.  If I don't find enough, I'll start the search over and filter by Shelf Location - Children's Non-Fiction, Audience - Children, or Material Type - Children's Book.  The latter ones will return results for all ages, so there's some sleuthing to be done to find books that are geared toward preschoolers.

When I find a book that I think looks good, I'll look it up on Amazon to see if I think it's a good fit.  I look at the recommended age range, the reviews, and the book preview if there's one available.  This way, I can see if the book is written at an appropriate level.

If the search results don't return enough books, I'll try to search some other terms.  For example, when I searched for "Native American", I got almost nothing that was age-appropriate.  But when I searched for "Indians", I got more.

If searching the library's website doesn't return enough good results, I'll move to another method:  Google.  For example, I'll search for "books preschool South America."  This always gives me a number of websites from homeschoolers and other blogs that have Top-10-type lists for children's books on the given subject.  I'll find one that looks good, and then do a search in my library for it.  About 7 times out of 10, it's there and I just didn't see it for some reason.  I also check these out on Amazon just to make sure they're appropriate.
3.  Be discerning in your book list
I don't just grab the first 10 books I see on a subject, I like to get books that have good educational value or a message that pertains to the subject.  Notice I said "that pertains to the subject".  When I was looking for books on farms, I found a very highly rated book about two ducklings who went on an adventure together and got into some trouble.  Ducks are a farm animal, and the book had a good message.  But the message was not about farms, it was about working together and relationships, etc.  You could have substituted any animal or (person for that matter) in the book and it would not have changed the story.  So, I passed it by and chose books about different farm animals, what happens on a farm, machines that are used on a farm, etc.

I also try to step outside the box a little bit, knowing that my daughter's teacher reads every book herself before she reads it to the class.  When she told me they were doing "winter and Christmas", I thought, hmm, there are other holidays around this time besides Christmas.  So, I looked for books on Hanukkah and other holidays.  I also looked for books on how other countries celebrate Christmas.  When she said they were doing Africa, I easily found books on African animals, but then I tried hard to find books on the African people and culture.  If I find a really good book that's maybe a little bit too old for the class, I'll get it anyway.  I figure the teacher can decide herself if she thinks it's a good fit.
4.  Request the books (put them on hold)
My library's website has a feature that allows you to put the books on hold, and then they will transfer them from their "home" library to my local library.  After I have requested the hold, I look at my hold list and it shows what number I am in the queue.  If my queue number is more than 2, I will just cancel the hold.  It's not likely that I will get the book in time for it to be used in the current month.  (If it's a book I REALLY want, I might leave it anyway, in hopes that it will arrive in time.)

One new thing I learned this time is that you can suspend your hold.  For example, if you are on a long waiting list for a certain popular book, and you are afraid your turn will come up while you are on vacation, you can suspend your hold for the time you're on vacation while still keeping your place in line.  This can be helpful to me in two ways:
  1. I can do my searches early, say the middle of the previous month, put everything on hold and then suspend my hold until a week before I need the books.  That way I'm not checking them out too early and by the time I get them, the new month is starting and the class can keep them for a full three weeks of the month.  I usually renew them so the class can keep them for the whole month, but it won't let me renew if there's someone else waiting for it.
  2. I can put Christmas books on hold in October and then suspend my hold until a week before December.  That way, I am first in line for the Christmas books I want and I won't find myself 3rd, 4th, 5th in line for the good books (like I was last Christmas.)  This will work for any theme that has to do with a time of year when everyone else is checking out books on that same theme.  I really, really wanted Madame President for President's Day, but I never got it :-(
5.  Pick up and deliver the books
When the books arrive at my local library, I get an email.  They usually don't arrive all at once... some will show up in a couple days and then others will show up later.  They will only hold the books for so many days (I think it's 3), so I usually wait a day or so to see if any more books will come in before I go over there.

One thing I have started doing is taking a picture with my phone of the spines of the books while I am in the classroom dropping them off.  This way, I know that all the books were delivered, so if one comes up missing, I can prove that it was in the school.  I just put the books all together so all the spines are visible, and take one picture.
6.  Return the books
My library sends an email the day before a book is due, but this doesn't work for me because school is not open every day.  If the book is due on Sunday, I'll get the email on Saturday and will have no way of getting into the school to get the book.  I wish there was a way to set it to some other number of days, but there isn't.  So I set a reminder on my Google calendar to send me an email a week before.  If we are still in the current month, I will try to renew all the books so the class can keep them until the end of the month.  Usually, there's at least one that will not renew because someone else is waiting, so I'll have to go pick it up and turn it back in.

I have learned that my local library sometimes misses books that are turned in, or they don't scan right or something.  So again, I have started to take a photo of the spines of the books when I'm at the library before turning them in.  That way, if they say that I didn't turn something in, I'll have proof that I did.

So this was my (very long-winded) explanation of how I get books for my daughter's preschool class.  It's a great way to volunteer if you work during the week and can't actually volunteer in the classroom.  Just make sure you have an understanding with the school of how the books will be treated and who is going to pay the fine if they lose or damage a book.  In our case, they keep the books in a closet, and only the teacher is allowed to get them out.  She reads one and then puts it back so the kids can't destroy it, and she doesn't allow other teachers to use them either.  It has worked well for us so far, and the kids love the variety of books they get to read every day.
Picture
0 Comments

Mommy and Me Book Club - Alien Encounter

3/14/2017

0 Comments

 
When I saw a post about starting a Mommy and Me Book Club on ToddlerApproved.com, I thought this would be a great idea for my local MOMS Club. I love the idea of pairing a book with a related craft, and themed food is always fun. I also thought it would be a good idea to do some kind of movement activity, since sitting and listening to a book, then sitting and doing a craft is a lot of sitting for a young kid.

I did a search on Pinterest for “book and craft” combinations and ended up finding this Build Your Own Alien play dough project that was perfect. This was paired with a book called Aliens Love Underpants, but I couldn’t think of an effective way to provide a selection of ‘underpants’ for a large group of kids. Laminating is expensive and then I would have to cut them all out by hand. So, I looked for other alien books and found these two at my local library.
Picture
Picture
The illustrations in these books are fantastic and I loved the stories. Because much of the story is actually in the pictures, they’re really best for reading at a one-on-one level to a child so they can study the pictures. But to make sure that the children understood what was going on, I pointed out different things in the illustrations, and talked to the group: “What’s he doing?”, “What’s going on here?”, “What are they seeing up in the sky?”, “Look at the crazy ice cream,” etc.
I'm always looking for an excuse to make cookies, so I created these little dudes using a fire hydrant cutter and an upside-down Mickey head with the top of the ears cut off.
Picture
Picture
My inspiration came from these two cookies, the left from Lila Loa and the right from Collaboration with Cakes.
Picture
Picture
The items I provided for the “invitation to create” mostly came from the Dollar Tree. A pack of different sized googly eyes, metallic pipe cleaners, tiny rattles from the party favor section (they looked like alien heads to me), and hinged ball-knockers (okay that sounds really, umm, anyway). For the ball-knockers, I popped the ball part off the handle and provided the pieces separately. My friend had given me some Mardi Gras beads left over from a party, so I cut those up. Then I had some wooden beads that had come off an abacus that I bought in the dollar section at Target a while back. It broke after a time and I kept the beads for future use.  The sectioned trays are also from the Dollar Tree, I bought them two years ago for my daughter’s second birthday party when I had a taco bar. They were the perfect alien green.
Picture
I made the play dough with this recipe from Tinker Lab. I like to add the coloring in the pan while the mixture is still liquid. I find that adding the color later results in a sticky dough, so I’ve always done it this way. I used Americolor Electric Green.
Picture
Picture
Picture
For the movement activity, I came up with a sort of relay that had the kids running, criss-crossing my backyard to different stations. Though I’ve numbered the stations here to make things clear, they did not actually have numbers when we did it. The idea was that the kids were searching for moon rocks, but first they had to pick up space junk and then fix their rocket ship.
Picture
Picture
  1. Station 1 - This station had a pile of “space junk” (stuff that came out of my recycle bin). Things like plastic containers, cardboard boxes and magazines or catalogs work best because they are heavy enough that they won’t blow away in a breeze.  Also they should be clean, of course.
  2. Station 2 – Two brown paper grocery bags to deposit the space junk in.
  3. Station 3 – Two cookie sheets with paper cut-outs of various pieces of hardware and spare parts. These all had tape on the back of them and were lightly stuck to the cookie sheet so they wouldn’t fly away, but the kids could easily pick them off without pulling the tape off the back.
  4. Station 4 – A poster of a rocket ship that the kids had to stick the hardware on.  I used a free web tool called Block Posters for this.  All you do is upload a picture or graphic, tell it how many pages wide you want it to be, and it will chop the graphic into blocks and output a .pdf file that you can print.  Then you just trim off the white borders and tape the pieces together.
  5. Station 5 - A pile of "moon rocks", plastic Easter eggs filled with candy and wrapped in aluminum foil.
Picture
So, the kids had to run over to the space junk and grab a couple, run to the bags and toss the space junk in, run to the spare parts and grab one, run to the rocket ship and put it on, and then run to get a moon rock and then give it to their mom.  Then they did it over and over again until all the moon rocks were gone, and those kiddos were out of breath!

In hindsight, one rule I should have explained more carefully is that each kid was only allowed to take one moon rock at a time, because some of the kids were grabbing handfuls at a time, and one kid ended up with a ton while other kids only had a couple.  The kids didn't seem to notice, but to make it fair for each kid, I would limit the number of rocks per kid so that they all end up with the same amount.  You can use the moms to enforce this by telling them that the kids are only allowed to have so many.

We've already had one mom volunteer to host Mommy and Me Book Club next month, so I can't wait to see what we are going to be doing!
Picture
0 Comments

"Mermaid Cove" Small World

7/10/2016

1 Comment

 
Picture
For her first birthday, Claire got this Step2 water table from her Mémère, and two years later it's still one of her favorite things.  This is one of the simplest water tables out there, not a lot of bells and whistles, but what I love about it is the three separate sections that lend themselves so well to creating "small worlds".  A while back I created a dinosaur small world based on the one pictured here. 

Today's small world came to me when I was at the cake store, and I saw bins and bins of all these little plastic cake decorations.  Some of them are rings, some are cupcake picks, and some are just little figurines.  The palm trees are from the cake store also.  I paid less than $5 for all of it.

I would have liked to use sand in the big section of the table, but it would have been too hard to empty out (and save for future use) when we want to change it up, so I opted for pea gravel.
Picture
I really wanted aquarium gravel, but it would have been $8 at Walmart for two little bags and that probably wouldn't have been enough.  I got a giant sack of pea gravel from Home Depot for $4.  It was pretty dirty, so I had to do some work to rinse it out, and even then it still made the water a little murky.  But after a couple uses, hopefully it will be nice and clean.
Picture
The blue gems are from Dollar Tree (also used those in the dinosaur small world) and the flowers are from my craft stash, left over from a diaper cake that my aunt-in-law made for my baby shower.
Picture
The decorative rocks (also used in the dinosaur small world) were from my craft stash, I bought them years ago at Michaels and have re-used them over and over for various purposes.
Picture
After I put the water in, Claire started rummaging through her water toys and emerged with these aquarium plants that she got from a friend for her birthday.  I had totally forgotten about them! 
Picture
She dressed up her new Mermaid Cove with colorful corals, and her mermaid "Ariel" was happy as a clam.  *groan*  :-)
Picture
1 Comment

Claire's Carousel Third Birthday Party

6/27/2016

1 Comment

 
Picture
Claire has been crazy about carousels ever since she was a baby.  I remember walking past a carousel (that was not functioning) when she was just saying her first words, and hearing her very quietly, very urgently saying, "Horrrse.  Horrrrse.  Horrrrse."  And now, as soon as we walk in to the zoo, the first thing she wants to do is go on the carousel.  This was a fun party to put together, and the pastel colors just looked so beautiful together. 
I made the invitations with my Silhouette Portrait, using Jamie Koay's Ornate Carousel Horse tag and a PhotoShop brush set of scroll banners by http://lileya.deviantart.com/.
Picture
I made the backdrop with plastic table cloths from the dollar store, following the directions I found here.  I used my Silhouette Portrait to make the bunting. 
Picture
The Carousel Horse .svg file is by Erin Doran from the Silhouette Design Store.  It was really easy to use, four layers that just layered on top of each other.  I made the "3" using a doily .svg file by Jamie Koay.  I bought the gold paper from Jo Anns, and found out that it was really hard to use.  It tore in some places and didn't cut all the way through in other places.  I ended up having to use my Exacto knife a lot to finish the cuts.  The paper is discontinued now.
Picture
Picture
I fell in love with this Godinger carousel cupcake stand on Amazon.  They had a cheaper white one that was more like wire, but I really, really wanted the more expensive chrome one, so I saved my credit card cash back to buy it.  I figure I can use it for other occasions, too.  Halloween carousel with witches and ghouls?  Mickey and Minnie carousel?  I will find a reason to use it :-)
Picture
I found a set of three ceramic carousel horses on Ebay.  They are now adorning her dresser :-)  The white stands are candle holders I found at the thrift store that I spray painted white and decorated with some adhesive-backed gold trim I found in the dollar bins at Michaels.
Picture
I found this pack of beautiful pastel marshmallow twists at Home Goods when I was shopping for serving dishes.  I was so excited that I put down the dish I was buying in order to pick it up and then realized when I got to the checkout that I didn't even have what I came there for.  They were nice and soft, and tasted great!
Picture
This pretty brown horse is a coin bank that I found at Target, and the roll of tickets was purchased on Amazon.  The "C" dish is from Ivy Lane and I found the sixlets at Jo Anns, perfect colors and a little shimmery, too.  They were delicious!
Picture
I found this little lady on Etsy.  I used craft glue dots to attach her to the plate so she wouldn't accidentally be knocked over.  They were perfect for each other!
Picture
Picture
The carousel horse clip art is from JW Illustrations on Etsy; doily .svg file from Jamie Koay.  The paper straws are from ShopCherrySprinkles on Etsy.
Picture
I was going to buy some Martha Stewart paper flowers, but they weren't quite the right colors.  After I found some instructions, I realized that paying $15 for paper flowers was crazy, and I made them myself in about 15 minutes.
Picture
For the chandelier decoration, I used some tissue paper balls from Ikea, and glued little white flowers to them.  I made the paper carousels with my Silhouette Portrait using Samantha Walker's Carousel Hexi Box tutorial.
Picture
Picture
The cake was a Disney Princess Garden Royalty cake from the local grocery store, without the characters.  It was chocolate with strawberry filling and whipped icing, and tasted AMAZING.  I bought a carousel music box from Amazon and used it as a cake topper and a gift.
Picture
I didn't want to put the carousel directly on the cake, so I rummaged through Claire's play market and found this York Peppermint Patty mini container.  I turned the lid upside down and attached some gold trim to the edge.  It was perfect for hiding the metal disc at the bottom.
Picture
Picture
Picture
The Birthday Girl loved it!
Picture
My mom made the Funfetti Rice Krispie treats, using this recipe, and I found the pinwheel party favors at Jo Ann's on clearance for 70% off.  Score! 
Picture
And finally, the cookies!  I made the carousels with a cupcake cutter (very proud of myself for being creative instead of just copying someone else like I normally do ;-)  The peach colored icing flowers came from a local cake store, and the gold shine food paint is from Tru Color, all natural made with annatto seed.
Picture
It was a beautiful party for a beautiful little girl who loves beautiful horses :-)
1 Comment

The Ultimate Train Cookie

5/1/2016

0 Comments

 
Picture
Pinterest is a wonderful thing.  I wasn't sure when I started this project if it was going to end up being one of those Pinterest Fails or not, but I was sure that I wanted to give it a try.  I found this big train cookie a while back and always wanted to try my hand at it, but I had no reason to make a big train cookie.  Until I got an invite to my friend's son's birthday party, who was going to be 3... and who loves trains.
I made my own pattern using some clip art I found on the internet and a font called Porkys.  I had to print this on two pieces of paper and then tape them together.  I made one whole one, and then one with all the pieces cut out.
Picture
I had never made a cookie this big before, so I got on Cookie Connection to ask for advice.  I ended up using a baking sheet that had no sides and rolling the dough out directly on the baking sheet.  I had a silicone baking mat under the dough, which helped it to not stick to the baking sheet after baking.  I used a knife to hand-cut the "3" and the four train cars, and baked them separately (the "3" went in by itself because it would have to bake longer than the cars.) 

After letting everything cool, I transferred the "3" to my cake board.  I slid a cardboard cake board under the silicone baking mat and then put another cake board on top, and carefully flipped it over.  I peeled off the silicone baking mat from the bottom of the cookie and then put the cake board back on top (which was really the bottom) and then flipped it over again. 
-- As a side note, I used scrapbooking paper from my stash to decorate the cake board and then wrapped it in Glad Press and Seal.  The paper and the Glad are taped on the back with packing tape.  Using the Glad is a must because if you drop icing on the paper, it's not coming off. --
Then came the icing.  These are the most colors I have ever used for one project, I usually stick to a color palette of about 5 colors plus white.  Because I was flooding such large areas, I also had to make two different icing consistencies for the green and cyan colors, a thicker consistency for piping the outline and a thinner one to fill it in.  I almost ran out of green icing when I filled the base coat, phew.  Had just enough.
Picture
So, now I needed to somehow transfer my design to the cookie.  I usually do this with food coloring markers, but I am not very good at following my lines exactly and I didn't want any marker showing, especially since the train tracks were pretty unforgiving.  Since they are not filled in, I couldn't really make any mistakes with them.

I ended up using an awl that I had bought, thanks to a recommendation I saw on a cookie site.  It worked perfectly.  I carefully scratched a dashed line in the base coat of icing.
Picture
Picture
This way if I missed my line when I was piping, it wouldn't be as noticeable.
Picture
I used that technique for many things - the tracks, the sun, the rainbow, etc.  Then I just slowly worked away at all the different details, doing a little at a time and letting the colors dry before putting on another color.  For the small areas and lines, I used my heat gun to apply heat for 20 seconds or more to prevent the icing from caving in, but as always, I still got a little caving.  I also burned myself with the heat gun, but we won't talk about that.  Lesson learned.  I also melted the Glad wrap with the heat gun and had to transfer the cookie off and re-do it.  Another lesson learned.
To make the windows, I painted the cookie with silver luster dust and then piped the icing on over the top of it.  You can see my edible marker lines in this picture.
Picture
A work in progress... the lighting in this room is really yellow.
Picture
I kept it simpler than the original to give myself fewer opportunities to mess it up :-)  All in all, I think it turned out pretty good and it was really fun!
Picture
0 Comments

Cinderella Play Dough Kit

3/9/2016

0 Comments

 
Picture
"Though you're dressed in rags, you wear an air of queenly grace,
Anyone can see a throne would be your proper place..."


My latest Claire craft, an ode to one of my favorite Disney movies and one that Claire has watched Every. Single. Day. for the past 4 months. 

It all started when I found this crown cookie cutter at Walmart for $1.  Claire loves play dough and I think it's fun to make because I can add any colors and scents that I want.  An idea was born!  It took me a long time to collect everything in this kit... I just happened upon some things in stores and had to do some searching for the rest.  But all in all, it was fairly cheap to put together.

The sparkly play dough is lavender scented and tiny tiaras crown the tops of the bags.  I found the tiaras in the party section at Target and used glue dots to attach them to the bags.

I used my favorite play dough recipe, but I like to add the color to the liquid instead of kneading it in afterwards.  While this results in more work, because you have to make one batch for each color, I find that adding it afterwards results in sticky dough.  If you add it beforehand, you can add as much as you want to get a darker color, and just cook off the moisture to result in perfect dough.   I halved the recipe and added 8 or 9 drops of lavender essential oil that I had in the cabinet.  I also added some clear plastic glitter, maybe 2 tablespoons per batch.
Picture
The cookie cutter and wooden castle are from Walmart.  The key (you know, the one the step-mother uses to lock Cinderella in her attic :-) is from Michaels, left over from another project where I didn't end up using it.
Picture
The star confetti is also from Walmart.  I made the labels myself using Scroll Banners by Lileya.  Claire calls it "fairygodmuverdust", all one word :-)
Picture
The Crown Jewels are from Dollar Tree.  Obviously they should not be left with unsupervised children.  They also fall apart easily.
Picture
The "magic wand" is actually an acrylic fondant roller that I got for $4 on Ebay.  It's really quite beautiful and the perfect size for a play dough kit.  I cut a star out of some silver glitter paper I found in my stash and attached it with a glue dot.  The glass slippers you can buy on Amazon, though I got mine for free from a nice mom on our local Facebook page.
Picture
I put it all together in a small basket I got on sale at Michaels, and made a bow using ribbon from Walmart.
Picture
She loved it!  And the best part is, it keeps her entertained for a good 15 minutes at a time, which for her is a long time.
Picture
Picture
Picture
Picture
Here's the breakdown of supplies:
Crown cookie cutter - Walmart - $1
Wooden castle cutout - Walmart - $1
Star confetti - Walmart - $1
Rings - Dollar Tree - $1
Key - Michaels - $1.50 (free for me because I already had it)
Fondant roller - Ebay - $4
Mini tiaras, 10 pack - Target - $3
Glass slippers, 8 count - Amazon - $7 (free for me)
Basket - Michaels - $3
Ribbon - Walmart - $1
Play dough - Homemade
0 Comments

Potty Training Sticker Chart To-Go

11/16/2015

0 Comments

 
A couple days ago, I started full-on potty training with my daughter, using a sticker chart that we hung on the wall.  We never really left the house for 2 days, so it was working great.  Then today, we went to the store and she went potty in the restroom there and, of course, asked for her sticker.  And I didn't have any.  She was okay with it, but when I got home, I thought there must be something in my craft stash that I can use to make a portable sticker chart. 

First, I was thinking a plastic checkbook cover would be great, but I didn't have anything like that, so I ended up finding this little key ring notebook.  I bought 5 of these at Michaels (or was it Target?) out of the dollar bin years ago and never used them for anything, so this was perfect.
Picture
First, I tore some pages out of the back to make room for a stash of stickers.
Picture
Then I cut a piece of card stock to make a little pocket and put some double-faced tape on it.
Picture
I put the pocket on the inside of the back cover and cut up a sheet of stickers to stash in there.  There's a line of Scotch tape at the bottom of the pocket so nothing falls out.
Picture
Then I decorated the front with more stickers.  I hung it from one of the zippers on the diaper bag, so we'll always have it with us, and we won't risk dropping it on a public restroom floor.
Picture
0 Comments
<<Previous

    Archives

    May 2019
    April 2019
    March 2017
    July 2016
    June 2016
    May 2016
    March 2016
    November 2015
    July 2015
    May 2015
    April 2015
    March 2015
    February 2015
    January 2015
    December 2014
    August 2014
    July 2014
    March 2014
    February 2014
    January 2014
    December 2013
    September 2013
    August 2013
    July 2013
    June 2013
    May 2013
    April 2013
    March 2013
    February 2013
    December 2012
    November 2012

    Categories

    All
    Baby On Board
    Baby On Board
    Crafts
    Decorated Cookies
    Food Appetizers
    Food Desserts
    Food Main Dishes
    Kids
    Scrapbooking

    Picture
    Check out the cool stuff I've been Pinning lately...
    Contact Me!

    Enter your email address:

    Delivered by FeedBurner

    RSS Feed

Powered by Create your own unique website with customizable templates.