Adventures in Sherwood Forest
  • Blog
  • Recipes
  • About

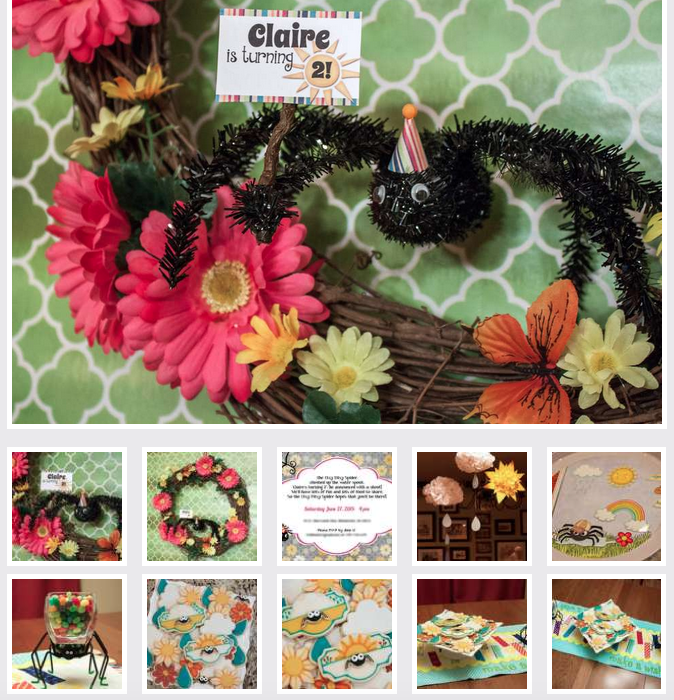
Claire's Itsy Bitsy Spider Birthday Party

7/29/2015

0 Comments

 
Picture
Claire is a huge fan of Itsy Bitsy Spider.  When she was an infant, that was the only song that could stop her from crying.  Her favorite book for a long time was Iza Trapini's unique version of the story.  Now at two years old, she's starting to be able to sing it herself, and loves seeing the occasional real-life spider (even Rosy the giant taratula at the Butterfly Pavilion.)

This was a really fun party theme to do because there's not much out there... they don't make Itsy Bitsy Spider themed party supplies, ya know?  So, it forced me to come up with my own ideas.

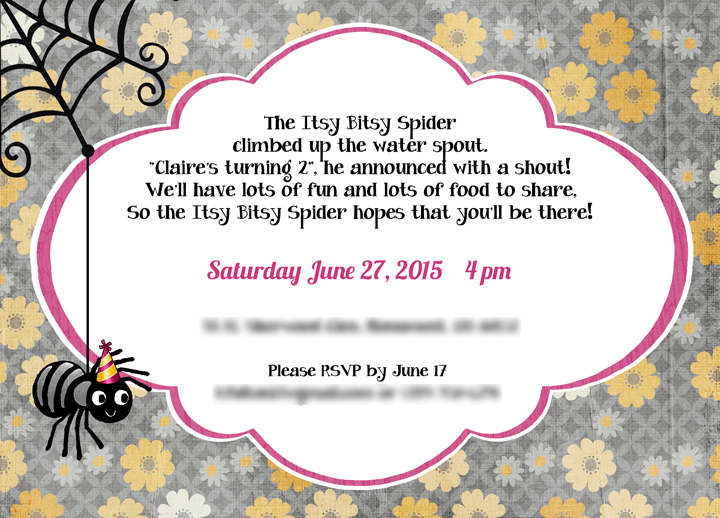
First, the invitation.  There are actually a lot of Itsy Bitsy Spider invitations out on Etsy.com.  I liked this one, but the colors weren't quite right so I decided to use the general format and create my own.  I also came up with my own wording, which I am extremely proud of because I'm not normally good at that stuff, LOL!

I like going old-school and sending out paper invitations, I get them printed at OvernightPrints.com.  They have great quality and are super cheap, but (unlike their name would imply) shipping takes forever if you don't pay extra.  I try to do stuff far enough in advance that I don't need to pay extra (it takes about a month for normal shipping.)
Picture
Flowered paper from Your Sweet Smile digital scrapbooking kit from Studio Sherwood. Party hat and spider web found via Google Images, and spider was scanned from one of Claire's books, called "Hello, Bugs!"

I started planning this party in October because that's when all the spider stuff is out in the stores.  Most of the stuff was either the wrong colors or too menacing-looking, but I did find a couple things I got great use out of.

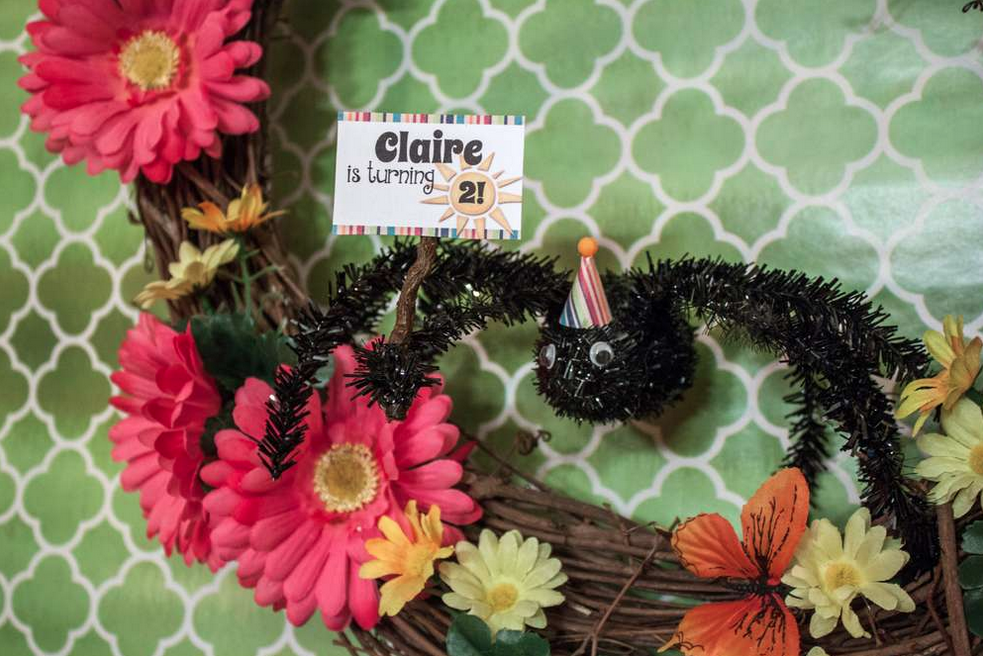
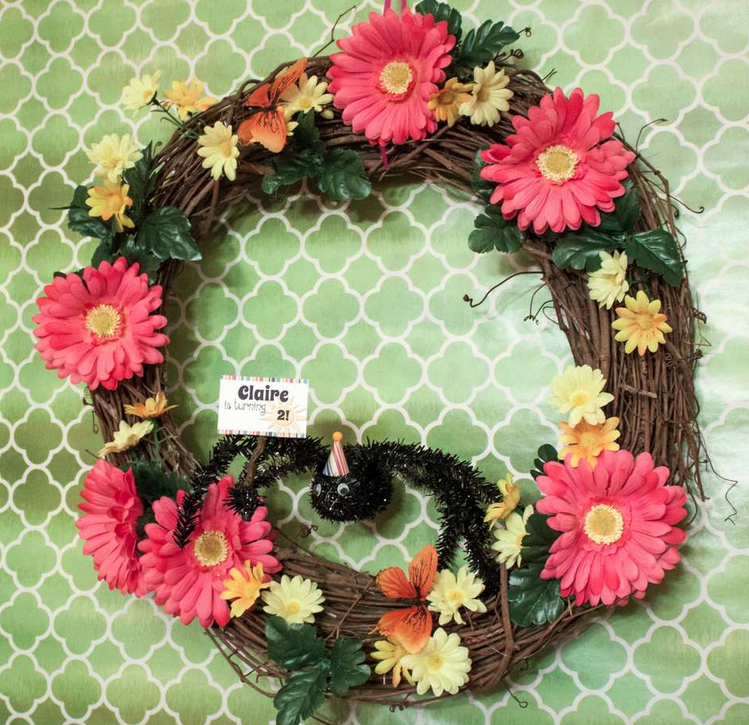
The first was this big googly-eyed spider that I found at my local Safeway grocery store.
Picture
Striped pattern from Color Happy digital scrapbooking kit by Michelle Coleman. Sun from Good Old Summertime by KimEric Kreations.
I made a little party hat for him out of some paper and a plastic bead and hot-glued it on.  The flowers are from a flowered garland I bought at Michaels; I pulled the flowers, leaves and butterflies off and hot-glued them around a grapevine wreath.  I made the sign on my computer and glued it to a small stick.

Claire LOVES this spider so much that I had to buy a wreath hanger and hang it on her bedroom door.  She says "Hi Mr. 'Pider!"  to it multiple times a day.
Picture

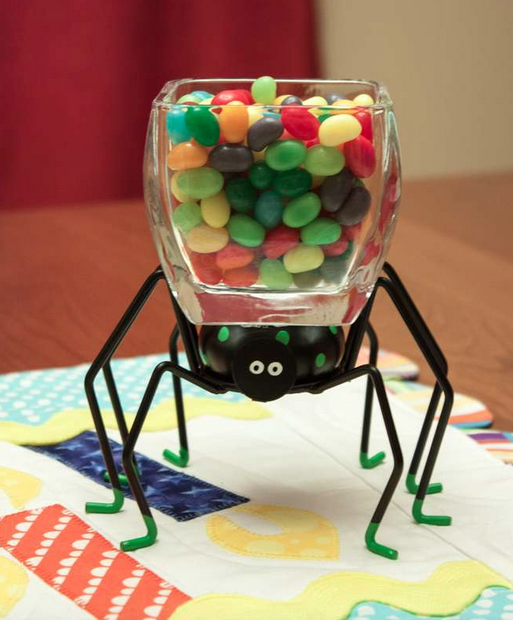
A couple of my favorite elements of the party were the candy dishes.  I found these spider votive holders at my local Kroger-affiliate grocery store in October.  The glass dishes are candle holders from Michaels.  I glued them together and put some colorful jelly beans in them.  Can't wait to use these again for Halloween!

Picture

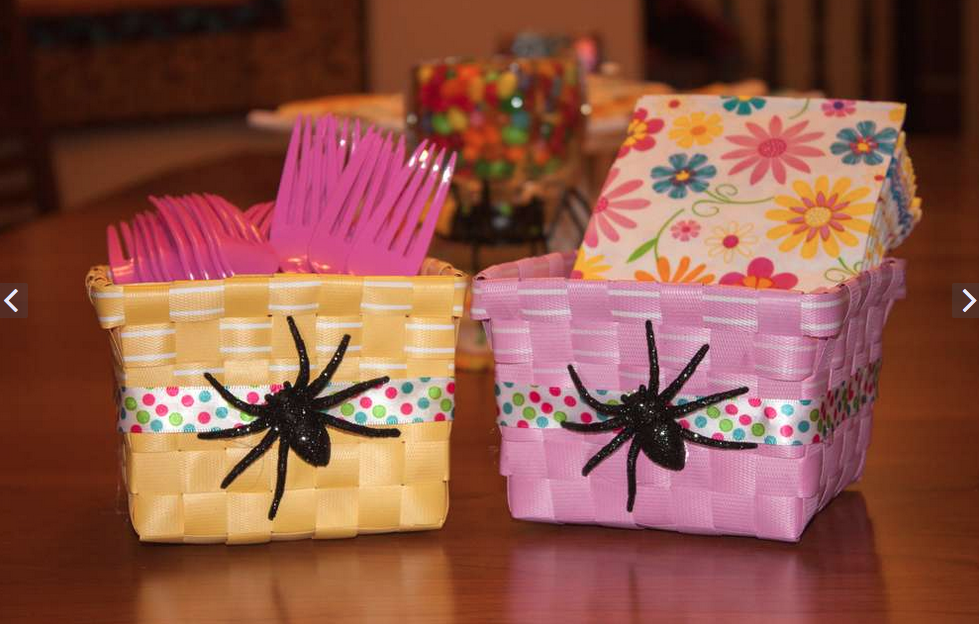
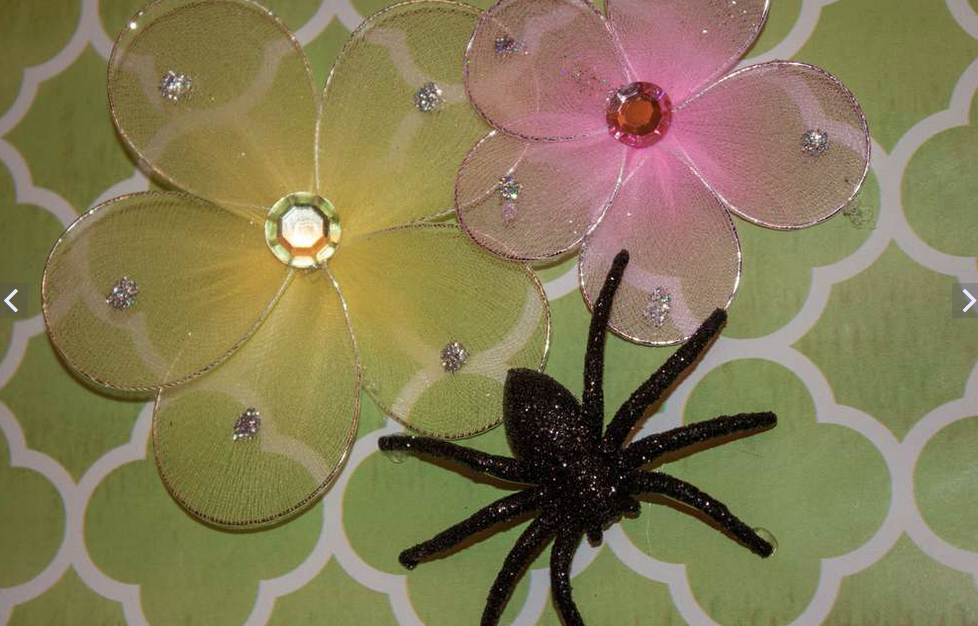
I also found these glittery spiders at Walmart around Halloween, they came in a 12 pack.  I used some of them to decorate Dollar Tree baskets (the same baskets I used for her first birthday party), and some to decorate the wall.  The green background pictured here is wrapping paper from Dollar Tree, I used it to cover a large painting behind the food table and that's where I hung the wreath and the glitter spiders.  The flowers are also from Dollar Tree spring selection.  Napkins are from my local Kroger-affiliate, polka-dot ribbon from the dollar bin at Michaels.
Picture
Picture

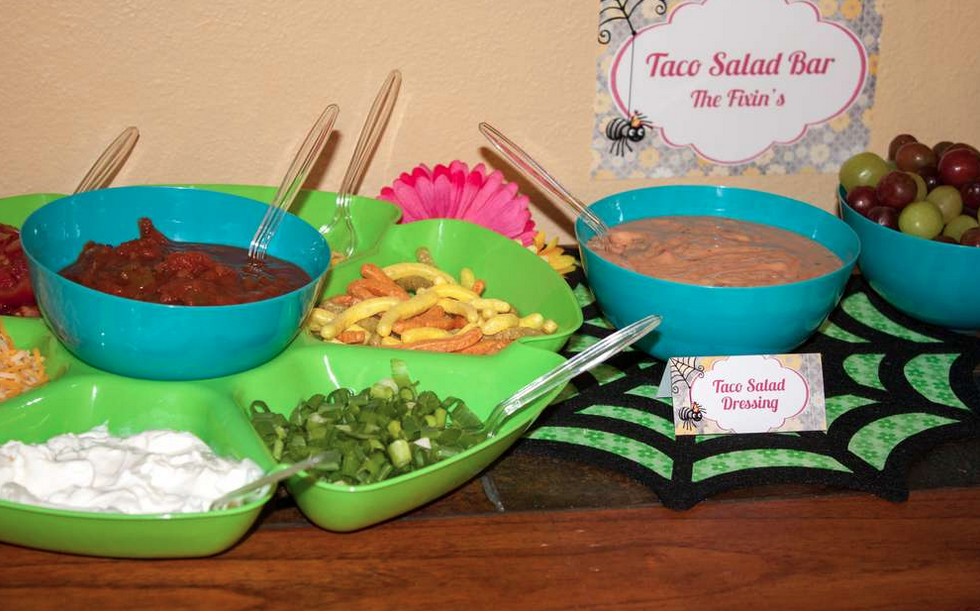
The other things I found at Halloween were these felt spider web place mats at Michaels.  I glued pieces of green patterned scrapbook paper underneath them.  I was going to use them under my candy dishes, but the spiders on the candy dishes didn't stand out enough because it was black on black, so I used them on the food table instead.
Picture
Plastic serving dishes from Dollar Tree

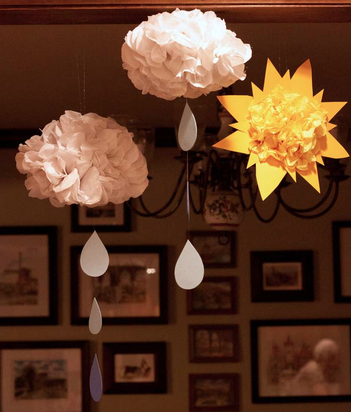
Next up are some hanging sun and rain cloud decorations made out of tissue paper.  I could not get a very good picture of these due to the lighting, but they were REALLY cute.  Some tutorials here and here for the tissue paper part.  For the rain drops, I cut the shapes out of blue cardstock and just sandwiched the fishing line in between two pieces and glued it.
Picture

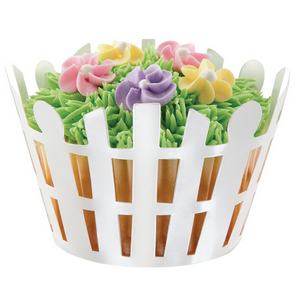
For the cupcakes, I had a vision that did not turn out quite as I had hoped.  I wanted them to look like these cupcakes from Wilton, with two flowers and a tiny spider next to the flowers.
Picture
Wilton picket fence cupcake wrappers
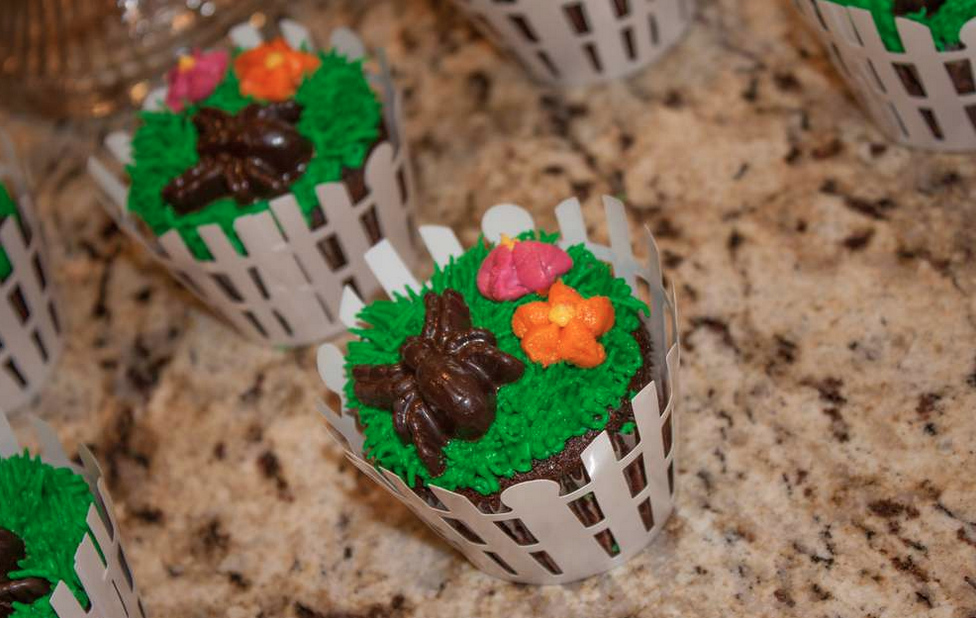
But I couldn't find any candy spiders small enough.  I tried making some by piping chocolate onto waxed paper, but that didn't go well.  I ended up using a mold, but the spiders were bigger than I wanted them to be.  We also used buttercream instead of royal icing for the flowers, so they didn't turn out as nice because we had to freeze them and then try to get them on the cupcakes without messing them up.  And they sweated.  Annnnd, the bakery took my request of "make the frosting look like grass" very seriously, and it was VERY green, LOL.  I wish I had taken the Wilton picture in and told them to make it like this so it would have been lighter.

Alas, lessons learned.
Picture

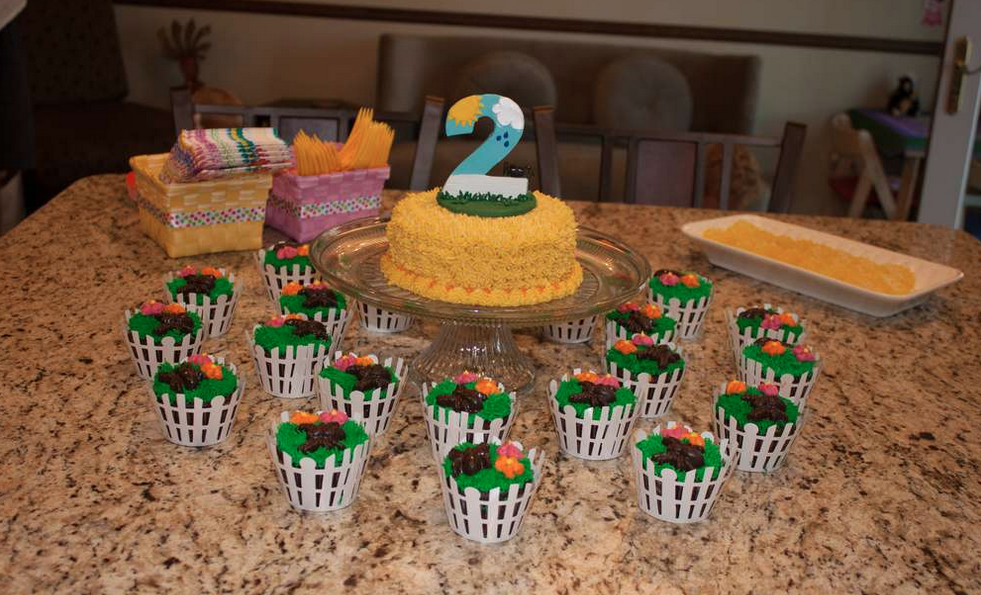
They still looked nice grouped around the cake.
Picture

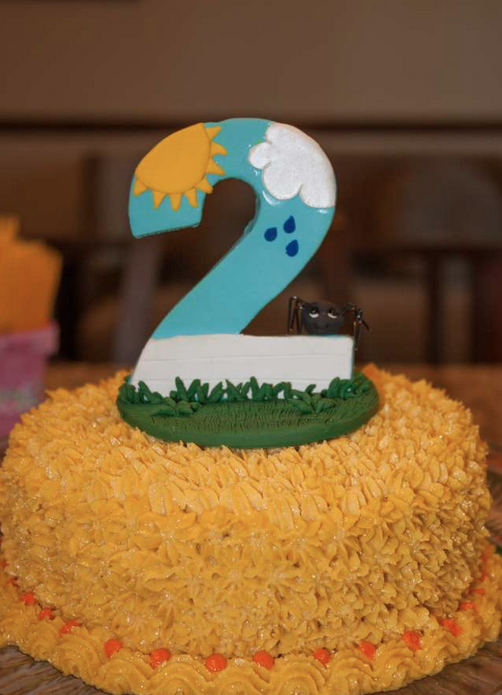
The cake topper was commissioned through Lynn's Little Creations on Etsy.  She made our wedding cake topper, so I decided that I was going to have her make Claire's birthday cake toppers every year, and then we would turn them into ornaments for the Christmas tree.  It's kind of hard to see the spider in this picture, but he was so cute!
Picture

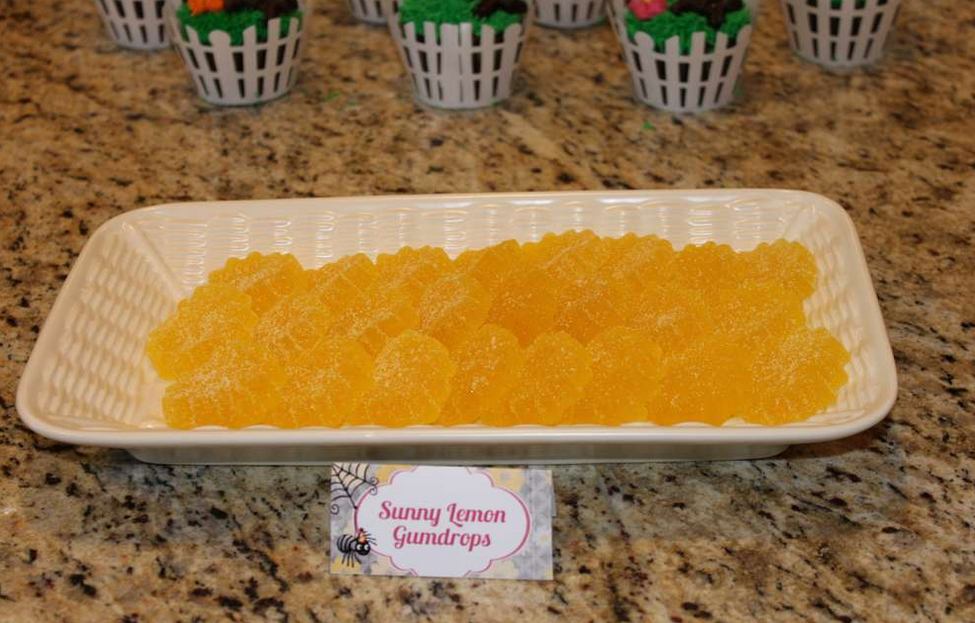
I made some Sunny Lemon Gumdrops using a star shaped silicone mold.  I followed this recipe from Sew Can Do and used lemon extract.  They were delicious!
Picture

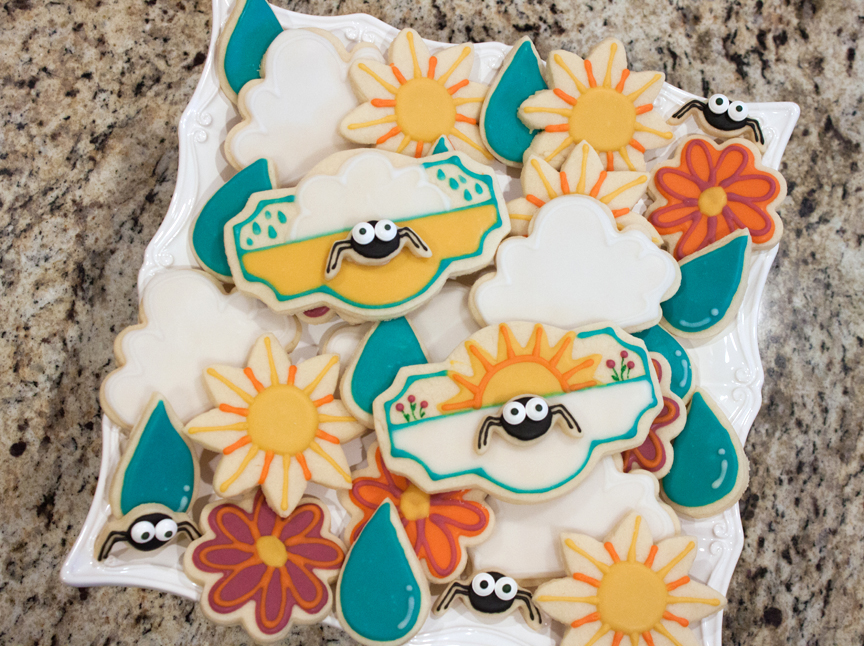
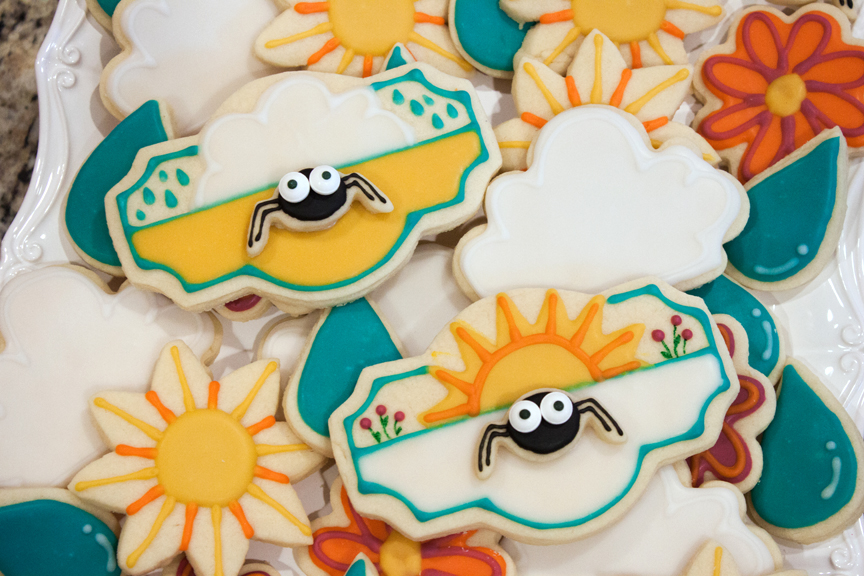
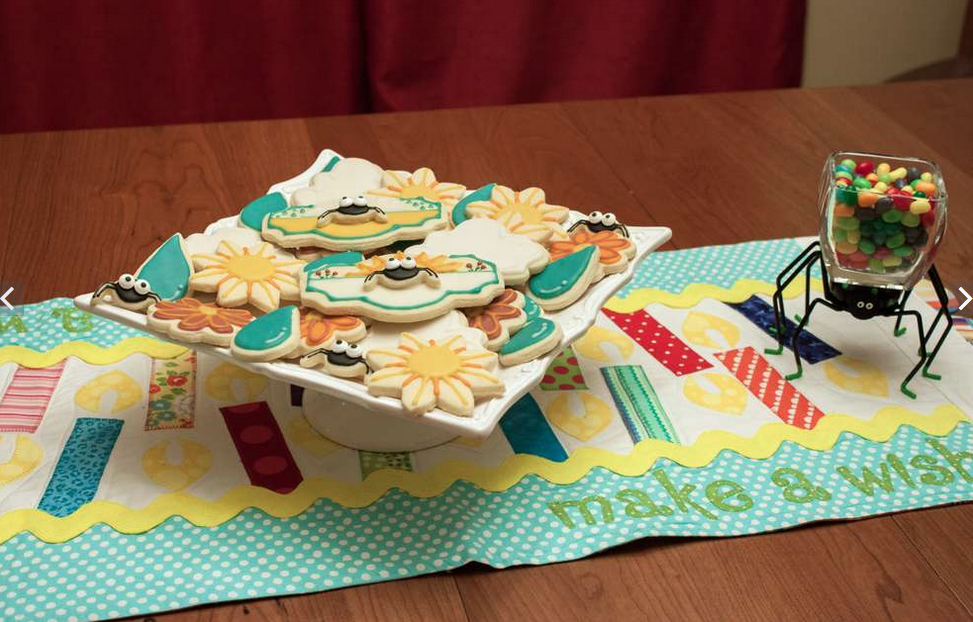
My pride and joy -- the cookies!
Picture

I got the idea for the plaque cookies from this sample picture at Karen's Cookies, and the idea for the sun at Glorious Treats.  I made the rain drops with a heart cutter and then just sliced them in half. 

Picture
The tiny spider cookie cutter is from this Wilton set, and the eyes are these candy eyeballs, also from Wilton.

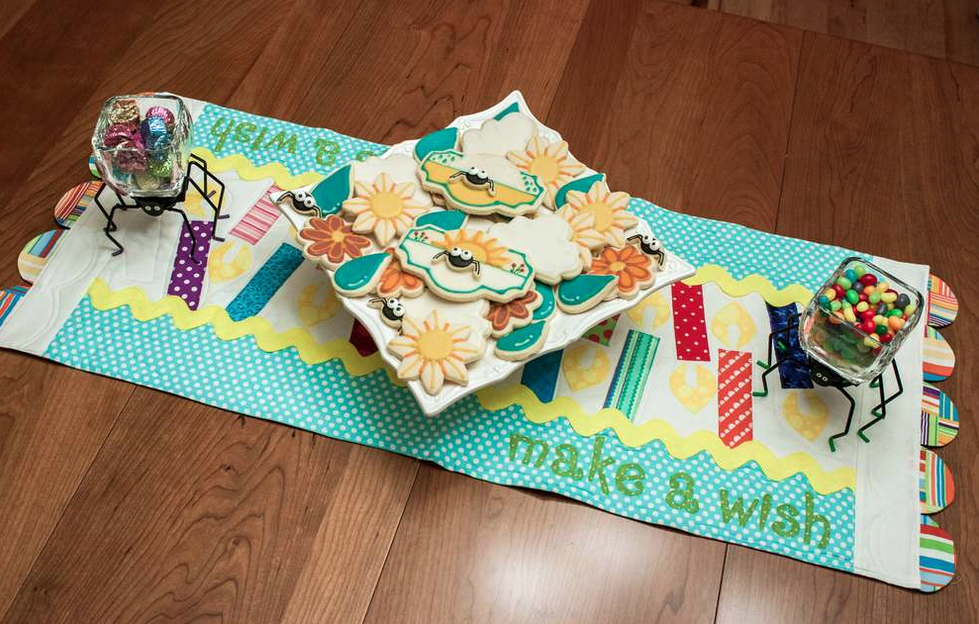
This beautiful quilted table runner was made by Claire's Great-Aunt Cindy.  There is a matching place mat that goes with it that says, "It's My Day!"  We used it at her first birthday party and will be using for every birthday to come.  It just happened to match the cookies perfectly, that was not planned!  :-)
Picture
Picture

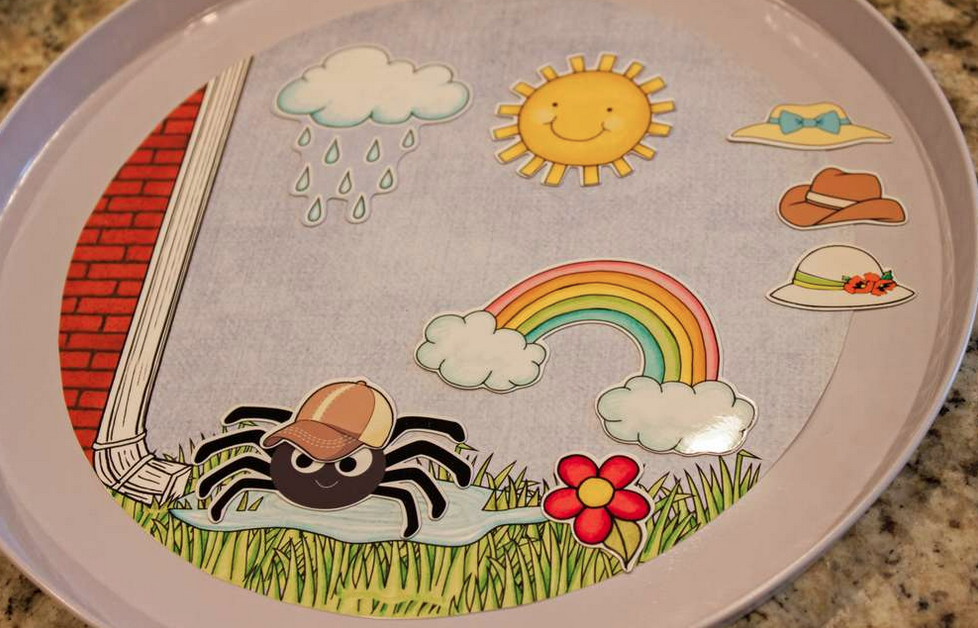
And finally, the party favors.  These are little magnetic Itsy Bitsy Spider scenes using printable magnet paper.  I cut the shapes out with my Silhouette portrait.  The metal background is a burner cover (2 for $1 at Dollar Tree).
Picture
I created the scene myself using some graphics I found via Google Images, and various different digital scrapbooking kits by Kate Hadfield.


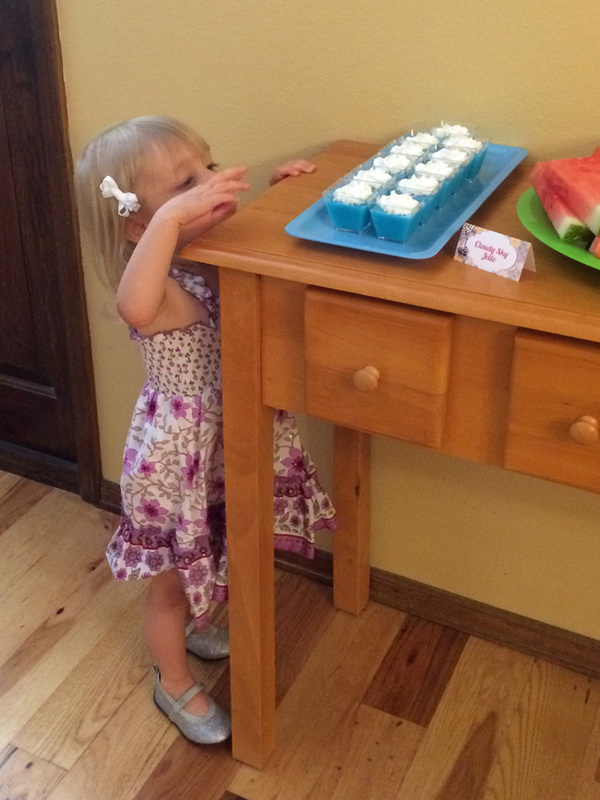
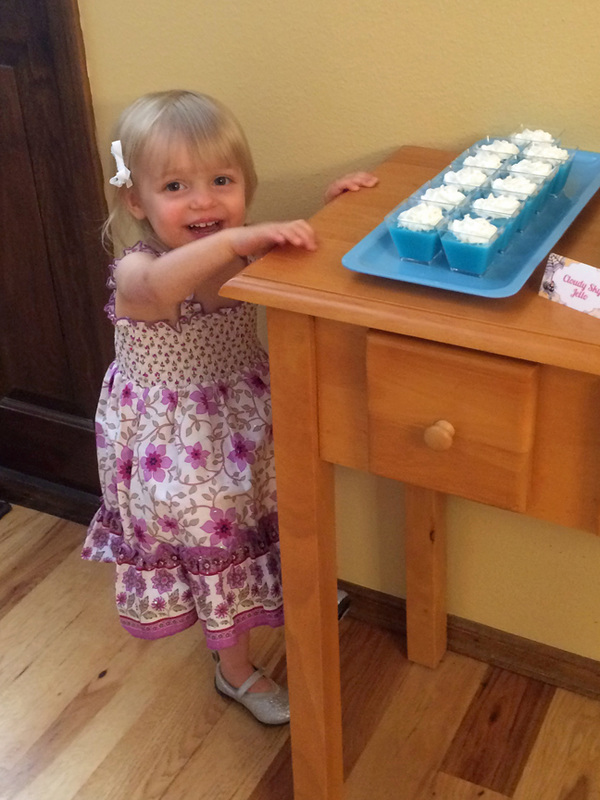
Whew!  That was a lot of pictures!  The party was a blast!  Here are a couple more of the birthday girl trying to sneak some jello... and the look on her face when she realized she was caught.
Picture
Picture
0 Comments

Free Baby Word art

5/6/2015

2 Comments

 
Picture
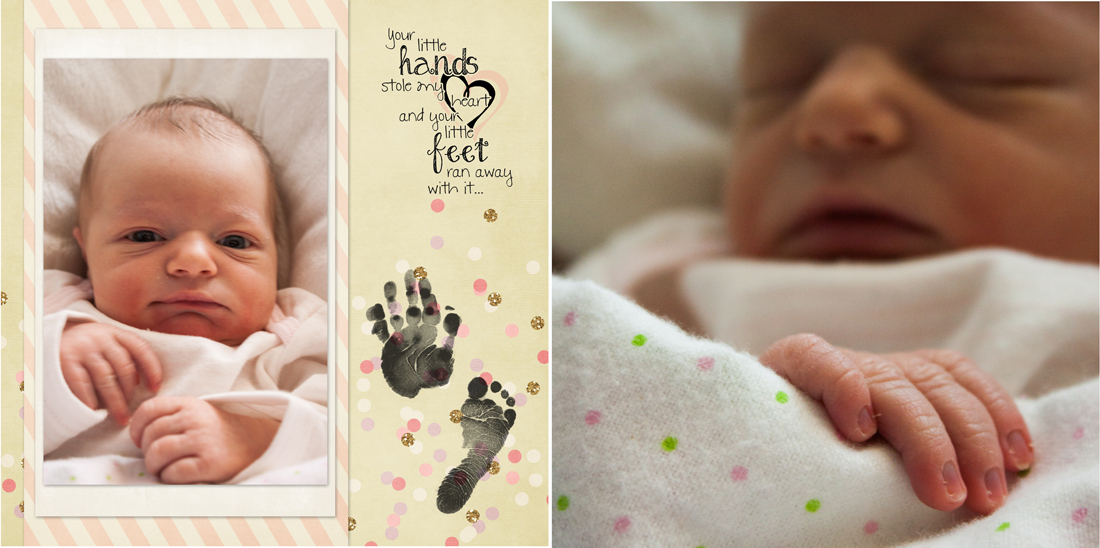
This is a page layout I made for Claire's baby scrapbook.  I scanned in the hand and footprints from the hospital and gave them a transparent background so it would look like they were stamped right on the page.

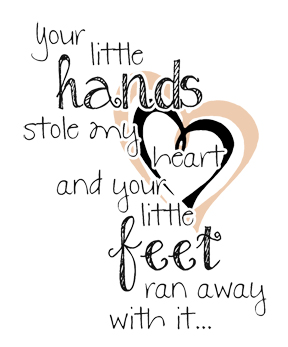
I love making word art, it can take a title or quote to a much higher level than just printing it all in the same font.  I have a word art tutorial -somewhere- on my computer, or on our backup server.  One of these days, I'm going to dig it out and share it.

Until then, here is the .png file for the word art I made for this hands and feet layout.  Enjoy!
Picture
Download here.
2 Comments

Superhero Apples

4/29/2015

2 Comments

 
Picture
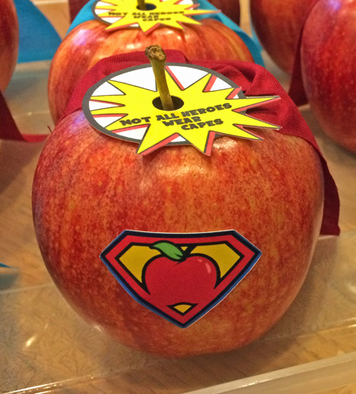
Teacher Appreciation Week is coming up next week and Claire's school is doing a superhero theme!  ZAP!  POW!  Okay, I'm done.  hehe

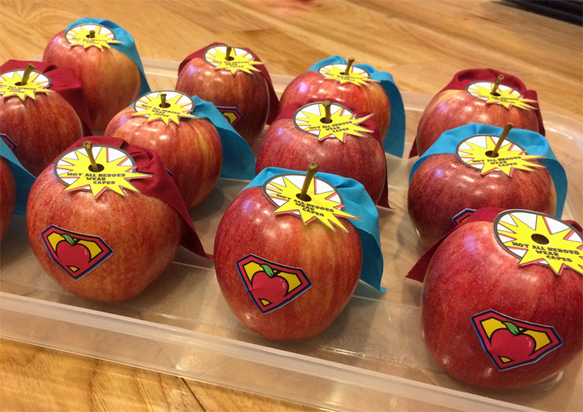
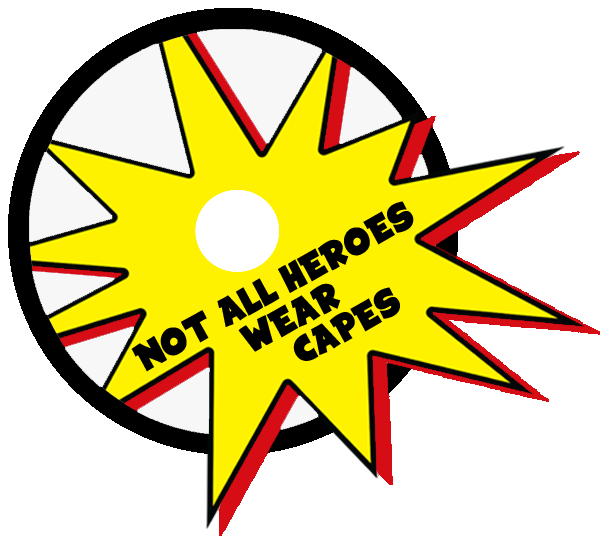
I couldn't resist another chance to use my Silhouette, so I made these cute little superhero apples, one for each teacher in the school.  I used Silhouette printable sticker paper for the shields and plain card stock with double-sided tape for the top label.
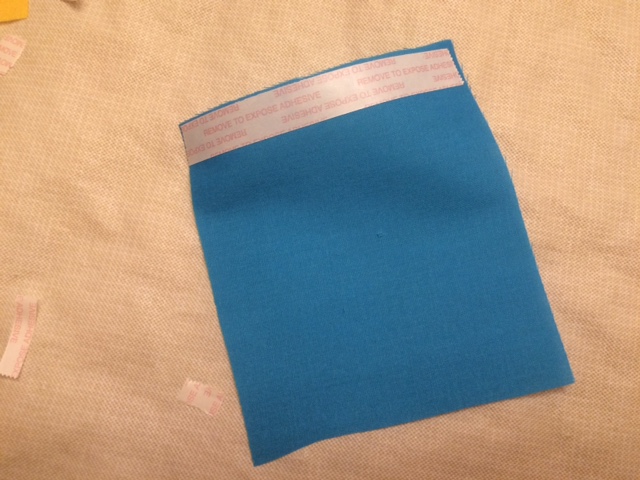
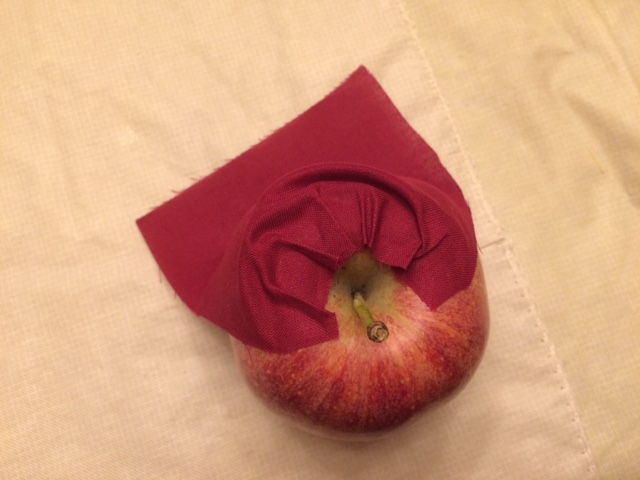
For the capes, I used some material from my fabric stash and cut pieces about 4x4 inches.  (The piece shown in the photo is a little longer, but I ended up trimming it after I put it on the apple because it was too long.)  I put a strip of double-sided tape along the top of each and then attached it to the apple, gathering it as I went.  Originally I had yellow capes, too, but the tape didn't stick at all to the yellow material.  I can only guess that maybe it was polyester and not cotton?
Picture
Picture
Thread the apple stem through the hole in the label and attach the label to cover up the gathered section of the cape.
Picture
Remember, an apple a day keeps evil villains away!  And here are the .png files if you would like to make your own crime-fighting produce.  Enjoy!
Picture
Picture
2 Comments

Traveling Tea Party (Magnetic)

4/8/2015

5 Comments

 
Picture
NOTE: This project contains small parts. Children should be supervised while using it.

Picture
     I've been having some crafty fun lately making magnetic games to entertain Claire on the plane when we fly back east this summer.  (Magnetic in hopes that less pieces get dropped into the black hole that lurks under an airplane seat.  Though magnets aren't going to stop her from purposely throwing things on the floor, which I know will also happen.)
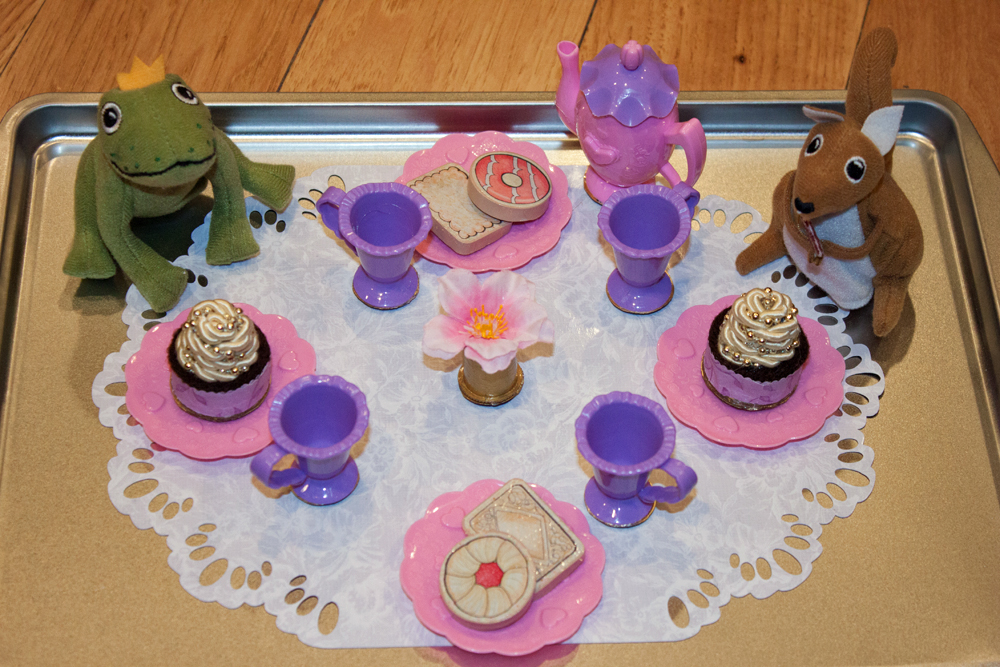
     One of her favorite toys is her Fisher Price Tea Set.  She loves to line up her stuffed animals and dolls, pour tea for them and then help them drink their tea and feed them plastic pastries.  I thought it might be fun to create a travel-sized version of her favorite pastime. 
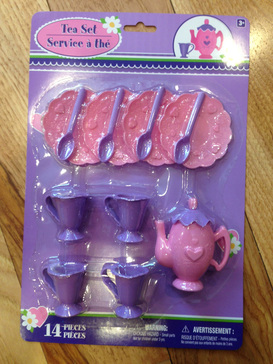
     First I thought I would use a doll house sized tea set, but they were pretty expensive and also very small.  Then I decided to check the Dollar Tree just in case, and I found the PERFECT travel sized tea set!  More on the tea set later...

Picture
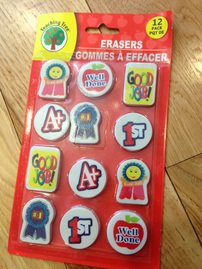
     For the pastries, I used a set of erasers I also found at the Dollar Tree.  They were the perfect size and shape for cookies and crackers. 
     As I was working on this project, I came across an old green foam door hanger in my stash, and realized that I probably could have used that and just cut it to the shapes I wanted.  This would have made my traveling tea set even lighter in weight.  If I decide I want to add some more food later, like slices of pie, I might try that.
Picture
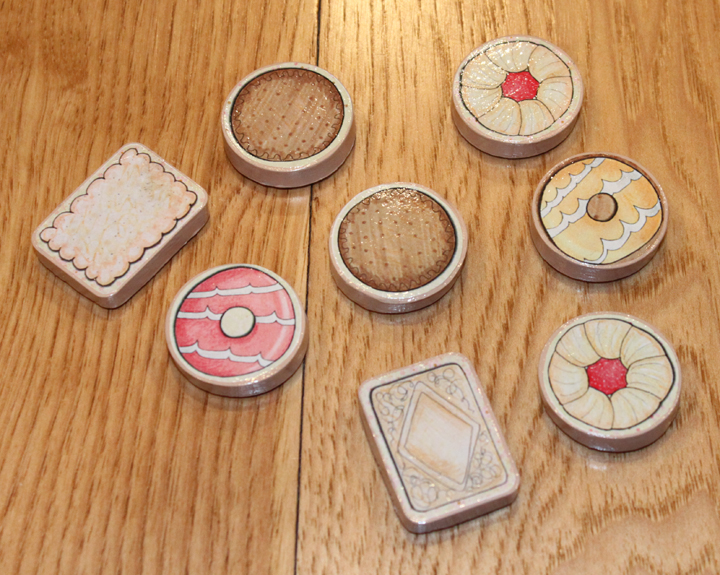
     For the graphics, I used another kit from my favorite digital scrapbooking artist, Kate Hadfield.  Her Tea Party kit had the perfect shape graphics I needed for my round and rectangular erasers.  I re-sized the cookies and crackers to the exact size I needed and had them printed on a laser printer.  A laser print would allow me to use Modge Podge to adhere the paper and seal it without making the ink run.
     I found some beige craft paint in my stash and painted the erasers, then used the Modge Podge to attach the graphics.  I then put several coats of Modge Podge on the whole thing to protect it and (hopefully) keep the paint from peeling off.
Picture
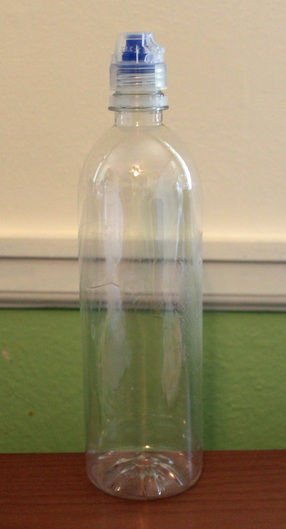
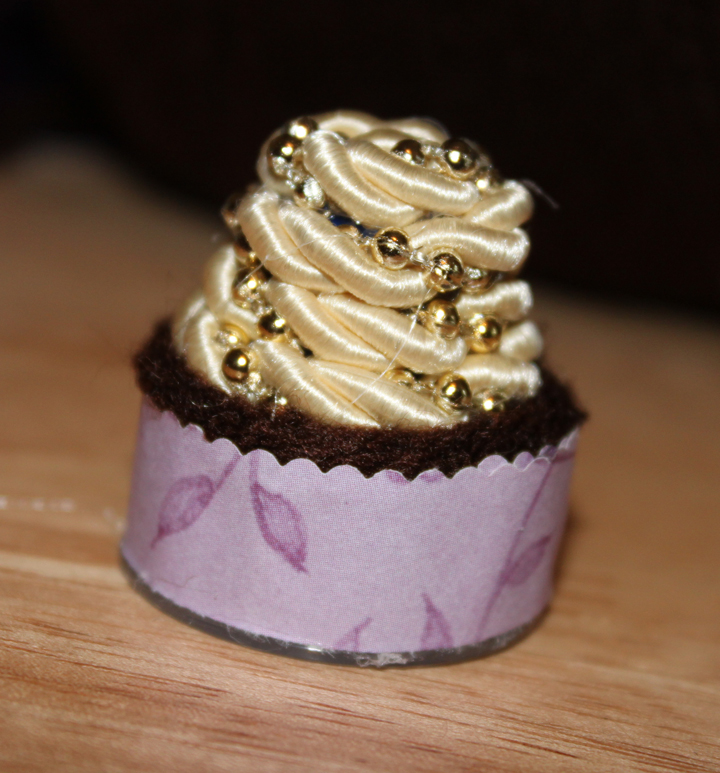
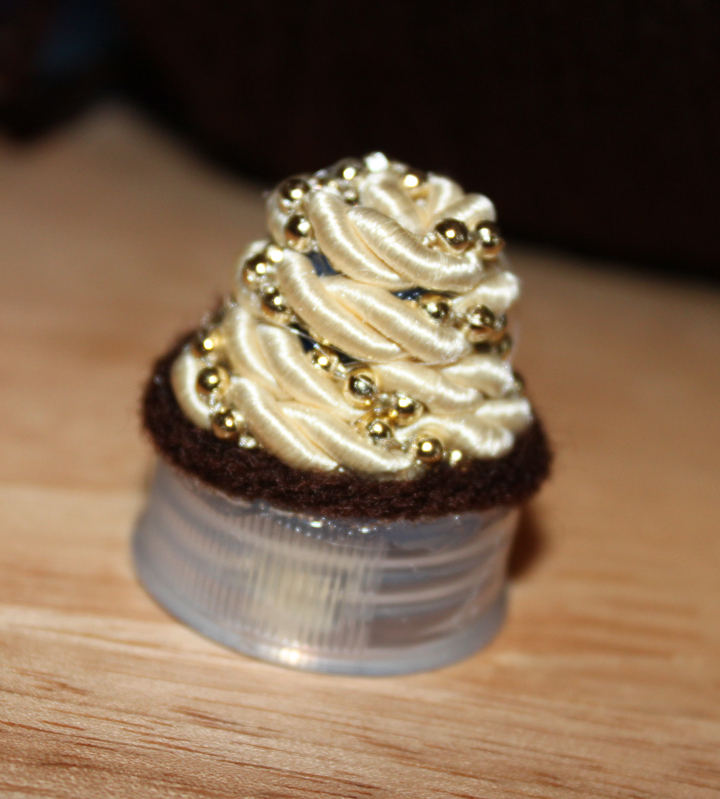
     By then, my creative juices were flowing and I decided that she needed some cupcakes, LOL.  Kate's kit has a couple really cute cupcakes, but I didn't want to just print them out and lay them flat on an eraser, I wanted them to look more like real 3D cupcakes.  I stood, staring into my craft closet, waiting for inspiration to come to me -- when I saw two empty water bottles.
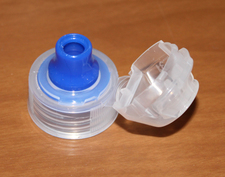
     I had planned to use them to make a scuba diver costume for Claire for Halloween last year, but never got around to it.  The tops were perfect for what I needed.  I used scissors to cut off the cap and trimmed any sharp edges off.
     I don't know what brand this water bottle is, but I got it at my local Kroger affiliate.
Picture
Picture
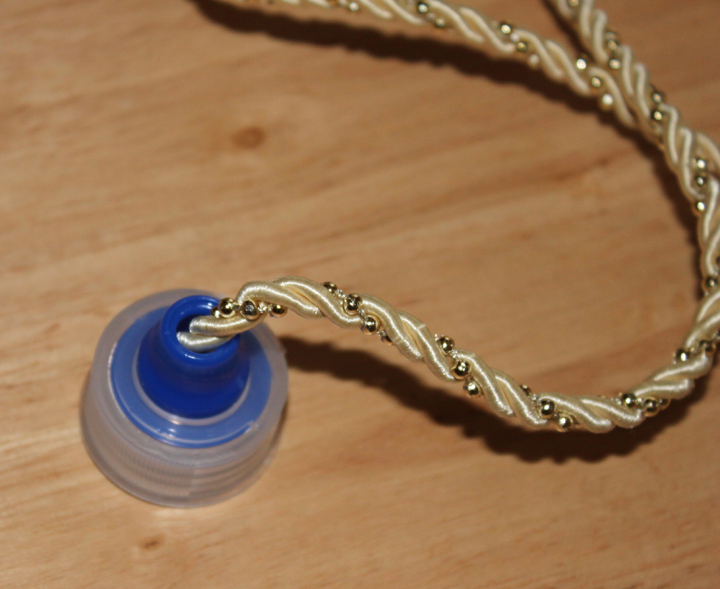
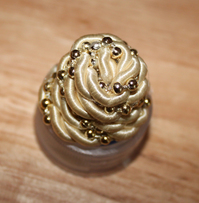
     More rummaging in my craft stash produced an old roll of beaded trim.  (It's amazing what I can find in that closet!)  I stuck the end of the trim down into the hole in the top and hot glued it from the underside.
     I then put two small dots of hot glue on the top side to hold the trim in place.
Picture
Picture
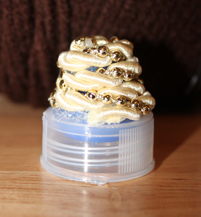
I wrapped the trim around the blue part, gluing it as I went, until it reached the white plastic part. 
Picture
Then I wrapped some brown yarn around the very bottom, gluing as I went, overlapping onto the white plastic part slightly.
Picture
     I found some lavender patterened paper in my old scrapbooking stuff, so I cut a strip using some decorative scissors and glued it around the white plastic part to make the cupcake wrapper.  (Note the tell-tale strings of hot glue hanging out in this picture.  Every time I use hot glue, I feel like I just walked through a spider web.)
Picture
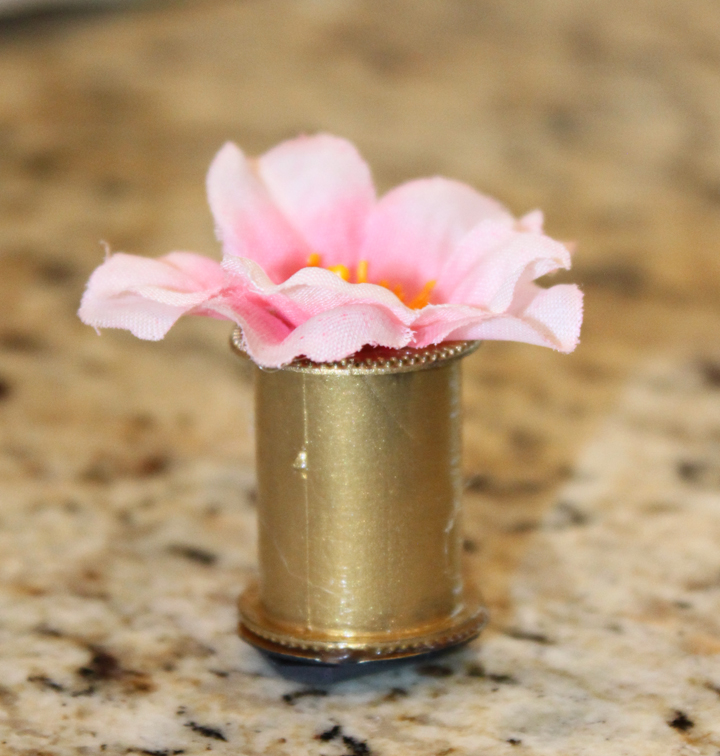
     What tea party is complete without a vase of flowers on the table?  This is an empty thread spool I found lying around on my sewing machine table.  I painted it with gold craft paint and then put several coats of Modge Podge on it to protect it.
     The flower is left over from a diaper cake that Kevin's Aunt Kathy made for my baby shower.  I just put the stem down into the hole of the spool and hot glued it. 
Picture
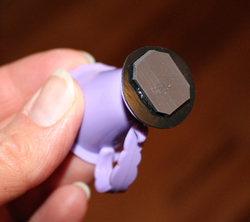
     Now, I needed to adhere magnets to the bottom of all of this stuff, but many of the bottoms were not flat.  The plates were fine.  But the tea pot and cups had bottoms that caved in, the water bottle lid obviously did not have a bottom, etc. 
So, I cut out some pieces of thin plastic (i.e. a lid from a sour cream container or something like that).  I just used a pen to draw around the bottom of the item, and then cut it out with scissors. 
     First I tried Krazy Glue to attach it to the bottom, but that did not work well, so I ended up using hot glue.  I applied the hot glue to the rim of the bottom of item and then centered it on my plastic circle and pressed it down.  If any squeezed out, I used my finger to either wipe it off or smash it down before it hardened.      

    I used magnetic tape on the bottoms, but the adhesive was not strong enough for the slick plastic, so I ended up using Krazy Glue to stick the magnets on the plastic pieces.  The tape adhesive worked fine for the erasers.  Because the magnet tape comes on a roll, I found it necessary to bend the tape backwards to straighten it out before I stuck it on. 
     I also used hot glue to permanently attach the lid to the tea pot.  Interestingly, the plastic on the plates is so thin that if you put a pastry or cupcake down flat on the plate, the magnet sticks to the magnet on the underside of the plate.  Handy!  


Picture
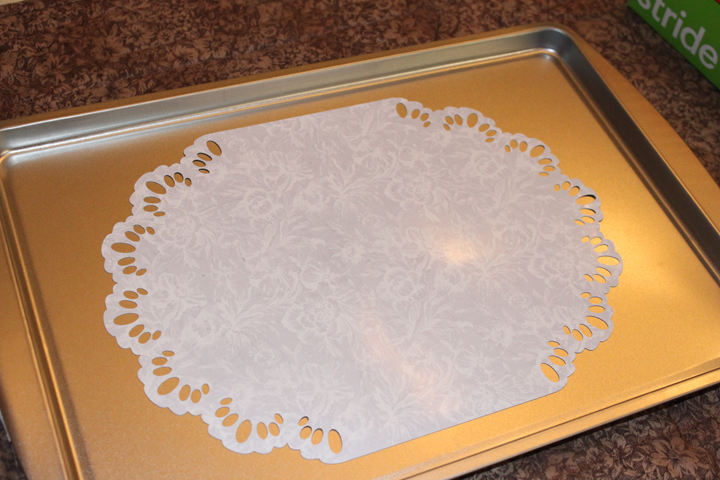
     The final finishing touch to my table setting was a lace table cloth.  Kevin bought me a Silhouette Portrait cutting machine for my birthday and this was the perfect opportunity to learn how to use it.  I used a floral pattern from Sorta Shabby by Mommyish, recolored it to gray and printed it on Silhouette Printable Magnet Paper.
     I used a doily cut file from the Silhouette store (the machine came with free download cards, so it was no cost to me.)  The doily was round, but I found that it didn't fit all 4 place settings plus vase and tea pot, so I did some modifications to make it longer.  Then I cut it out on my Silhouette. (NOTE:  The Silhouette cut settings for Printable Magnetic Paper were not right, I had to increase it to 5 on the blade and do a double-cut.)
Picture
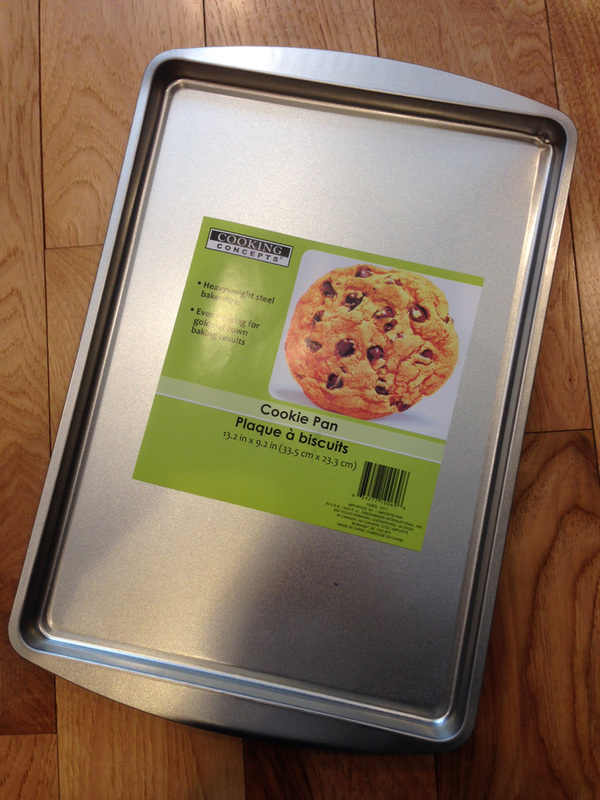
     I bought a small cookie sheet, also from the Dollar Tree.  I figure this will serve as a coloring desk, dining table, and place to play with her magnetic games.  The table cloth and other paper-like games will travel in a manila envelope that I will tape to the back of this cookie sheet so they don't get smashed.
Picture
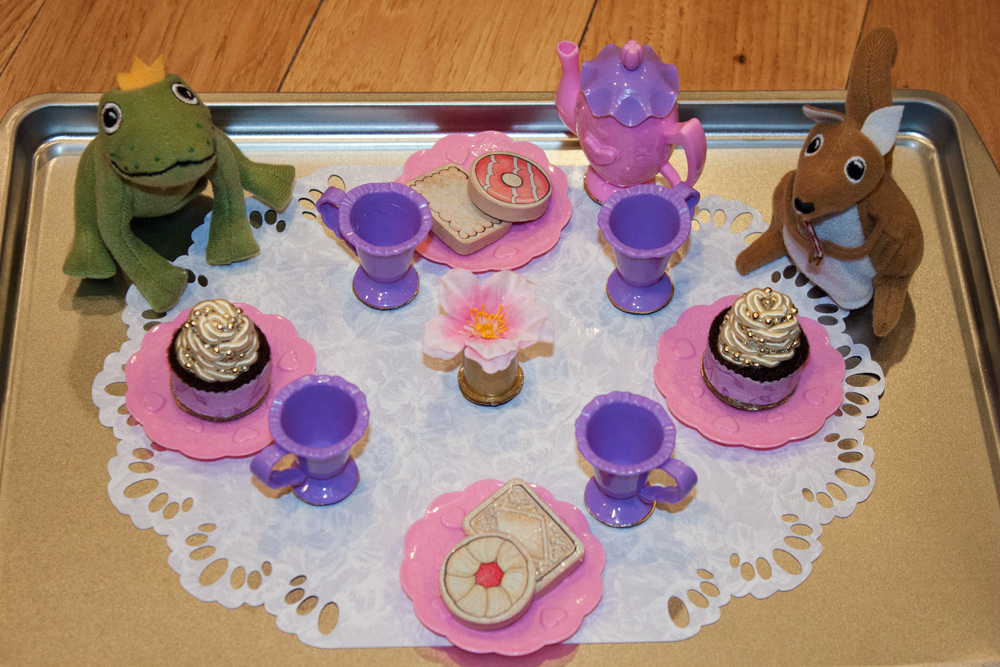
     Well, now that we have this beautiful table, we have to invite some guests!  Frog Prince and Squirrel are finger puppets from Ikea (though may no longer be available.)  They are the only finger puppets we have that actually sit upright.
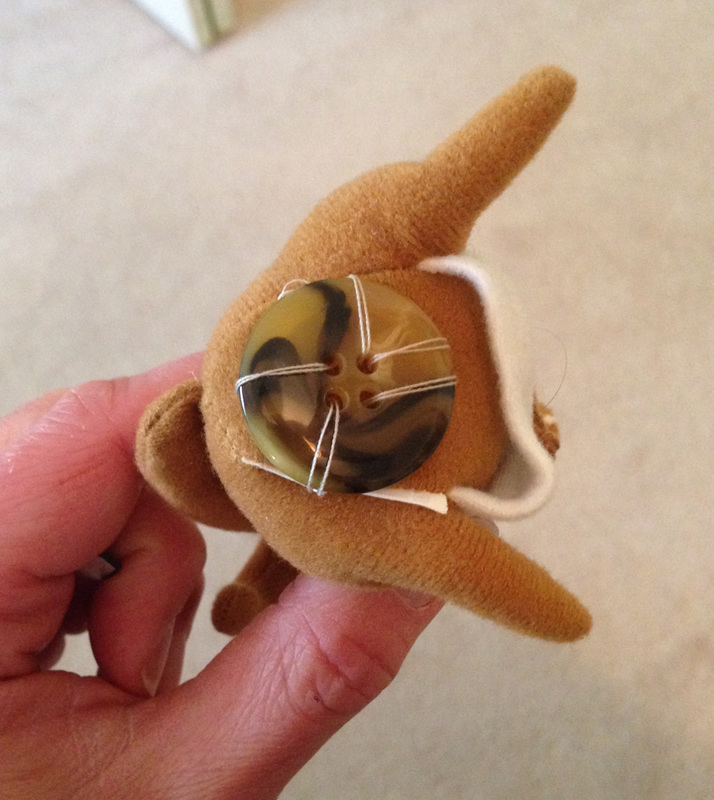
     I didn't want to ruin them by gluing a magnet to the bottom, so I sewed a button onto the bottom of each and then hot glued the magnet to the button.  When the tea party is no longer needed, I can just cut the thread and Frog and Squirrel are brand new again.
Picture
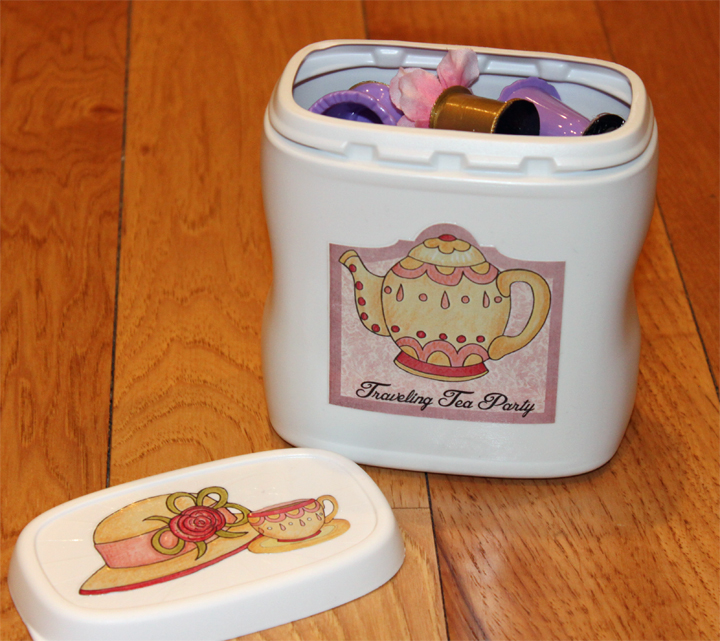
     And all of the pieces fit just right into this French's fried onion container that I saved from Christmas, because I just KNEW I would need it for something, LOL.  I used some more graphics from Kate's Tea Party set, cut them out with my Silhouette and modge-podged them on.
Now we just have to hope that between this, the other 4 magnetic games I made, the Melissa and Doug dress-up game, the animal beading game, the busy pages my mom made, the unopened issues of Hello magazine, the flashcards, the iPad, and the 87 different kinds of snacks I am bringing, we will have at least 15 minutes of peace on the flight.
Picture
5 Comments

DIY Paint Smock From Thrift Store Clothes

3/4/2015

1 Comment

 
Picture
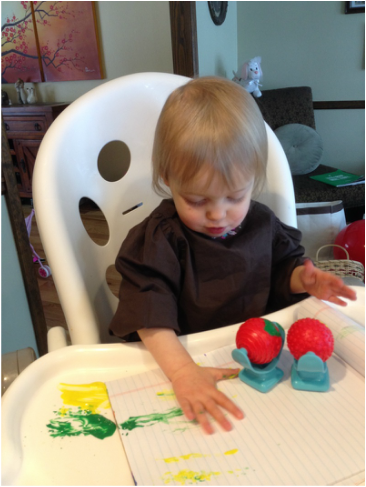
Claire has discovered (a.k.a is obsessed with) the joy of painting.  I gave her some washable paints a couple months ago, and now she wanders around the house all day saying "Paibt, paibt."  And then I bought her some washable markers to color with, so now she wanders around saying "Cow-woo, cow-woo."
Well, I found out that washable paint/marker doesn't always mean washable.  Even after rinsing and soaking and spraying with OxyClean, some of her shirts still have marks on them.  So, I wanted to get her some kind of paint smock.  They don't really make paint smocks for tiny 1.5 year-olds, so I went to our new Goodwill to see if I could find a large long-sleeved shirt. 

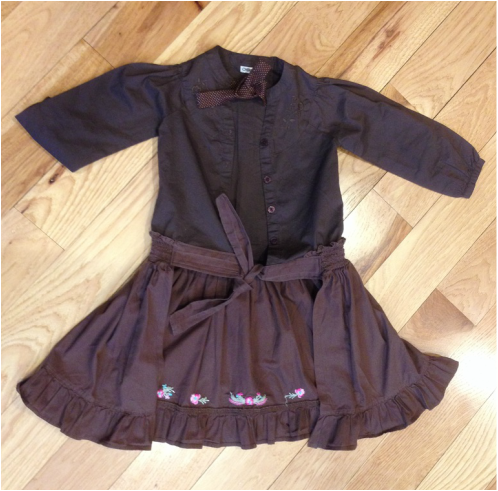
I ended up finding a long-sleeved, button-down shirt in size 3T.  It was big enough to fit over whatever clothes she has on, but not long enough to cover her legs (she also likes drawing on her pants.)  Then I spotted a sundress, also size 3T, so I got that to cover her legs.  Bonus -- they were both brown, so stains will not show as much!
Picture
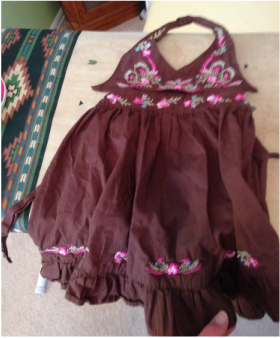
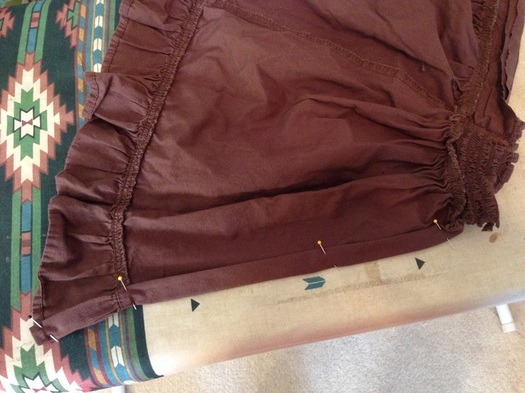
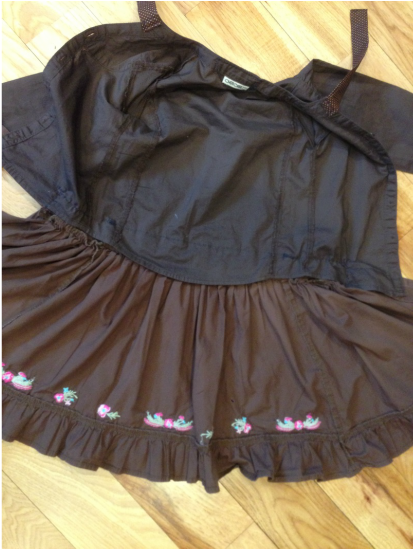
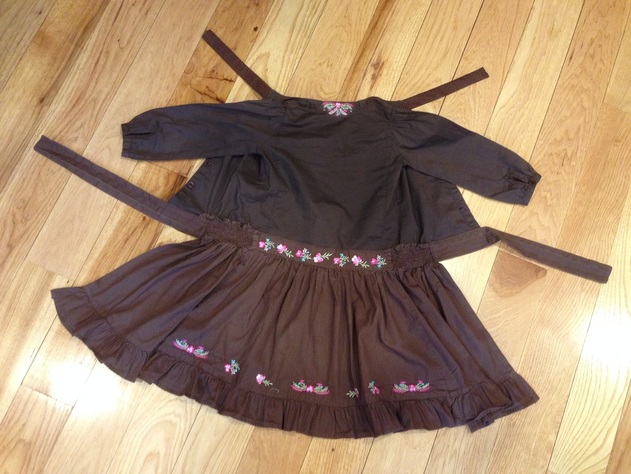
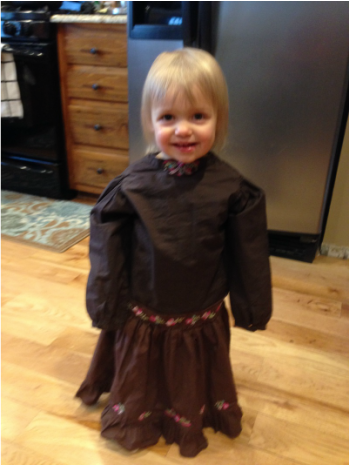
This is what the dress looked like.  Originally, I thought I would just cut off the top of the dress and have her wear it as a skirt, and then just put the shirt on.  But, I really need to practice sewing, so I decided to try to put the two together to make a full-length smock.

It killed me to cut this dress up, by the way.  It was so cute!  But it was too perfect for what I needed, so now Claire just has a super-cute paint smock.
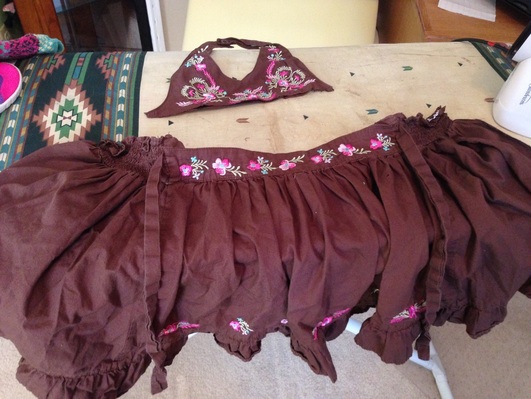
I cut the top off of the dress and then cut the skirt part all the way up the back.  I also cut off the ties so that I could re-position them.
Picture
I hemmed the cut edges on the skirt part.
Picture
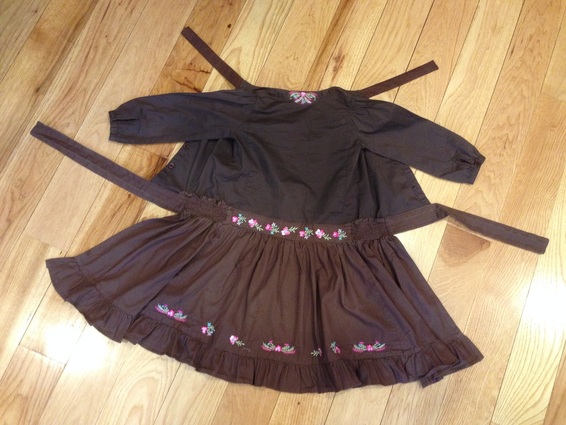
This picture is out of order, but it shows how I fit the top and the bottom together.  I turned the shirt around backwards so the smock could be put on like an apron.  (You are looking at the back here.)
Picture
I just centered the shirt (backwards) on the skirt and sewed all the way across the top of the skirt.  The shirt is wider than the skirt.
Picture
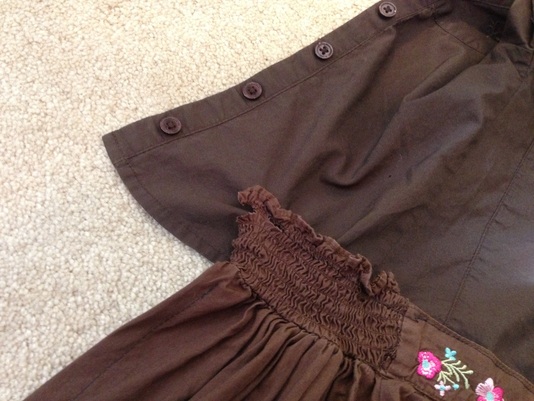
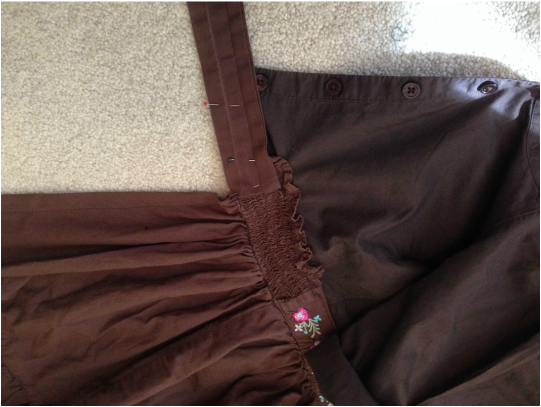
I hemmed the cut end of the ties and re-attached them by sewing them to the skirt and to the part of the shirt that was wider than the skirt.  I had to remove one of the buttons to get it out of the way.
Picture
And this is how Claire kept herself busy while I was sewing.  (Yes, that is underwear on her head.  My underwear from when I was little.)
Picture
Picture
I cut the tags off on the inside and managed to put a little hole in the shirt.  *sigh*  I still had the top part of the dress left over with some pretty embroidery on it, so I cut a piece out and zig-zag stitched it on to cover the hole.  The final thing I needed was more ties for the neck, so I raided my fabric stash and made a couple.
Picture
Here's a view from the back.
Picture
I think it's going to be a while before she grows out of it, what do you think?  No chance of writing on those pants now!
Picture
Picture
1 Comment

DIY Play Market with No Tools!

2/15/2015

3 Comments

 
Picture
Full instructions below!
Picture
Picture
Picture
Picture
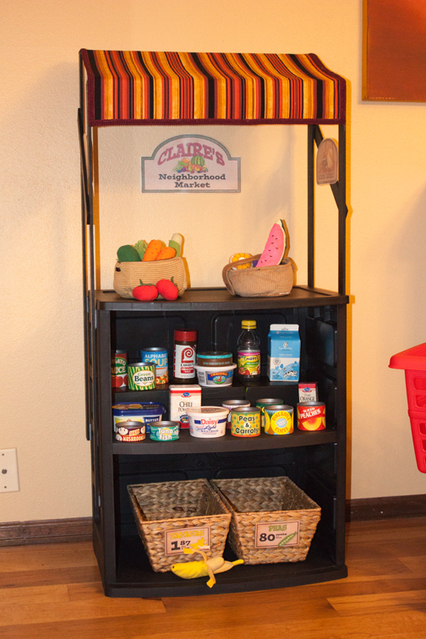
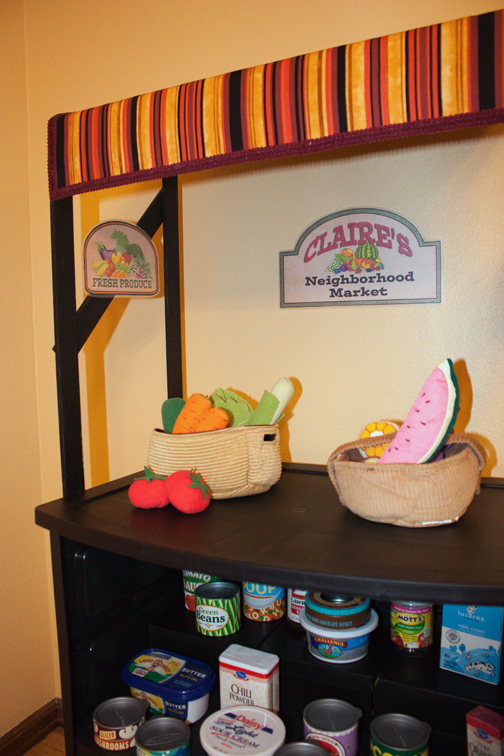
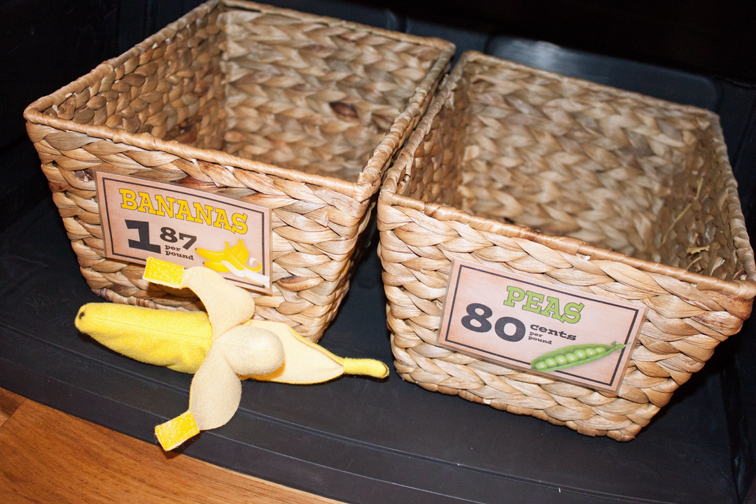
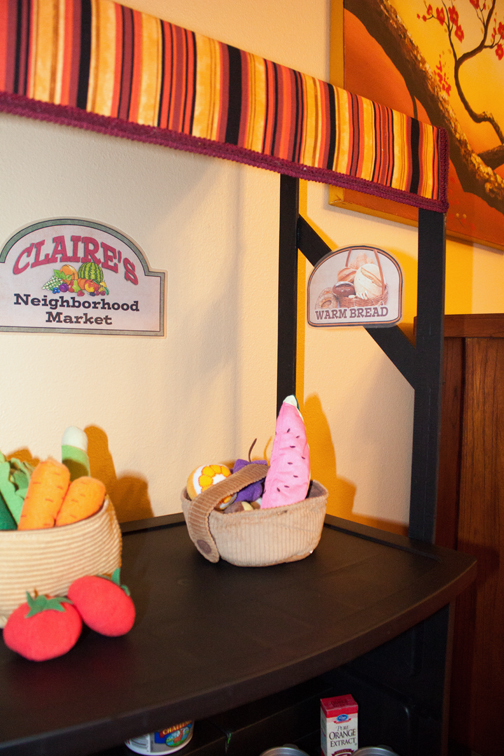
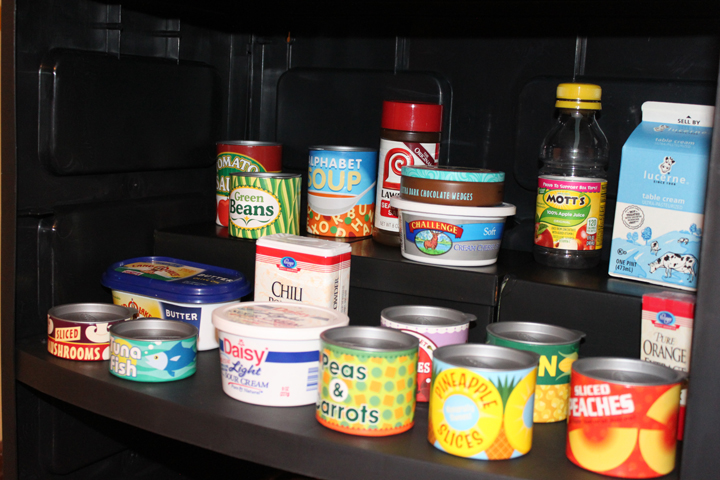
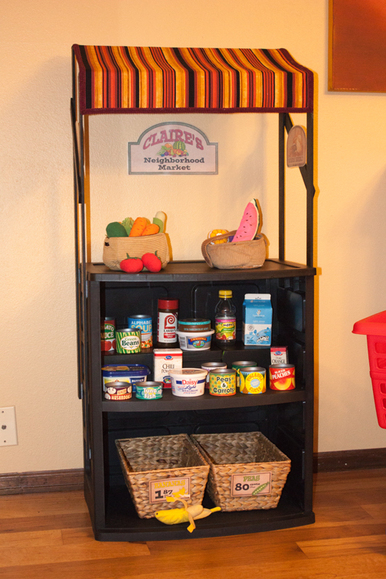
Claire got a shopping cart for Christmas, along with a set of Melissa and Doug grocery cans.  For the past several weeks, we have been saving some containers from our own groceries that would normally go in the recycle bin, so she's got quite a collection of food but she doesn't really know what to do with it.  She'll take it out of her shopping cart and put it on the floor, take the lids off every once in a while, but other than that she doesn't play with it much.  She's getting a play kitchen for her birthday in June, so I decided to make her a play market in hopes of encouraging her to play more with the cart and food.

Pinterest is rife with photos of DIY play kitchens and markets and blogs that tell you how to make them.  The only problem is that those people have some level of talent and/or patience with tools, and I don't.  Saws, drills, nail guns, they are not my friends.  On the other hand, glue, paper, scissors -- pretty much anything you find at a craft store, I can do. 

So, here is how I made a play market with no* tools:

Supplies:

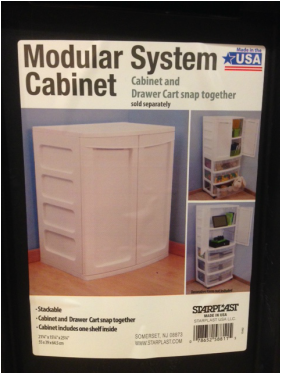
Black plastic storage cabinet (remove doors)
6 yard sticks
1 package sticky-back velcro
1 8-oz tester pot of black latex paint
2/3 yard fabric of your choice
2/3 yard fusible backing, medium weight
2 feet decorative trim, optional
scissors
glue gun
tape measure / ruler
level
hand saw / sandpaper, optional*
wood glue
paintbrush
small cardboard boxes, optional
baskets, optional

Picture

I wanted this project to be cheap and easy, sacrificing a bit of quality was okay with me.  I started with a black plastic storage cabinet for $20 at Walmart.  When I picked it up off the shelf, the doors fell right off.  Perfect, less work for me!  I chose black because it looked less cheap than white, and it was a fortunate choice for other reasons which I'll explain later.


Picture
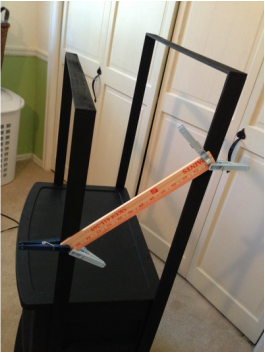
Then I needed to build a frame for the canopy.  I was musing about what type/size of wood I needed when my mom suggested using yard sticks.  Bingo!  They were cheap (89 cents ea.), the exact size I needed, didn't require sanding and were already cut into usable lengths.  I only had to make two cuts for this whole project.  (Okay, yes, I used a saw.  BUT, you could get them cut at Home Depot for a very small charge.  And had I known what length I needed when I bought them, I would have done that, but I was kind of winging it and wasn't sure what I was going to do.)

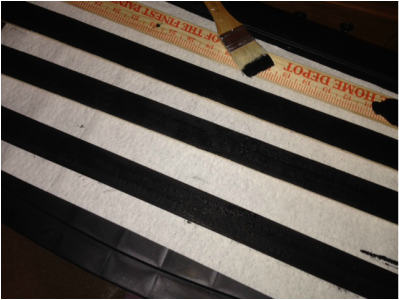
I painted four of the yardsticks black to match the cabinet.  This is where the color choice was fortunate -- the yard sticks were embossed with tick marks, numbers, Home Depot logo, etc.  Black paint reduced the shadows of the embossing so it's not as noticeable.


Picture
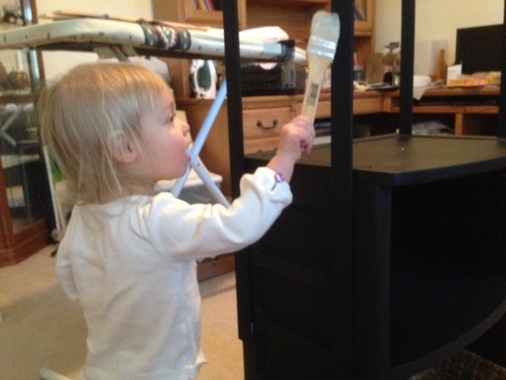
Put that kid to work!

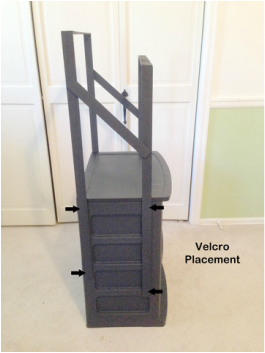
PictureI lightened this photo up a lot to show the placement of the sticks...
(This photo is out of order, but it shows the placement of the yard sticks and velcro.)

I used sticky-back velcro to attach four of the sticks to the sides of the cabinet.  Mostly because that was the simplest solution I could think of, but it also makes the canopy part removable if you want to store it somewhere.  I used white velcro because that's what I had in my craft stash, and you can't even tell.

I used two pieces of velcro per stick, one toward the top of the cabinet, and the other at the bottom end of the yard stick.  I did some measuring to be sure the sticks were in the same place on both sides.  I placed them on the cabinet, but didn't press too hard on the velcro.  I set one of the other yard sticks on top and used a level to make sure they were equal height.  I moved one stick up or down as needed until it was level, and then pressed down hard on the velcro to stick it down well.

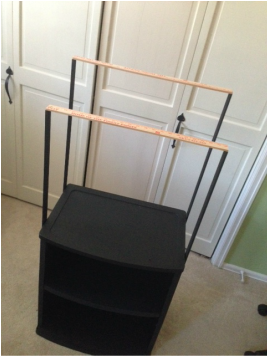
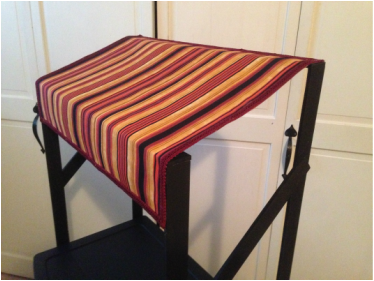
I set the front sticks lower than the back sticks so I could get a cute angle on the canopy.  As you can see in the photo, I didn't bother cutting them, I just placed the front lower than the back.  I also set the front sticks back a little from the front of the cabinet just so the canopy wasn't protruding as much. 

Picture
Then, I cut my last two yard sticks.  I placed one stick flat on top of the back sticks and measured and marked it for the cut, then I did the same with the front sticks.  Do not assume they will be the same -- for some reason, mine were slightly different.  Once I had them cut, I sanded the cut end a little bit, and then used wood glue to glue them to the top of the vertical sticks.  When that was dry, I painted them black.

Picture
I then took the remaining pieces of the yard sticks and glued them diagonally to the frame just to make it more stable.  If you wanted to make two more cuts, you could put them horizontally, but I was too lazy for that.  I used some extremely high tech clamps to hold them in place while they dried.  Then I painted them black.
Picture
I followed the manufacturer's instructions to fuse the fusible backing to the wrong side of my fabric.  This made it thicker/stiffer and ensured that I wouldn't have to hem the edges.  Because sewing is hard.  I measured and cut the fabric to size.  I had some trim left over from some other project years ago, so I used hot glue to glue it on the edges of the fabric.  Then I hot glued the fabric to my frame.


Picture
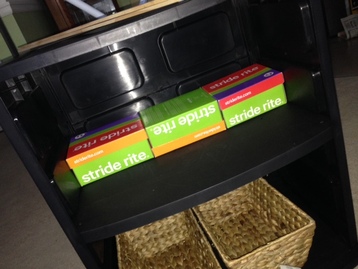
For the top shelf, I decided to make a set of risers so that Claire can more easily see all the food.  Also, the shelf is so big that it needed something to take up some vertical space.  I found that three Stride Rite shoe boxes were a perfect fit across.  (For the record, these are Size 5, 5.5 and 6 boxes.)  I had to turn one upside down to make them fit. 

Picture
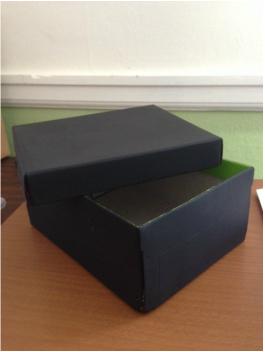
I painted them black and wedged them in.

Picture
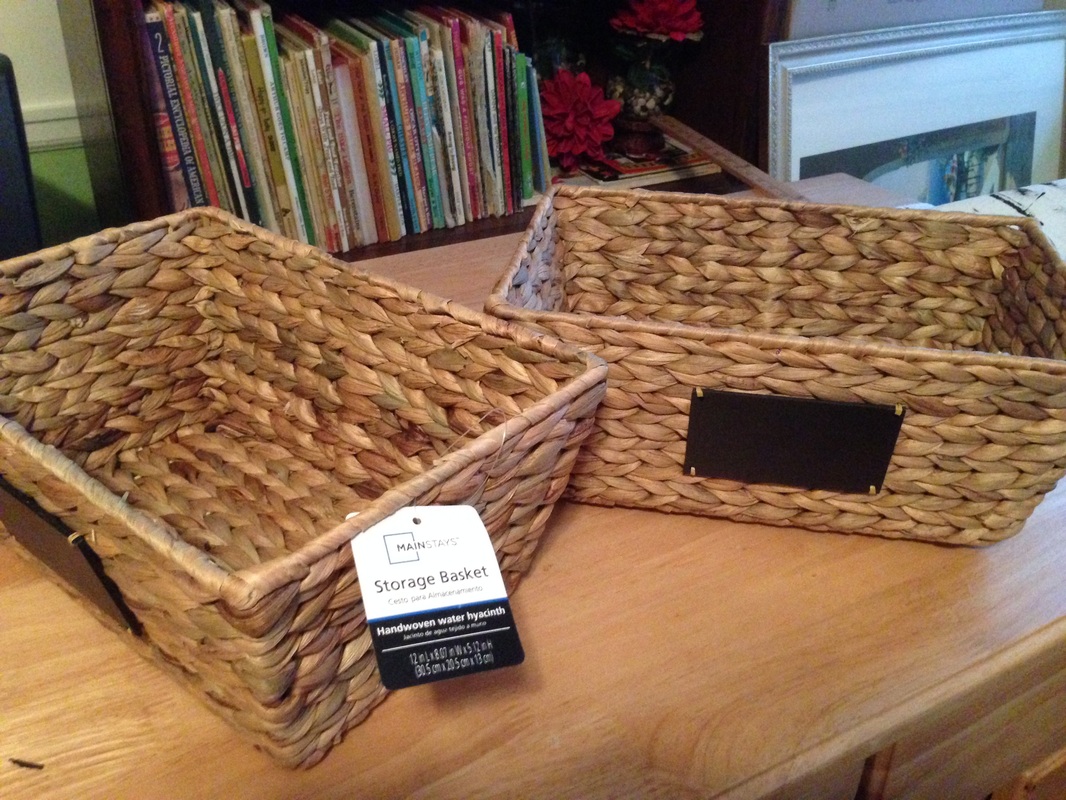
I bought the baskets at Walmart for $5 each.  They have a cute chalkboard tag, but I ended up turning them sideways to fit both on one shelf.

And that is how Claire's new market came to be!  It's all set up and waiting for her to discover it tomorrow morning!
Picture

And here is the big reveal :-)
3 Comments

A pet that's a rock...

2/6/2015

0 Comments

 
A pet that's a rock, a rock that's a pet... either way, it's a fine thing to have!

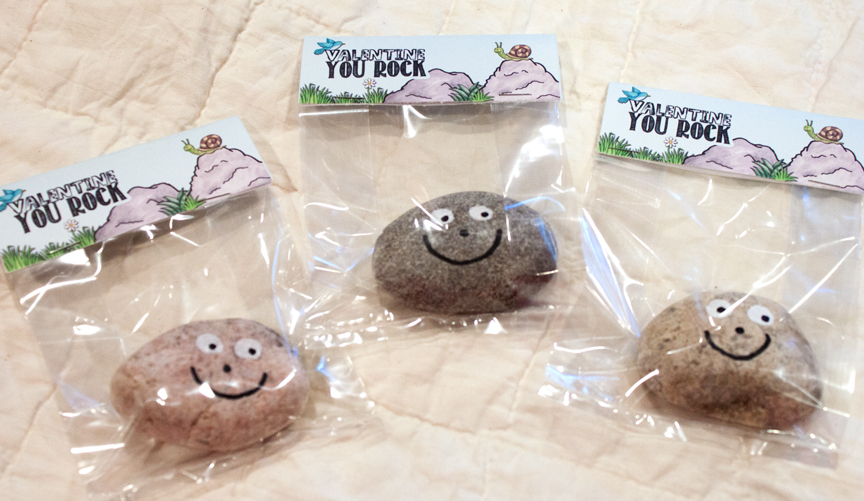
When our mommies club decided to exchange Valentines this year, I thought about what cute, crafty thing I could do.  (Because I can't just buy some at the store, I would have to give up my Martha badge.)  I thought it would be fun for Claire to give something that she really loves.  My first thought was, of course, dinosaurs.  But there's something she loves more than that...

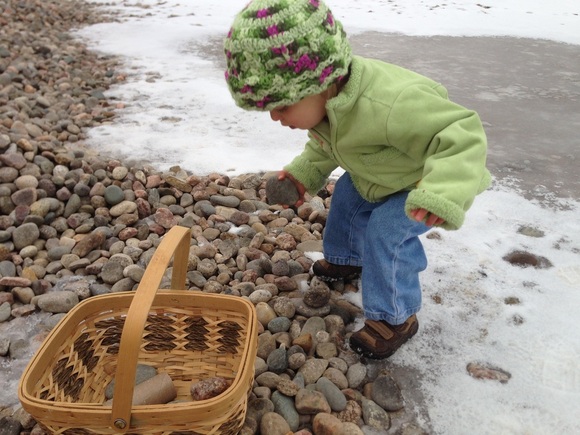
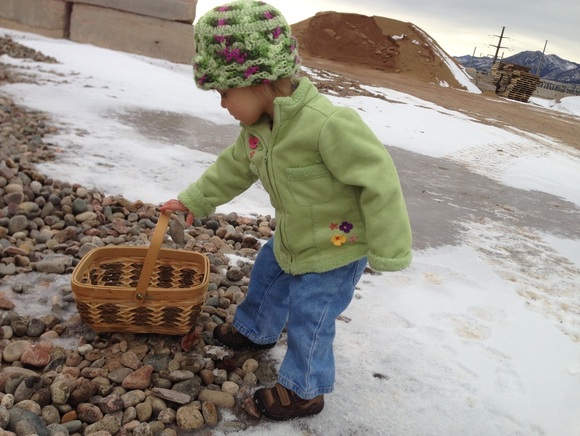
Rocks and sticks.  The very first thing she does when she goes outside is find a rock and a stick.  Even in our family pictures, she's holding rocks and sticks.  (You can't see the rocks, they're in her pockets.)

Picture
I did a search online and found Valentines with glow sticks, and Valentines with pop rocks, but glow sticks and pop rocks are not what she loves.  She loves plain ole rocks and sticks.  So we headed out, armed with a basket and a toilet paper tube, on an adventure to the local rock yard.
Picture
She collected about ten rocks before we had a minor meltdown (which I never did discover the reason for.)  I hurriedly collected ten more and then we went to the office to pay.  The guy looked up, gave my little basket the side-eye and waved me off with a "Have a good day..." 
Picture
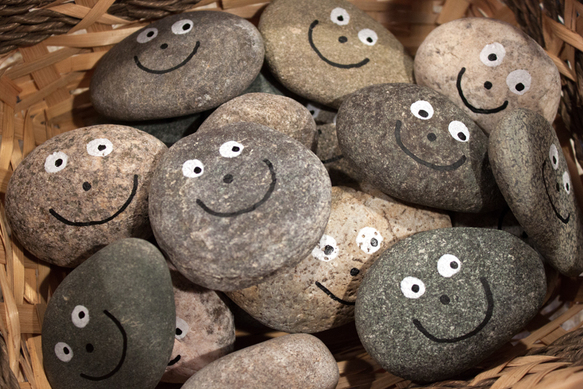
So we took our free rocks home and gave them a good scrubbing and a little personality with a paint pen.  This link has a good reference sheet for all kinds of cute faces, but I chose to keep it simple (lest my lack of artistic talent cause us to have to go back to the rock yard.)
Picture
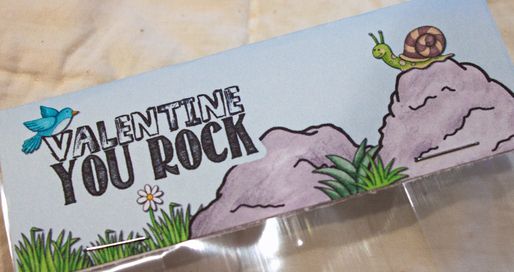
I made the labels with elements from several different digital scrapbooking kits by Kate Hadfield.
Picture
Picture
Claire loves hers... she keeps pointing at it, saying "Eye.... noooo (nose), and mouu (mouth)."  Right now it's traveling around in her baby stroller with a stuffed dog friend.  :-)

Credits:
Prehistoric, Walk in the Woods and Springity Spring by Kate Hadfield
Fonts:  Sketchbook and Return to Sender.
0 Comments

Blackened Chicken with Avocado Cream Sauce

1/28/2015

0 Comments

 
Picture
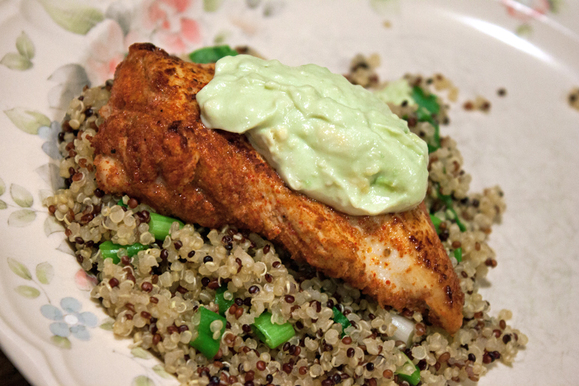
Blackened Chicken with Avocado Cream Sauce
With the pitter-patter of little Claire feet climbing up my leg, I'm always looking for meals that I can cook in 30 minutes or less.  Though I don't completely agree with the "10 minute prep time" this recipe boasts (it took me at least 5 minutes to find the right pan and all the spices), it still went very quickly and took very little effort.  I didn't bother getting the food processor out, I just mixed the cream sauce with a fork.  You could make little baggies of the blackened spice mix to make prep time even faster. 

While I didn't give Claire the chicken because it was spicy, and she couldn't have the yogurt cream sauce, she did very much like the quinoa, so I'll call it a win.  I gotta take what I can get :-)

http://www.skinnymom.com/2014/03/28/blackened-chicken-with-avocado-cream-sauce/
0 Comments

Christmas Cookies!

1/15/2015

0 Comments

 
Another belated post... the cookies I made for Christmas this year!

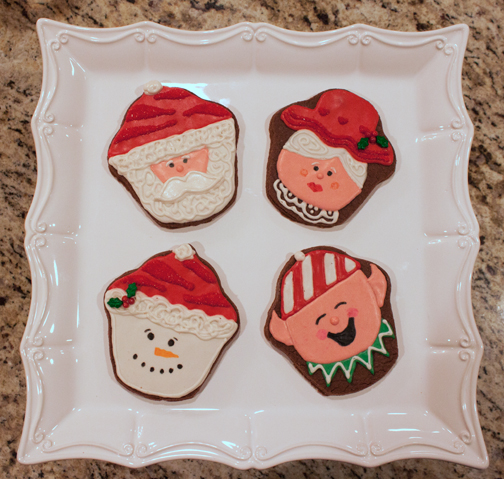
I have been working on creating an icing that is Claire-safe (egg, corn, dairy and soy-free.)  So far, I have not had success.  These cookies look okay from afar, but there was massive color bleed, they never really set up firm, and the general look of the icing was just not ideal.  More experimentation needed!

Picture
The Mr. and Mrs. with a couple of their friends...
Picture
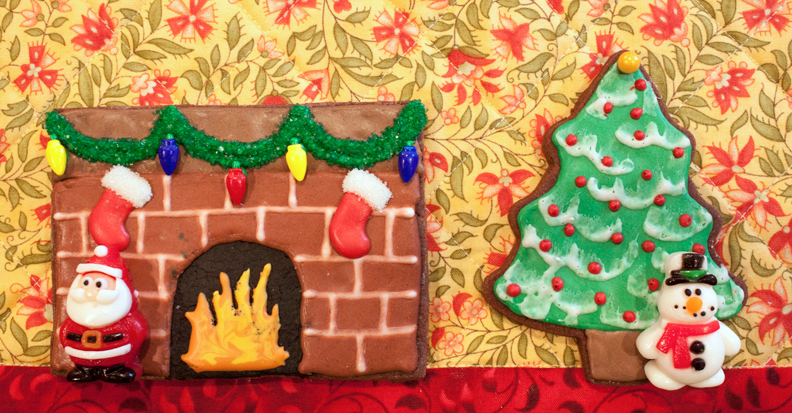
Wilton's cute reindeer set. The Santa is from a pack of gummy candies I found at Walmart that were surprisingly soft and tasted really good!
Picture
Snowman from the same pack of gummies. The black background of the fireplace is painted directly on the cookie with food coloring... in retrospect I would use wet-on-wet with black, yellow and orange icing to get a nicer flow with the flame.

Inspiration:
Fireplace cookie by Dessert Menu Please
Evergreen Trees by Allison Quirk Barrett
Festive Sleigh by Sweet Hill Cookies
Santa, Snowman, and Mrs. Claus cookies by Sweet Sugar Belle

0 Comments

Teacher Appreciation Day Treats

1/15/2015

0 Comments

 
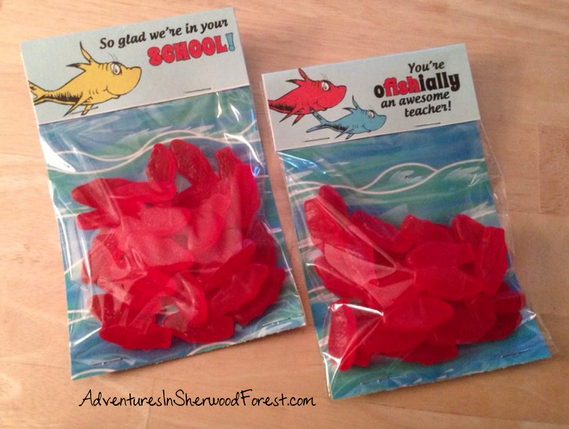
One fish, two fish, red fish, blue fish...  Quite a bit belated and not a very good picture.  But these are the treats I made for 25 teachers at Claire's school for Teacher Appreciation Week last year.  They were doing a Dr. Seuss theme. 
Picture
The cellophane bag is stapled on top of the printed card background (i.e. the card is not inside the bag) because I didn't want ink getting on the candy.

I found the fish graphics and the background by just doing a Google Images search.  The fish are from Clipartpanda and the wave background from PixShark.com.

Enjoy!
0 Comments
<<Previous
Forward>>

    Archives

    May 2019
    April 2019
    March 2017
    July 2016
    June 2016
    May 2016
    March 2016
    November 2015
    July 2015
    May 2015
    April 2015
    March 2015
    February 2015
    January 2015
    December 2014
    August 2014
    July 2014
    March 2014
    February 2014
    January 2014
    December 2013
    September 2013
    August 2013
    July 2013
    June 2013
    May 2013
    April 2013
    March 2013
    February 2013
    December 2012
    November 2012

    Categories

    All
    Baby On Board
    Baby On Board
    Crafts
    Decorated Cookies
    Food Appetizers
    Food Desserts
    Food Main Dishes
    Kids
    Scrapbooking

    Picture
    Check out the cool stuff I've been Pinning lately...
    Contact Me!

    Enter your email address:

    Delivered by FeedBurner

    RSS Feed

Powered by Create your own unique website with customizable templates.