My Girl Scout Daisy troop is working on their Space Science Explorer badge, and I came up with this fun idea to help them earn the "learn about the stars" portion of this badge.
I got the original idea from these animal constellation cookies, which I still may make someday because they are SO COOL. My original idea was to let the paint dry on the sun catchers and then use brads for stars and connect them with embroidery thread. But then I thought that you might be able to see the back of the brad that's bent over when you put it up to the sun, so I decided on this version instead. It would still be cool to do the embroidery floss version using acrylic paint (maybe paint pouring??), that way it wouldn't be see-through and you wouldn't be able to see the brads.
I got the original idea from these animal constellation cookies, which I still may make someday because they are SO COOL. My original idea was to let the paint dry on the sun catchers and then use brads for stars and connect them with embroidery thread. But then I thought that you might be able to see the back of the brad that's bent over when you put it up to the sun, so I decided on this version instead. It would still be cool to do the embroidery floss version using acrylic paint (maybe paint pouring??), that way it wouldn't be see-through and you wouldn't be able to see the brads.
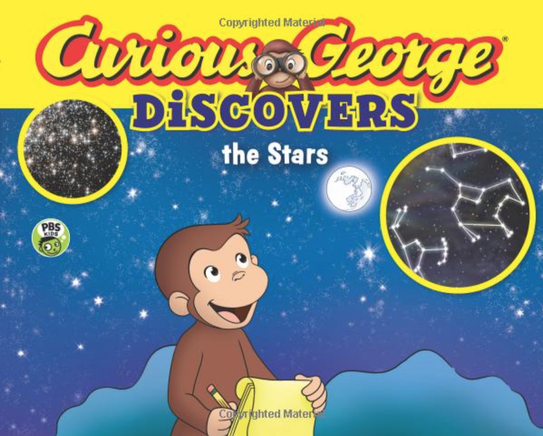
For our meeting, I read Curious George Discovers the Stars first, which I found at our local library. It was a good book to explain why we started recording stars in constellations all that time ago and was at an age-appropriate level for Kindergarten.
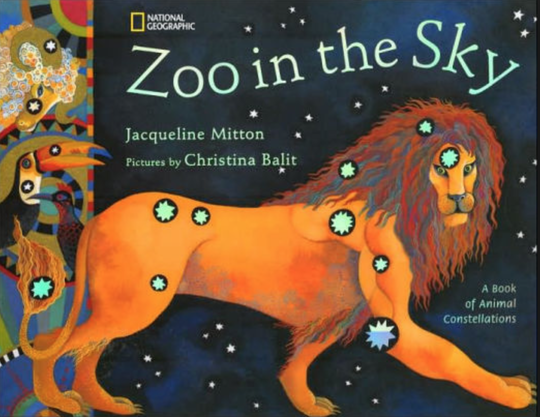
Then I showed them some pages from Zoo in the Sky, a beautiful book that shows different constellations and the story behind each. I didn't read the stories, but my point in showing this book was to show them different constellations and how they "look" like animals and other things.
I then showed them this series of pictures I found on Google Images.
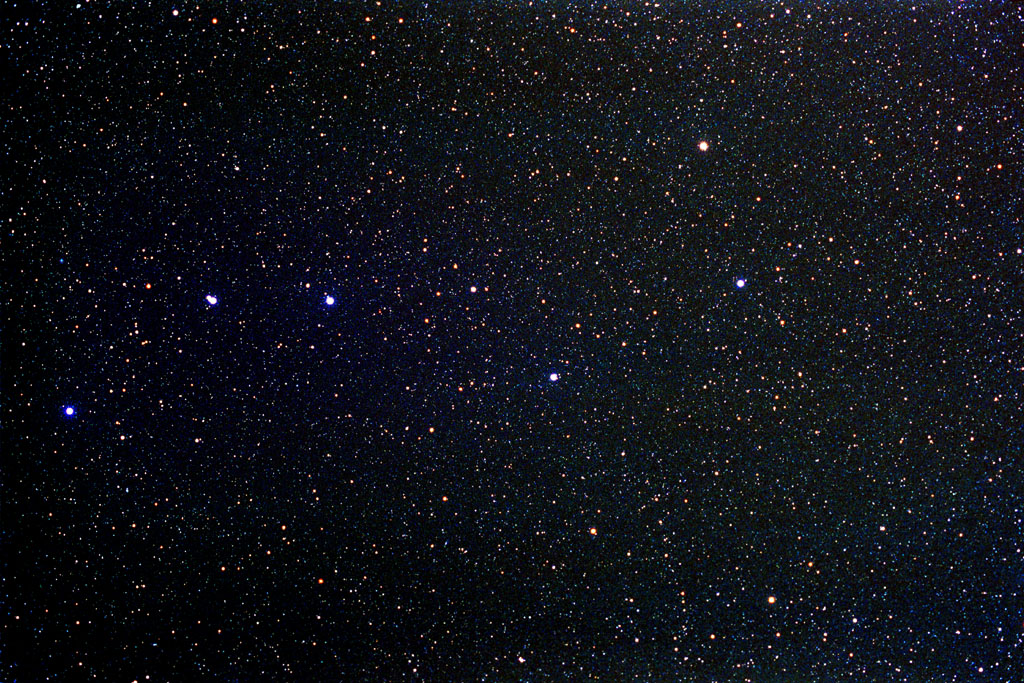
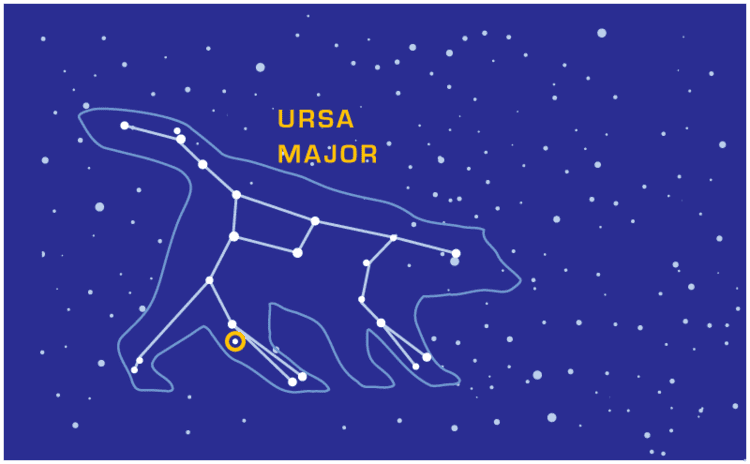
I told them this is the constellation Ursa Major (Great Bear). I asked them if they could see a bear in it:
I told them this is the constellation Ursa Major (Great Bear). I asked them if they could see a bear in it:
Credit: http://www.allthesky.com/constellations/ursamajor/big.jpg
Of course, they could not. Then I showed them this picture and asked if they could see the bear now:

Credit: https://www.solarsystemquick.com/universe/ursa-major-2.jpg
They agreed that they could see something that had legs and a tail, but that it didn't really look like a bear. Then I showed them this one:
Credit: https://alchetron.com/cdn/ursa-major-1833156b-b4d2-4416-8f13-2cb19c461e0-resize-750.png
This was the ah-ha moment... they finally agreed that they could see it was a bear. I used this as the lead in to the constellation sun catchers, pointing out that they don't have to put a lot of beads on it, and it doesn't really have to look like anything, because the animal shape on the back was going to let people know what it was supposed to be. Then we moved on with the project.
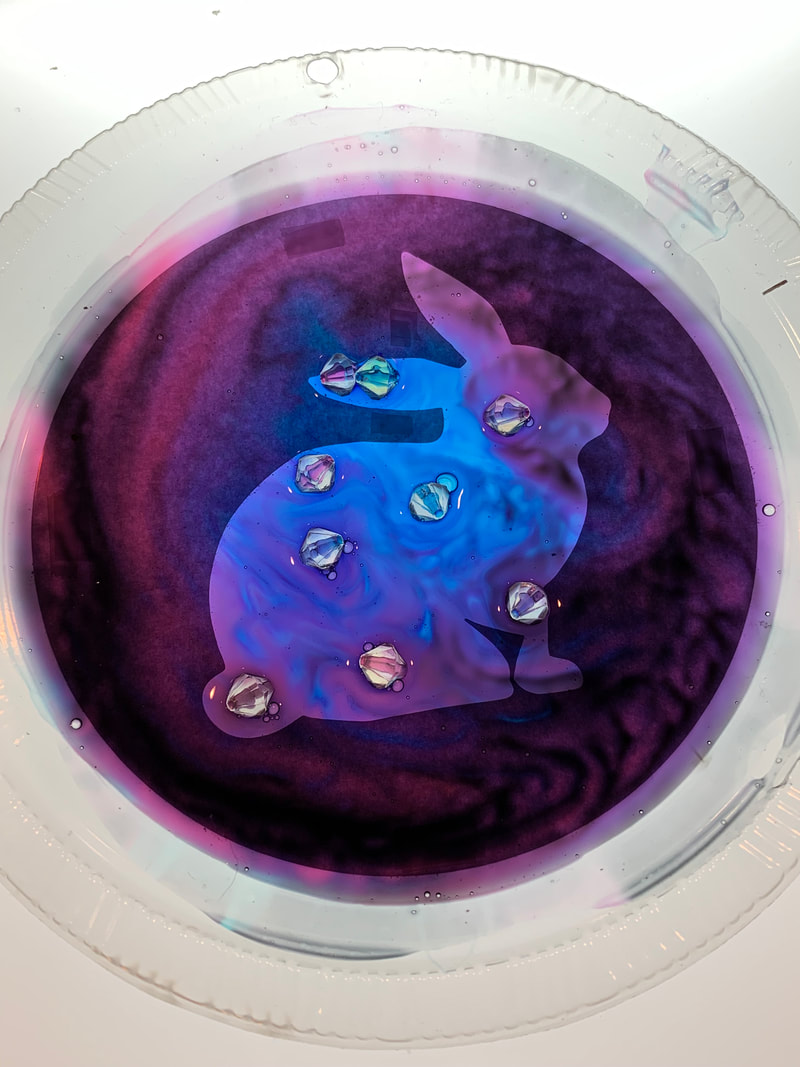
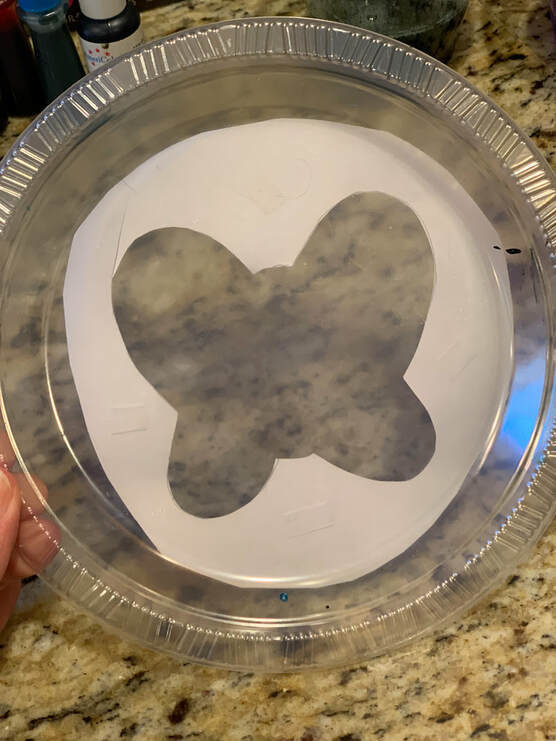
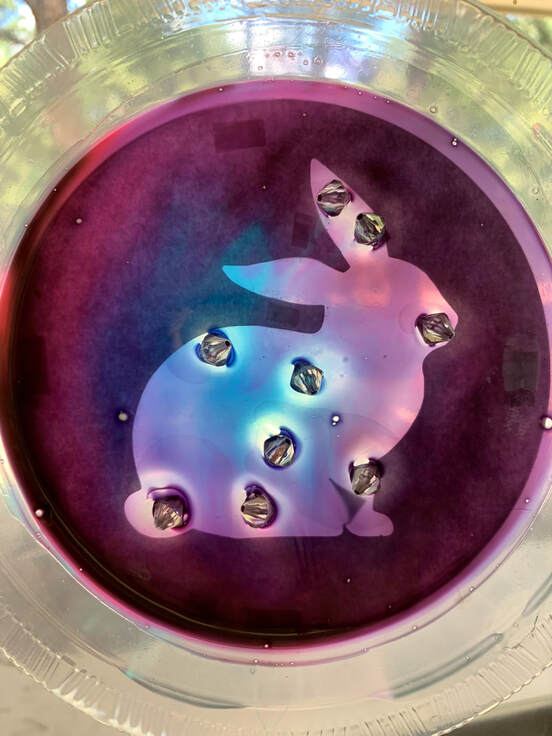
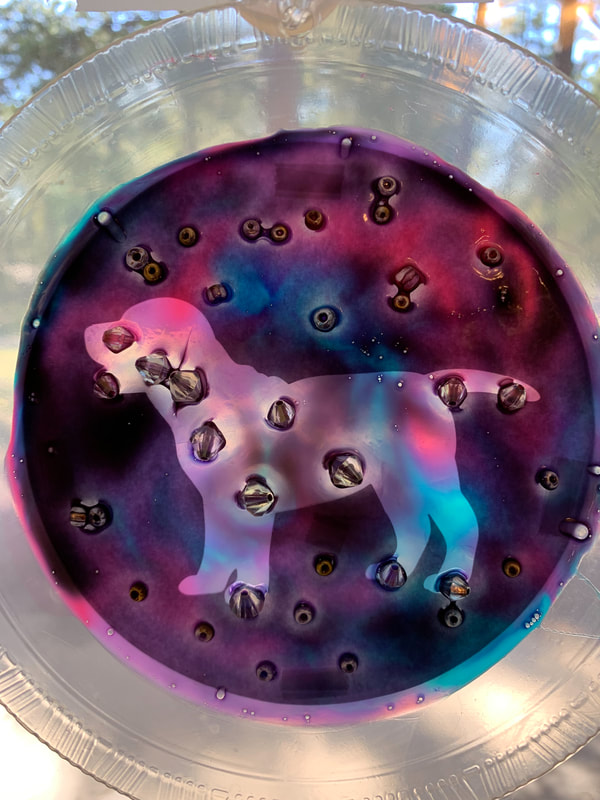
We started with clear plates from Dollar Tree. I had asked each mom what her daughter's favorite animal was (and as I found out, some of the moms were wrong, haha). I cut out a circle with the silhouette of each animal using my Silhouette cutting machine and taped it to the back of the plate. (The butterfly below was my practice one so it was just hand-cut.)
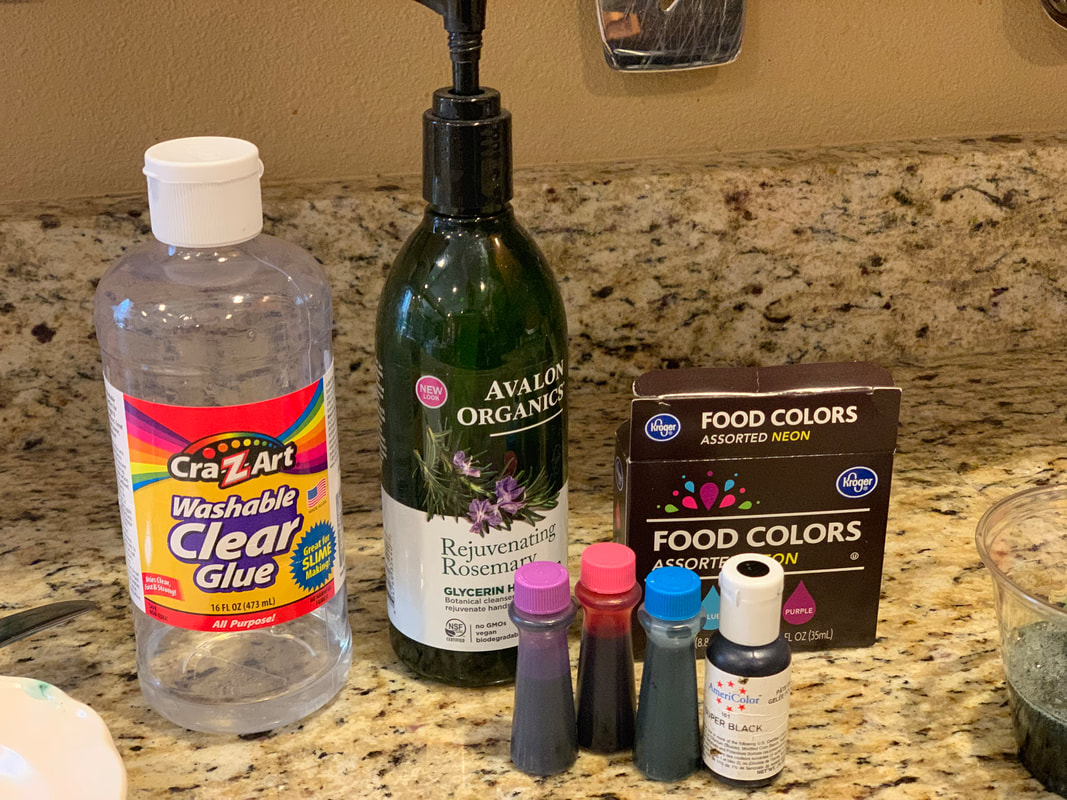
I didn't want to spend a lot of money on glass paint, so I found this recipe and decided to make my own. I already had clear glue on hand from making slime, and also had clear hand soap and food coloring. I wish I could tell you exact measurements, but I kind of just winged it. I had about 1/3 cup of glue and 5 squirts of soap in each cup. This was enough for 8 sun catchers.
This is a blurry pic, but I wanted to show what happens when you stir too vigorously. Remember that it has soap in it, so it will get a lot of bubbles in it if you're not careful. I just let it sit for a day (covered with plastic wrap) and then skimmed off the bubbles with a spoon.
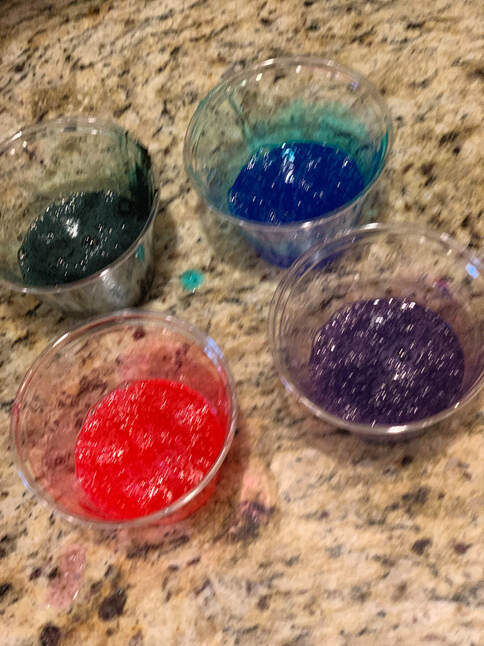
You'll want to make the paint a couple days ahead and try it yourself to see if the paint is dark enough or too dark. The first one I made (with just a tiny bit of paint, thankfully) was too dark in the black areas and you couldn't see through to the animal outline. The second (full) batch I made was too light, so I added more color till I was satisfied.
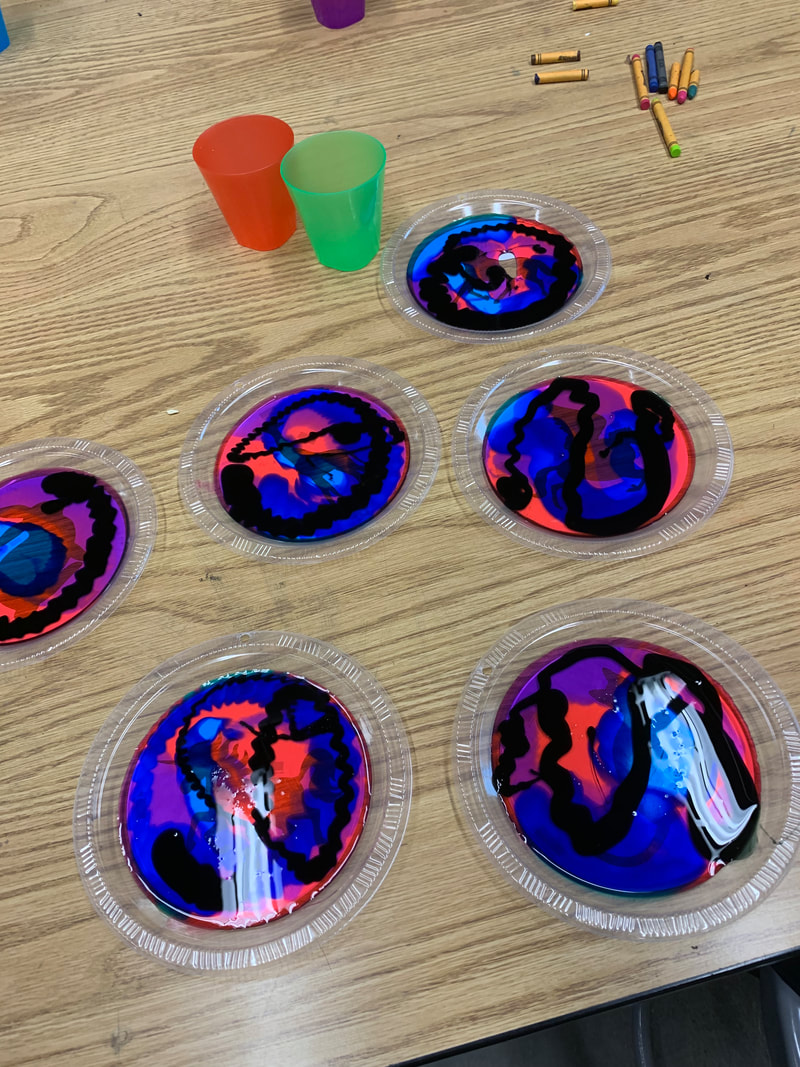
I drizzled the paint on the plates, starting with the lighter colors and ending with black. Then the girls tipped the plates back and forth and swirled the paint a little with a plastic knife. You don't want to swirl it too much or it will all mix together and just become gray.
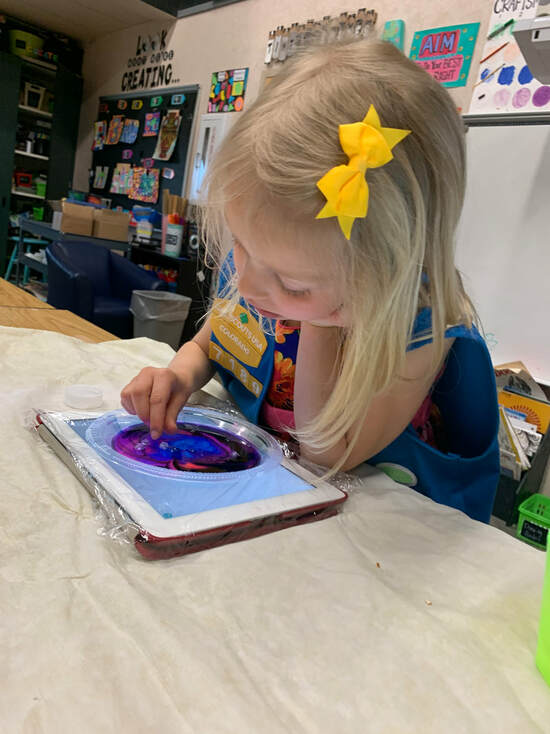
We used light tables so the girls could see through the paint to the animal outline so they would know where to put their stars. I had one real light table that was slanted, so I had to prop it up with a towel to make it level. I also used various iPads (protected with plastic wrap) and an app called Trace Table. You could just use a photo of a white piece of paper, but I had downloaded Trace Table for my daughter and liked the fact that you could lock the screen so it wouldn't change when you touched it. Since I had already paid for it, I was able to load it on old iPads that we had lying around, so we had four light tables.
I showed my girls some drawings of constellations (from Zoo in the Sky) and explained to them that it would be a good idea to put stars on the important parts of the body, like the head, legs, tail, etc. We had tweezers at the ready in case some of the stars got out of place and needed to be removed.
I used a bag of clear faceted beads I had found at our local creative re-use center (aka craft thrift store), Who Gives a Scrap. There were two different sizes of beads in the bag, so that was neat because the stars were different sizes.
After the project is done, you have to make sure to keep the plates level or the paint and beads will start to move around. If you do this at another location and then take it home in the car, it WILL move no matter how hard you try to keep it level. That's okay, you can just carefully reposition the beads once you get it home and on a flat surface.
It will take 3-4 days to dry, depending on how thick the paint is. You can check it after a couple days by holding it up vertically. If the stars start to move, it's not ready. Just nudge them back into place and keep waiting.
Once it's dry, you can punch a hole in the plate and use a suction cup (or string and tape) to hang it on the window. The dry paint may slide right off the plate after a week or so. You can just take the white paper off the plate and tape it onto the back of the dried paint disc and hang it back up.
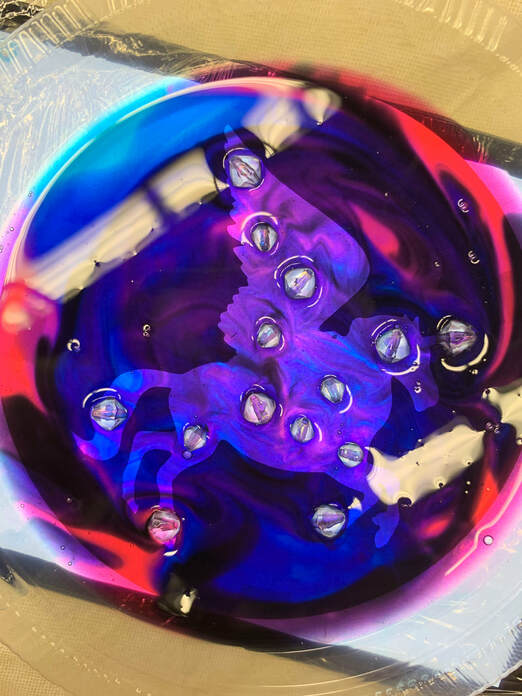
Side note - the one below had some bubbles in it which kind of look like other stars in the galaxy. I suppose it's a fine line between getting just enough bubbles and too many, but I think it looks cool. The trial one I did after I made the all-bubbled-up mixture I showed above did not look very good at all, as all the bubbles attached to the beads. There weren't random bubbles scattered around to look like other stars, they were just globbed up right next to the beads.
It will take 3-4 days to dry, depending on how thick the paint is. You can check it after a couple days by holding it up vertically. If the stars start to move, it's not ready. Just nudge them back into place and keep waiting.
Once it's dry, you can punch a hole in the plate and use a suction cup (or string and tape) to hang it on the window. The dry paint may slide right off the plate after a week or so. You can just take the white paper off the plate and tape it onto the back of the dried paint disc and hang it back up.
Side note - the one below had some bubbles in it which kind of look like other stars in the galaxy. I suppose it's a fine line between getting just enough bubbles and too many, but I think it looks cool. The trial one I did after I made the all-bubbled-up mixture I showed above did not look very good at all, as all the bubbles attached to the beads. There weren't random bubbles scattered around to look like other stars, they were just globbed up right next to the beads.
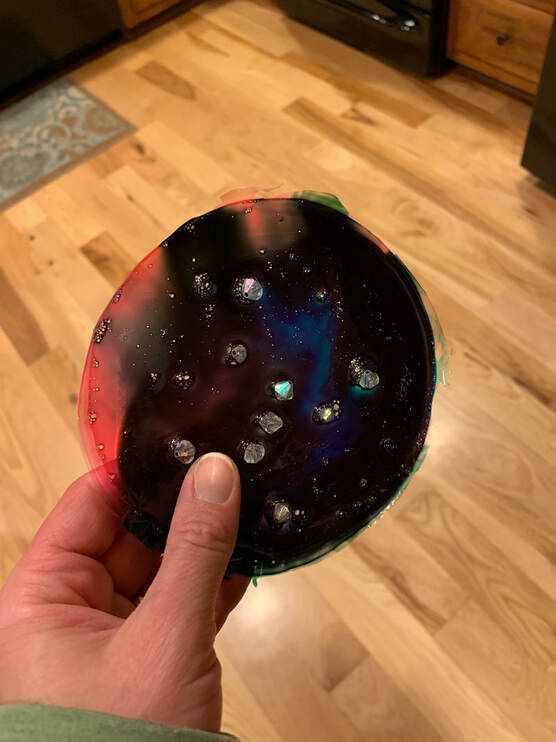
Our paint changed a little after it was dry and the swirls weren't as evident but it still looks pretty.
Afterward we had one plate left over so my daughter and I tried it again using clear seed beads to make extra stars. I don't like it as much, I think it's the holes in the beads that throws it off.
By the way, remember that this is just glue and soap so don't get it wet. One of my trial sun catchers ended up falling into a dish of water that we had some "growing animals" soaking in and it was a slimy mess and stained some of our animals.
All in all, it was a lot of fun and the girls LOVED it!
All in all, it was a lot of fun and the girls LOVED it!
 RSS Feed
