
NOTE: This project contains small parts. Children should be supervised while using it.
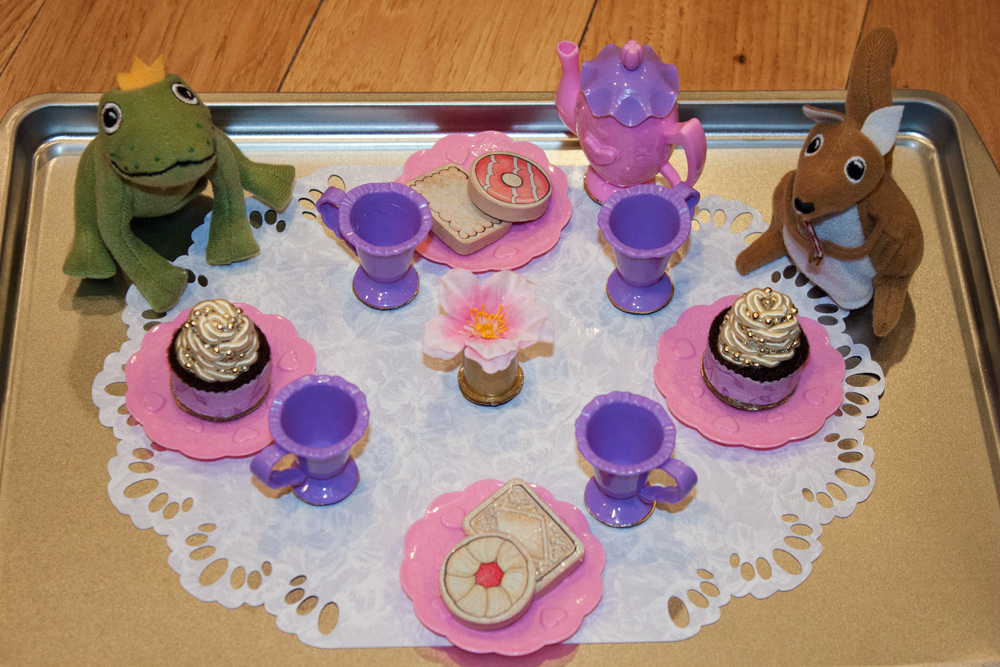
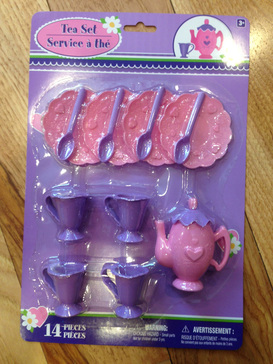 | I've been having some crafty fun lately making magnetic games to entertain Claire on the plane when we fly back east this summer. (Magnetic in hopes that less pieces get dropped into the black hole that lurks under an airplane seat. Though magnets aren't going to stop her from purposely throwing things on the floor, which I know will also happen.) One of her favorite toys is her Fisher Price Tea Set. She loves to line up her stuffed animals and dolls, pour tea for them and then help them drink their tea and feed them plastic pastries. I thought it might be fun to create a travel-sized version of her favorite pastime. First I thought I would use a doll house sized tea set, but they were pretty expensive and also very small. Then I decided to check the Dollar Tree just in case, and I found the PERFECT travel sized tea set! More on the tea set later... |
 | For the pastries, I used a set of erasers I also found at the Dollar Tree. They were the perfect size and shape for cookies and crackers. As I was working on this project, I came across an old green foam door hanger in my stash, and realized that I probably could have used that and just cut it to the shapes I wanted. This would have made my traveling tea set even lighter in weight. If I decide I want to add some more food later, like slices of pie, I might try that. |
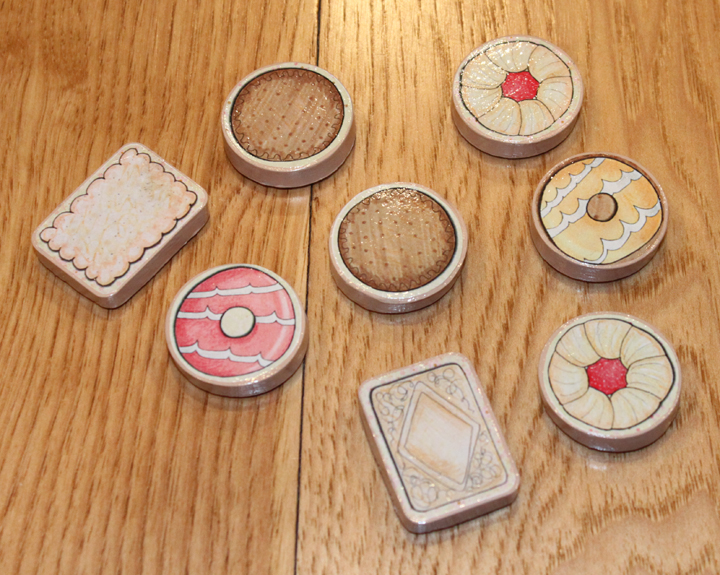 | For the graphics, I used another kit from my favorite digital scrapbooking artist, Kate Hadfield. Her Tea Party kit had the perfect shape graphics I needed for my round and rectangular erasers. I re-sized the cookies and crackers to the exact size I needed and had them printed on a laser printer. A laser print would allow me to use Modge Podge to adhere the paper and seal it without making the ink run. I found some beige craft paint in my stash and painted the erasers, then used the Modge Podge to attach the graphics. I then put several coats of Modge Podge on the whole thing to protect it and (hopefully) keep the paint from peeling off. |
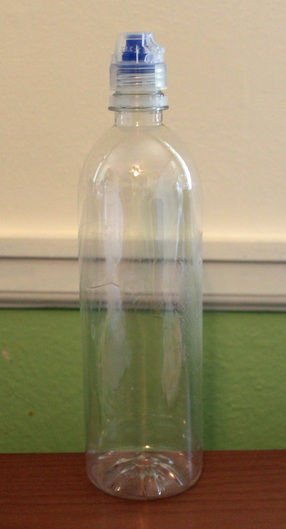 | By then, my creative juices were flowing and I decided that she needed some cupcakes, LOL. Kate's kit has a couple really cute cupcakes, but I didn't want to just print them out and lay them flat on an eraser, I wanted them to look more like real 3D cupcakes. I stood, staring into my craft closet, waiting for inspiration to come to me -- when I saw two empty water bottles. I had planned to use them to make a scuba diver costume for Claire for Halloween last year, but never got around to it. The tops were perfect for what I needed. I used scissors to cut off the cap and trimmed any sharp edges off. I don't know what brand this water bottle is, but I got it at my local Kroger affiliate. 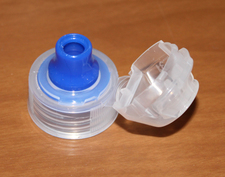 |
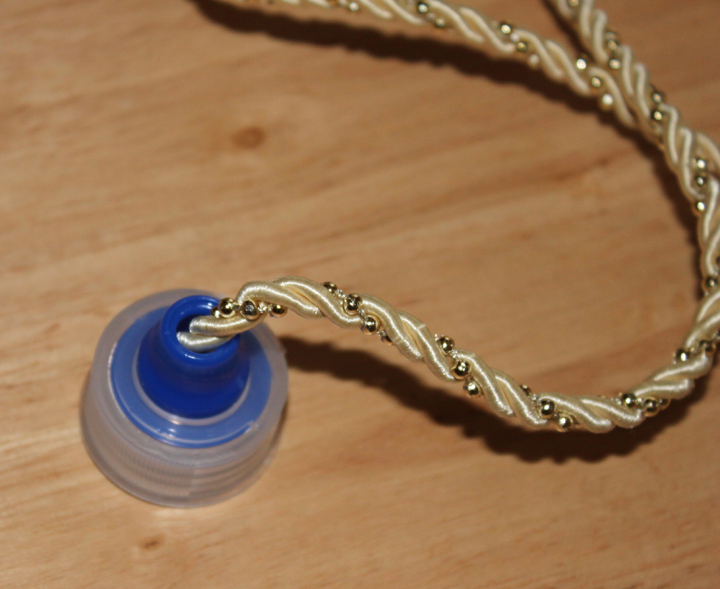 | More rummaging in my craft stash produced an old roll of beaded trim. (It's amazing what I can find in that closet!) I stuck the end of the trim down into the hole in the top and hot glued it from the underside. I then put two small dots of hot glue on the top side to hold the trim in place. |
 |  | I wrapped the trim around the blue part, gluing it as I went, until it reached the white plastic part. |
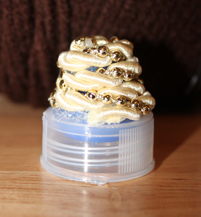
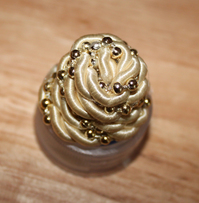
 | Then I wrapped some brown yarn around the very bottom, gluing as I went, overlapping onto the white plastic part slightly. |
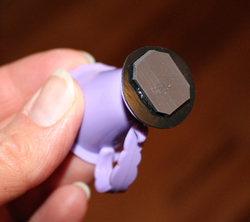
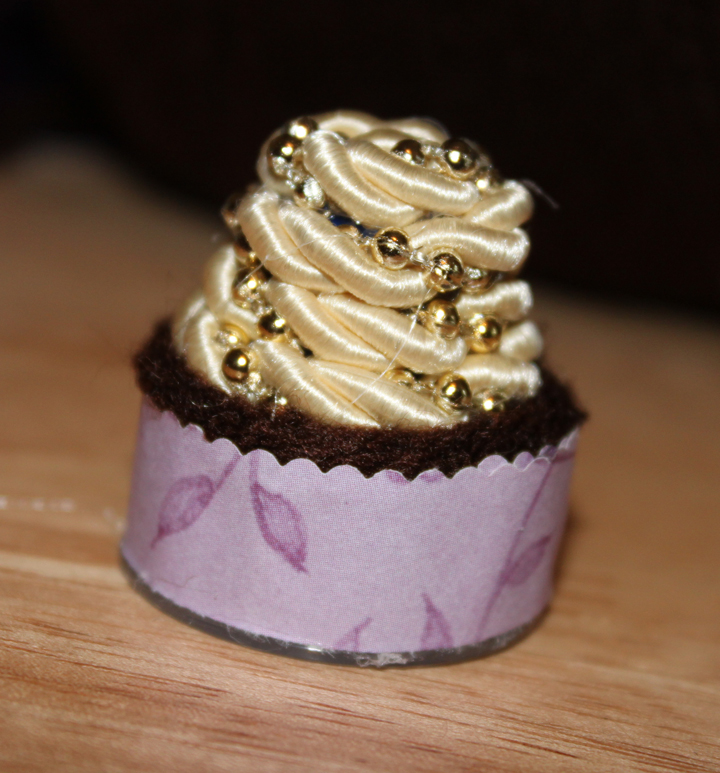 | I found some lavender patterened paper in my old scrapbooking stuff, so I cut a strip using some decorative scissors and glued it around the white plastic part to make the cupcake wrapper. (Note the tell-tale strings of hot glue hanging out in this picture. Every time I use hot glue, I feel like I just walked through a spider web.) |
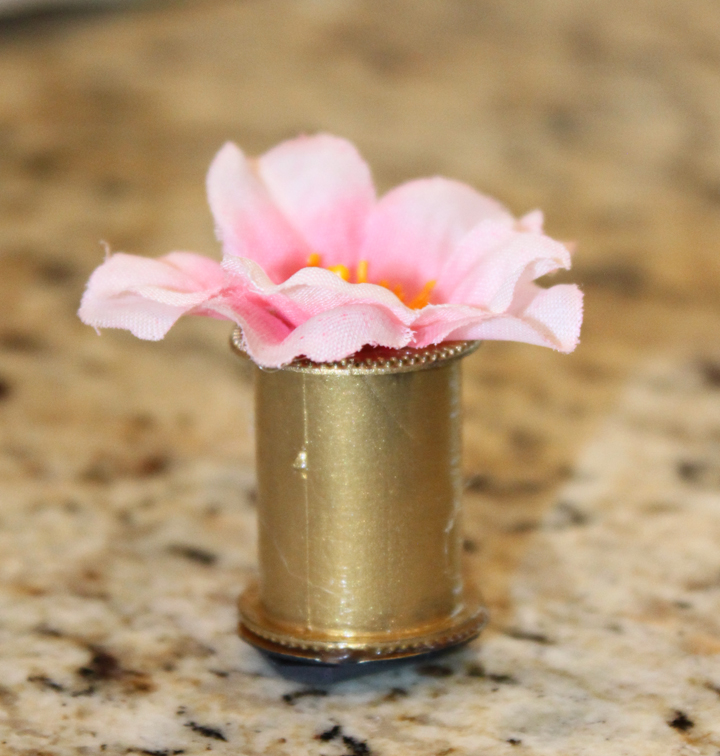 | What tea party is complete without a vase of flowers on the table? This is an empty thread spool I found lying around on my sewing machine table. I painted it with gold craft paint and then put several coats of Modge Podge on it to protect it. The flower is left over from a diaper cake that Kevin's Aunt Kathy made for my baby shower. I just put the stem down into the hole of the spool and hot glued it. |
Now, I needed to adhere magnets to the bottom of all of this stuff, but many of the bottoms were not flat. The plates were fine. But the tea pot and cups had bottoms that caved in, the water bottle lid obviously did not have a bottom, etc.
So, I cut out some pieces of thin plastic (i.e. a lid from a sour cream container or something like that). I just used a pen to draw around the bottom of the item, and then cut it out with scissors.
First I tried Krazy Glue to attach it to the bottom, but that did not work well, so I ended up using hot glue. I applied the hot glue to the rim of the bottom of item and then centered it on my plastic circle and pressed it down. If any squeezed out, I used my finger to either wipe it off or smash it down before it hardened.
I used magnetic tape on the bottoms, but the adhesive was not strong enough for the slick plastic, so I ended up using Krazy Glue to stick the magnets on the plastic pieces. The tape adhesive worked fine for the erasers. Because the magnet tape comes on a roll, I found it necessary to bend the tape backwards to straighten it out before I stuck it on.
I also used hot glue to permanently attach the lid to the tea pot. Interestingly, the plastic on the plates is so thin that if you put a pastry or cupcake down flat on the plate, the magnet sticks to the magnet on the underside of the plate. Handy!
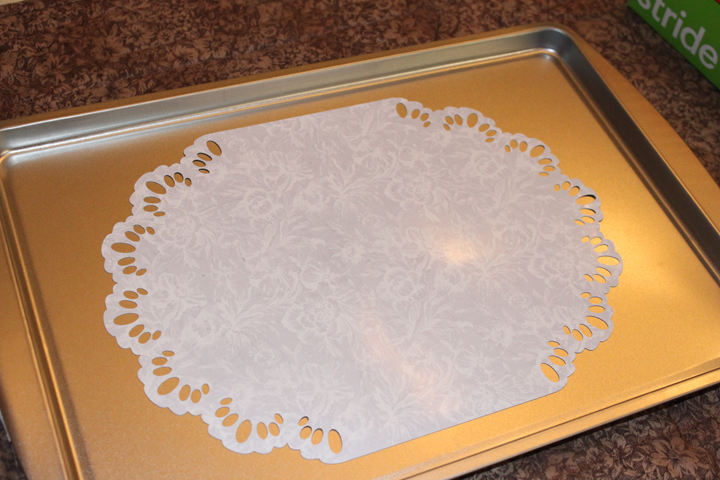 | The final finishing touch to my table setting was a lace table cloth. Kevin bought me a Silhouette Portrait cutting machine for my birthday and this was the perfect opportunity to learn how to use it. I used a floral pattern from Sorta Shabby by Mommyish, recolored it to gray and printed it on Silhouette Printable Magnet Paper. I used a doily cut file from the Silhouette store (the machine came with free download cards, so it was no cost to me.) The doily was round, but I found that it didn't fit all 4 place settings plus vase and tea pot, so I did some modifications to make it longer. Then I cut it out on my Silhouette. (NOTE: The Silhouette cut settings for Printable Magnetic Paper were not right, I had to increase it to 5 on the blade and do a double-cut.) |
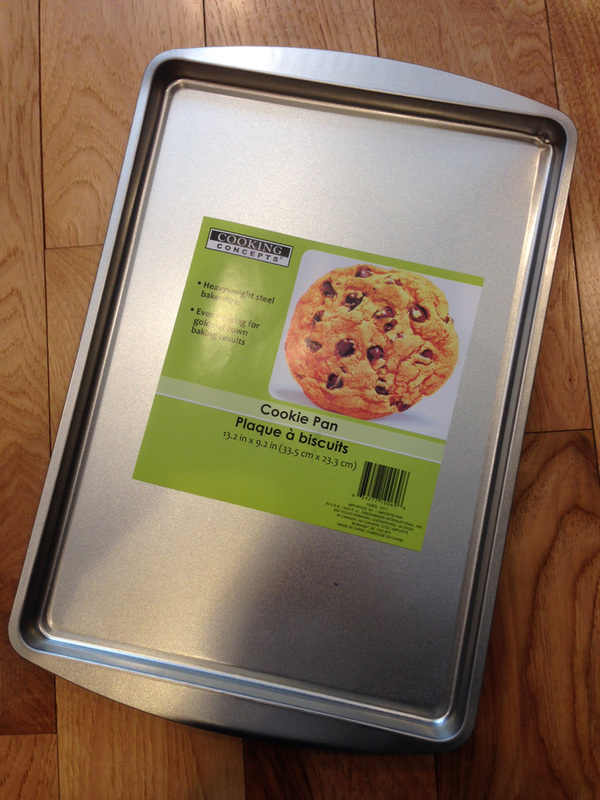 | I bought a small cookie sheet, also from the Dollar Tree. I figure this will serve as a coloring desk, dining table, and place to play with her magnetic games. The table cloth and other paper-like games will travel in a manila envelope that I will tape to the back of this cookie sheet so they don't get smashed. |
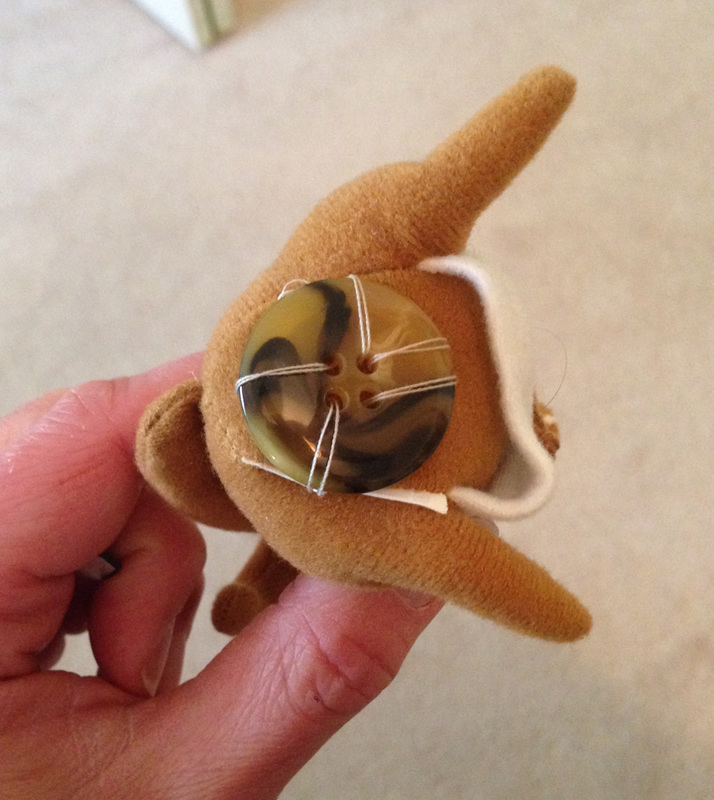 | Well, now that we have this beautiful table, we have to invite some guests! Frog Prince and Squirrel are finger puppets from Ikea (though may no longer be available.) They are the only finger puppets we have that actually sit upright. I didn't want to ruin them by gluing a magnet to the bottom, so I sewed a button onto the bottom of each and then hot glued the magnet to the button. When the tea party is no longer needed, I can just cut the thread and Frog and Squirrel are brand new again. |
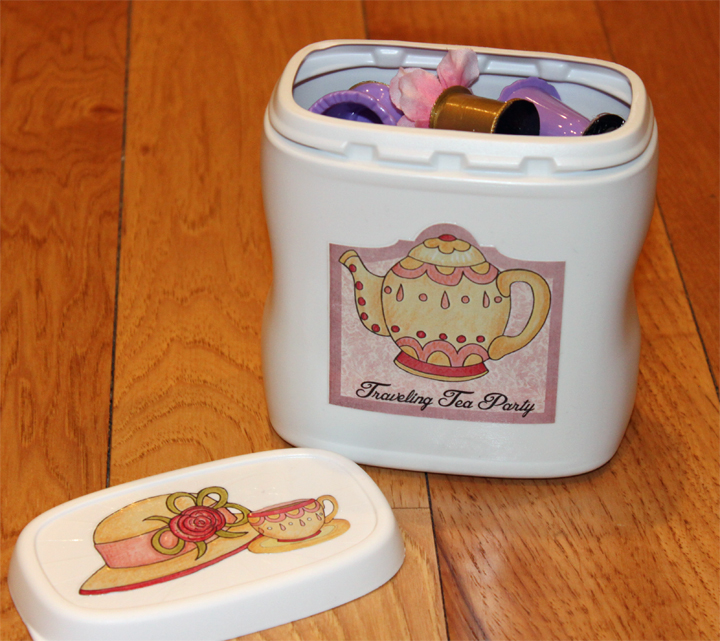 | And all of the pieces fit just right into this French's fried onion container that I saved from Christmas, because I just KNEW I would need it for something, LOL. I used some more graphics from Kate's Tea Party set, cut them out with my Silhouette and modge-podged them on. |
Now we just have to hope that between this, the other 4 magnetic games I made, the Melissa and Doug dress-up game, the animal beading game, the busy pages my mom made, the unopened issues of Hello magazine, the flashcards, the iPad, and the 87 different kinds of snacks I am bringing, we will have at least 15 minutes of peace on the flight.
 RSS Feed
